Create a Networking baseline
By design, Azure networking services maximize flexibility, availability, resiliency, security, and integrity. Network connectivity is possible between resources that are located in Azure, between on-premises and Azure-hosted resources, and to and from the internet and Azure.
Azure networking security recommendations
The following sections describe the Azure networking recommendations that are in CIS Microsoft Azure Foundations Security Benchmark v. 3.0.0. Included with each recommendation are the basic steps to complete in the Azure portal. You should complete these steps for your own subscription and by using your own resources to validate each security recommendation. Keep in mind that Level 2 options might restrict some features or activity, so carefully consider which security options you decide to enforce.
Restrict RDP and SSH access from the internet - Level 1
You can reach Azure VMs by using Remote Desktop Protocol (RDP) and the Secure Shell (SSH) protocol. You can use these protocols to manage VMs from remote locations. The protocols are standard in datacenter computing.
The potential security problem with using RDP and SSH over the internet is that attackers can use brute-force techniques to gain access to Azure VMs. After the attackers gain access, they can use your VM as a launching pad to compromise other machines on your virtual network, or even attack networked devices outside Azure.
We recommended that you disable direct RDP and SSH access from the internet for your Azure VMs. Complete the following steps for each VM in your Azure subscription.
Sign in to the Azure portal. Search for and select Virtual machines.
Select a virtual machine.
In the left menu under Networking, select Network settings.
Verify that the Inbound port rules section doesn't have a rule for RDP, for example:
port=3389, protocol = TCP, Source = Any or Internet. You can use the Delete icon to remove the rule.Verify that the Inbound port rules section doesn't have a rule for SSH, for example:
port=22, protocol = TCP, Source = Any or Internet. You can use the Delete icon to remove the rule.

When direct RDP and SSH access from the internet are disabled, you have other options that you can use to access these VMs for remote management:
- Point-to-site VPN
- Site-to-site VPN
- Azure ExpressRoute
- Azure Bastion Host
Restrict SQL Server access from the internet - Level 1
Firewall systems help prevent unauthorized access to computer resources. If a firewall is turned on but isn't correctly configured, attempts to connect to SQL Server might be blocked.
To access an instance of SQL Server through a firewall, you must configure the firewall on the computer that's running SQL Server. Allowing ingress for the IP range 0.0.0.0/0 (Start IP of 0.0.0.0 and End IP of 0.0.0.0) allows open access to any and all traffic, potentially making the SQL Server database vulnerable to attacks. Ensure that no SQL Server databases allow ingress from the internet. Complete the following steps for each SQL Server instance.
Sign in to the Azure portal. Search for and select SQL servers.
In the menu pane under Security, select Networking.
In the Networking pane, on the Public access tab, ensure that a firewall rule exists. Ensure that no rule has a Start IP of
0.0.0.0and End IP of0.0.0.0or another combination that allows access to wider public IP ranges.If you change any settings, select Save.

Enable Network Watcher - Level 1
NSG flow logs are an Azure Network Watcher feature that gives you information about IP ingress and egress traffic through an NSG. Flow logs are written in JSON format and show:
- Outbound and inbound flows on a per-rule basis.
- The network interface (NIC) the flow applies to.
- 5-tuple information about the flow: source and destination IP addresses, source and destination ports, and the protocol that was used.
- Whether the traffic was allowed or denied.
- In version 2, throughput information like bytes and packets.
Sign in to the Azure portal. Search for and select Network Watcher.
Select Network Watcher for your subscription and location.
If no NSG flow logs exist for your subscription, create an NSG flow log.
Set NSG flow log retention period to more than 90 days - Level 2
When you create or update a virtual network in your subscription, Network Watcher is automatically enabled in your virtual network's region. Your resources aren't affected and no charge is assessed when Network Watcher is automatically enabled.
You can use NSG flow logs to check for anomalies and to gain insight into suspected breaches.
Sign in to the Azure portal. Search for and select Network Watcher.
In the left menu under Logs, select NSG flow logs.
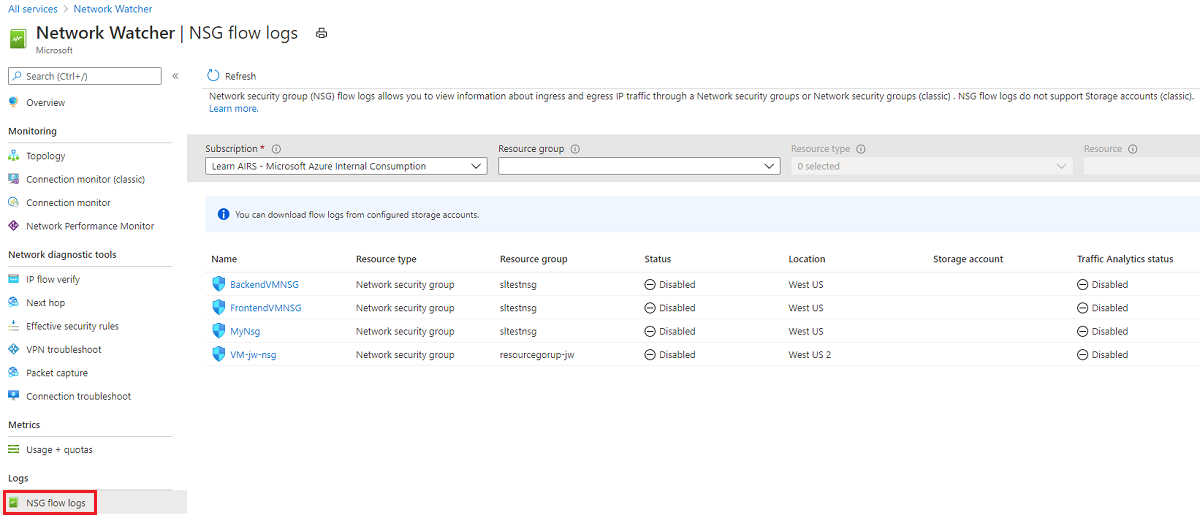
Select an NSG flow log.
Ensure that Retention (days) is greater than 90 days.
If you change any settings, select Save in the menu bar.
