Create an Azure VM baseline
Azure Policy is an Azure service you can use to create, assign, and manage policies. The policies you create enforce different rules and effects over your resources so that those resources stay compliant with your corporate standards and service-level agreements. Azure Policy meets this need by evaluating your resources for noncompliance with assigned policies. For example, you can have a policy to allow only a certain SKU size of VM in your environment. After this policy is implemented, new and existing resources are evaluated for compliance. With the right type of policy, you can bring existing resources into compliance.
Azure VM security recommendations
The following sections describe the Azure VM security recommendations that are in CIS Microsoft Azure Foundations Security Benchmark v. 3.0.0. Included with each recommendation are the basic steps to complete in the Azure portal. You should complete these steps for your own subscription and by using your own resources to validate each security recommendation. Keep in mind that Level 2 options might restrict some features or activity, so carefully consider which security options you decide to enforce.
Ensure that OS disks are encrypted - Level 1
Azure Disk Encryption helps protect and safeguard your data to meet your organization's security and compliance commitments. Azure Disk Encryption:
- Uses the BitLocker feature of Windows and the DM-Crypt feature of Linux to provide volume encryption for the OS and data disks of Azure VMs.
- Integrates with Azure Key Vault to help you control and manage disk encryption keys and secrets.
- Ensures that all data on the VM disks is encrypted at rest when it is in Azure storage.
Azure Disk Encryption for Windows and Linux VMs is in General Availability in all Azure public regions and Azure Government regions for Standard VMs and VMs with Azure Premium Storage.
If you use Microsoft Defender for Cloud (recommended), you're alerted if you have VMs that aren't encrypted. Complete the following steps for each VM in your Azure subscription.
Sign in to the Azure portal. Search for and select Virtual machines.
Select a virtual machine.
In the left menu under Settings, select Disks.
Under OS disk, ensure that the OS disk has an encryption type set.
Under Data disks, ensure that each disk has an encryption type set.
If you change any settings, select Save in the menu bar.
Ensure that only approved VM extensions are installed - Level 1
Azure VM extensions are small applications that provide post-deployment configuration and automation tasks on Azure VMs. For example, if a VM requires software installation or antivirus protection or if the VM needs to run a script, you can use a VM extension. You can run an Azure VM extension by using the Azure CLI, PowerShell, an Azure Resource Manager template, or the Azure portal. You can bundle extensions with a new VM deployment or run them against any existing system. To use the Azure portal to ensure that only approved extensions are installed on your VMs, complete the following steps for each VM in your Azure subscription.
Sign in to the Azure portal. Search for and select Virtual machines.
Select a virtual machine.
In the left menu under Settings, select Extensions + applications.
In the Extensions + applications pane, ensure that the extensions that are listed are approved for use.

Ensure that the OS patches for the VMs are applied - Level 1
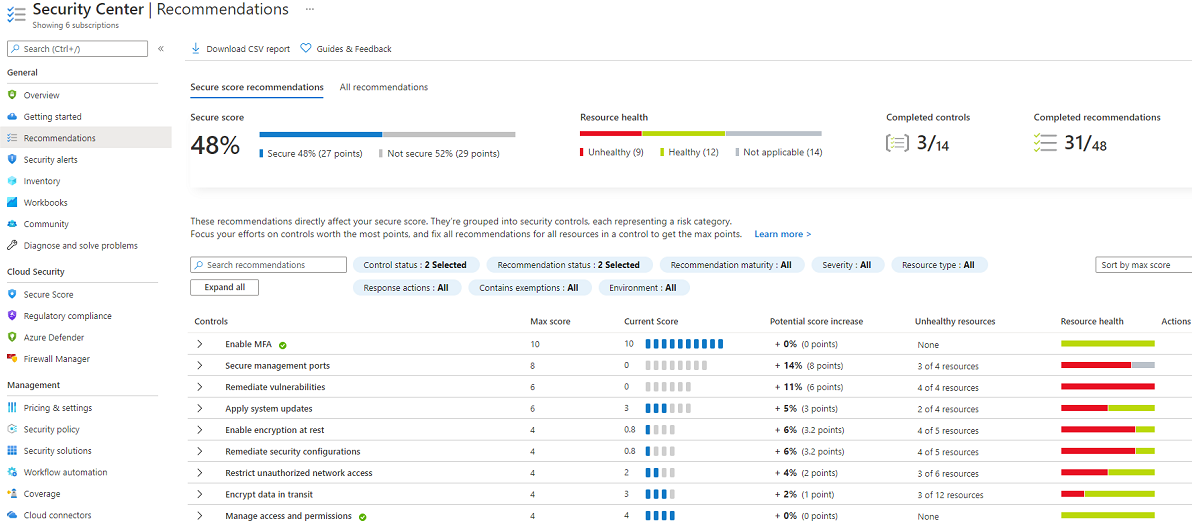
Microsoft Defender for Cloud monitors Windows and Linux VMs and computers daily for missing operating system updates. Defender for Cloud retrieves a list of available security and critical updates from Windows Update or Windows Server Update Services (WSUS). The updates you receive depend on which service you configure on the Windows computer. Defender for Cloud also checks for the latest updates in Linux systems. If your VM or computer is missing a system update, Defender for Cloud recommends that you apply system updates.
Sign in to the Azure portal. Search for and select Microsoft Defender for Cloud.
In the left menu under General, select Recommendations.
In Recommendations, ensure that there are no recommendations for Apply system updates.

Ensure that VMs have an endpoint protection solution installed and running - Level 1
Microsoft Defender for Cloud monitors the status of antimalware protection. It reports this status in the Endpoint protection issues pane. Defender for Cloud highlights issues like detected threats and insufficient protection, which can make your VMs and computers vulnerable to antimalware threats. By using the information in Endpoint protection issues, you can begin to create a plan to address any issues that are identified.
Use the same process as described in the preceding recommendation.
