Publish your virtual machine offer in Partner Center
We covered virtual machine (VM) offer basics and concepts to help create your VM. Now, let's spend some time on an overview of the Partner Center publishing process. In this process, you can put all the pieces together, providing the information needed to create and publish your offer.
The publishing process is broken down into several steps, each of which requires that you provide different information about your offer.
Offer setup
After clicking + New offer on the commercial marketplace overview page in Partner Center, you'll be taken to the offer setup page. This page is where you configure your CRM or HTTP endpoint to receive customer leads from Microsoft.
Configuring your offer's properties
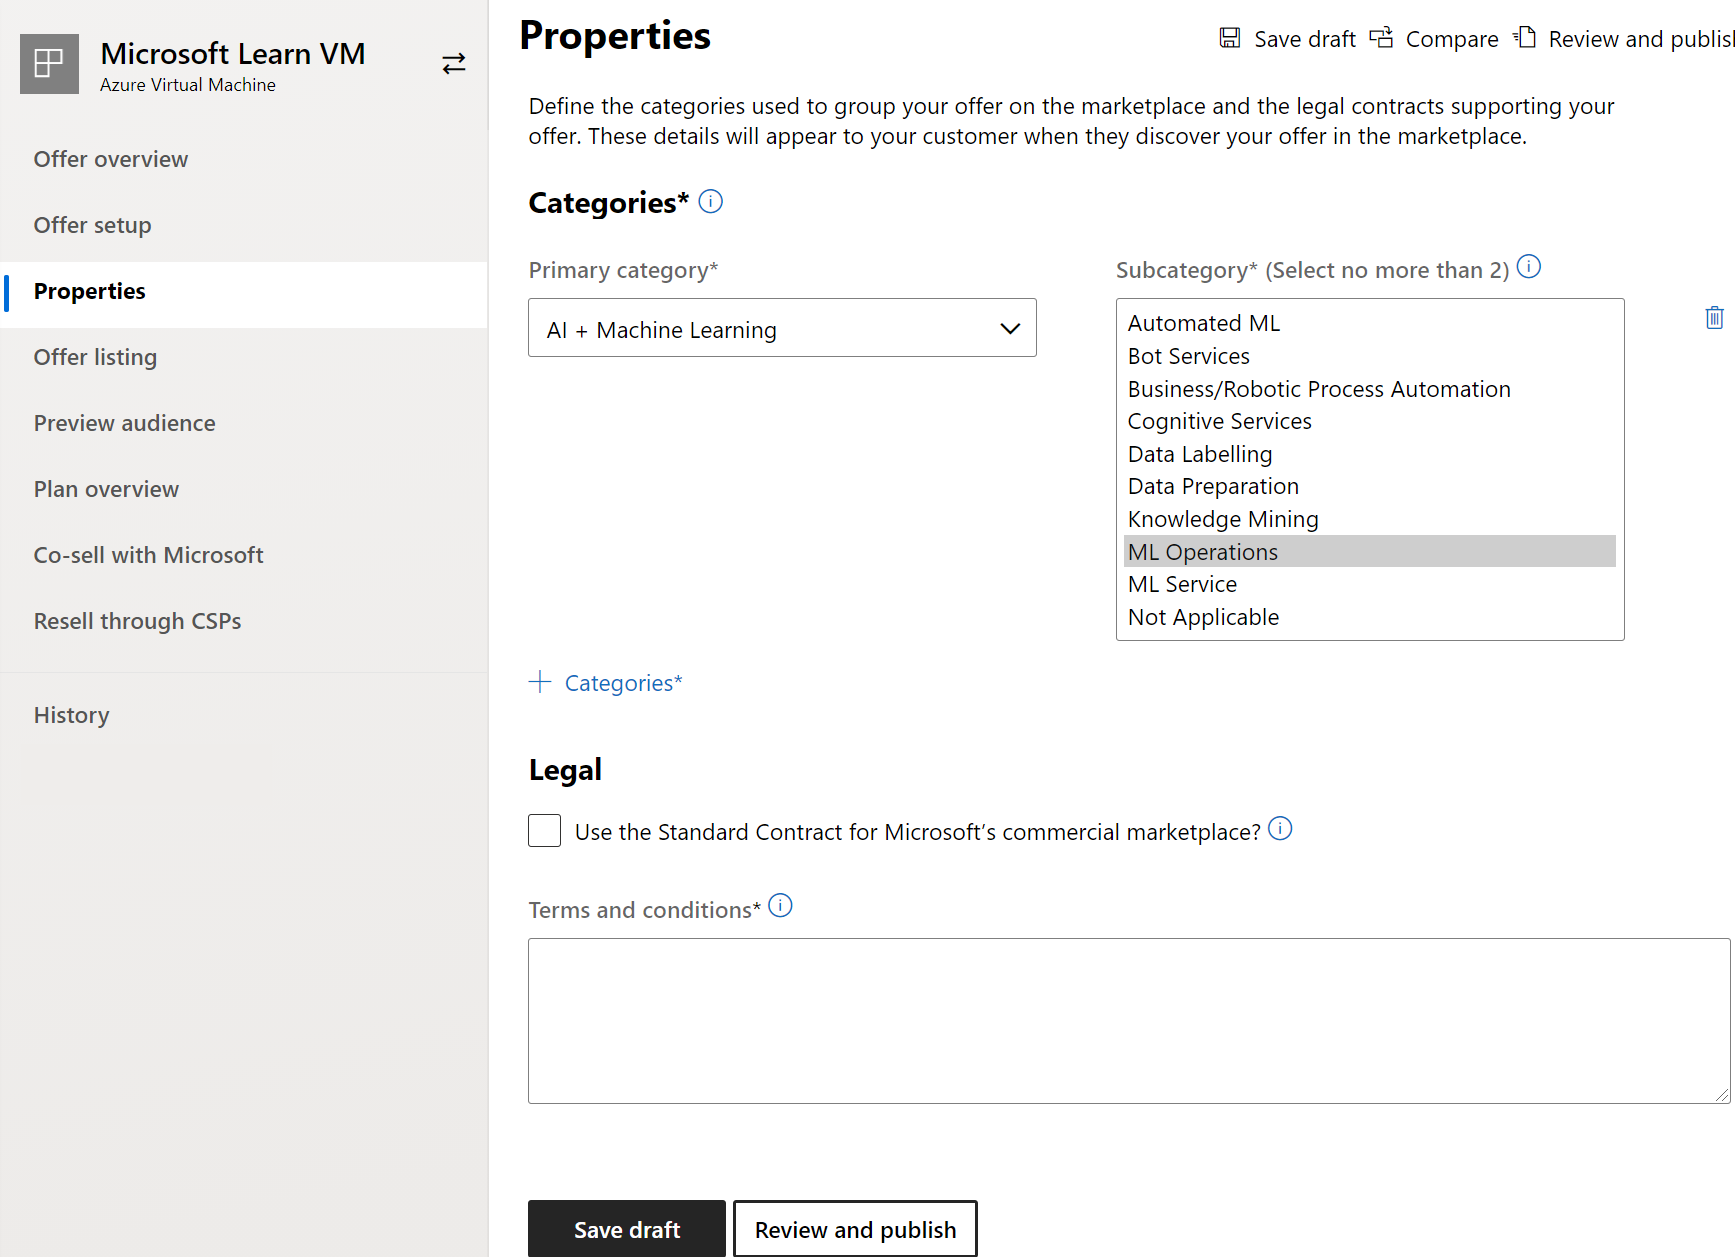
When you get to the properties tab of the publishing process, you're asked to define the categories and subcategories used to place your product in Azure Marketplace. Select your choices from a prepopulated list of options.
The properties tab is also where you provide the legal terms and conditions that govern the use of your software by customers. You can use the commercial marketplace Standard Contract, or define your own terms and conditions. If you choose the standard contract, you can supplement it with amendments from your company. For more detail on terms and conditions, reference our standard contract for Microsoft commercial marketplace documentation.
Providing information for your offer listing
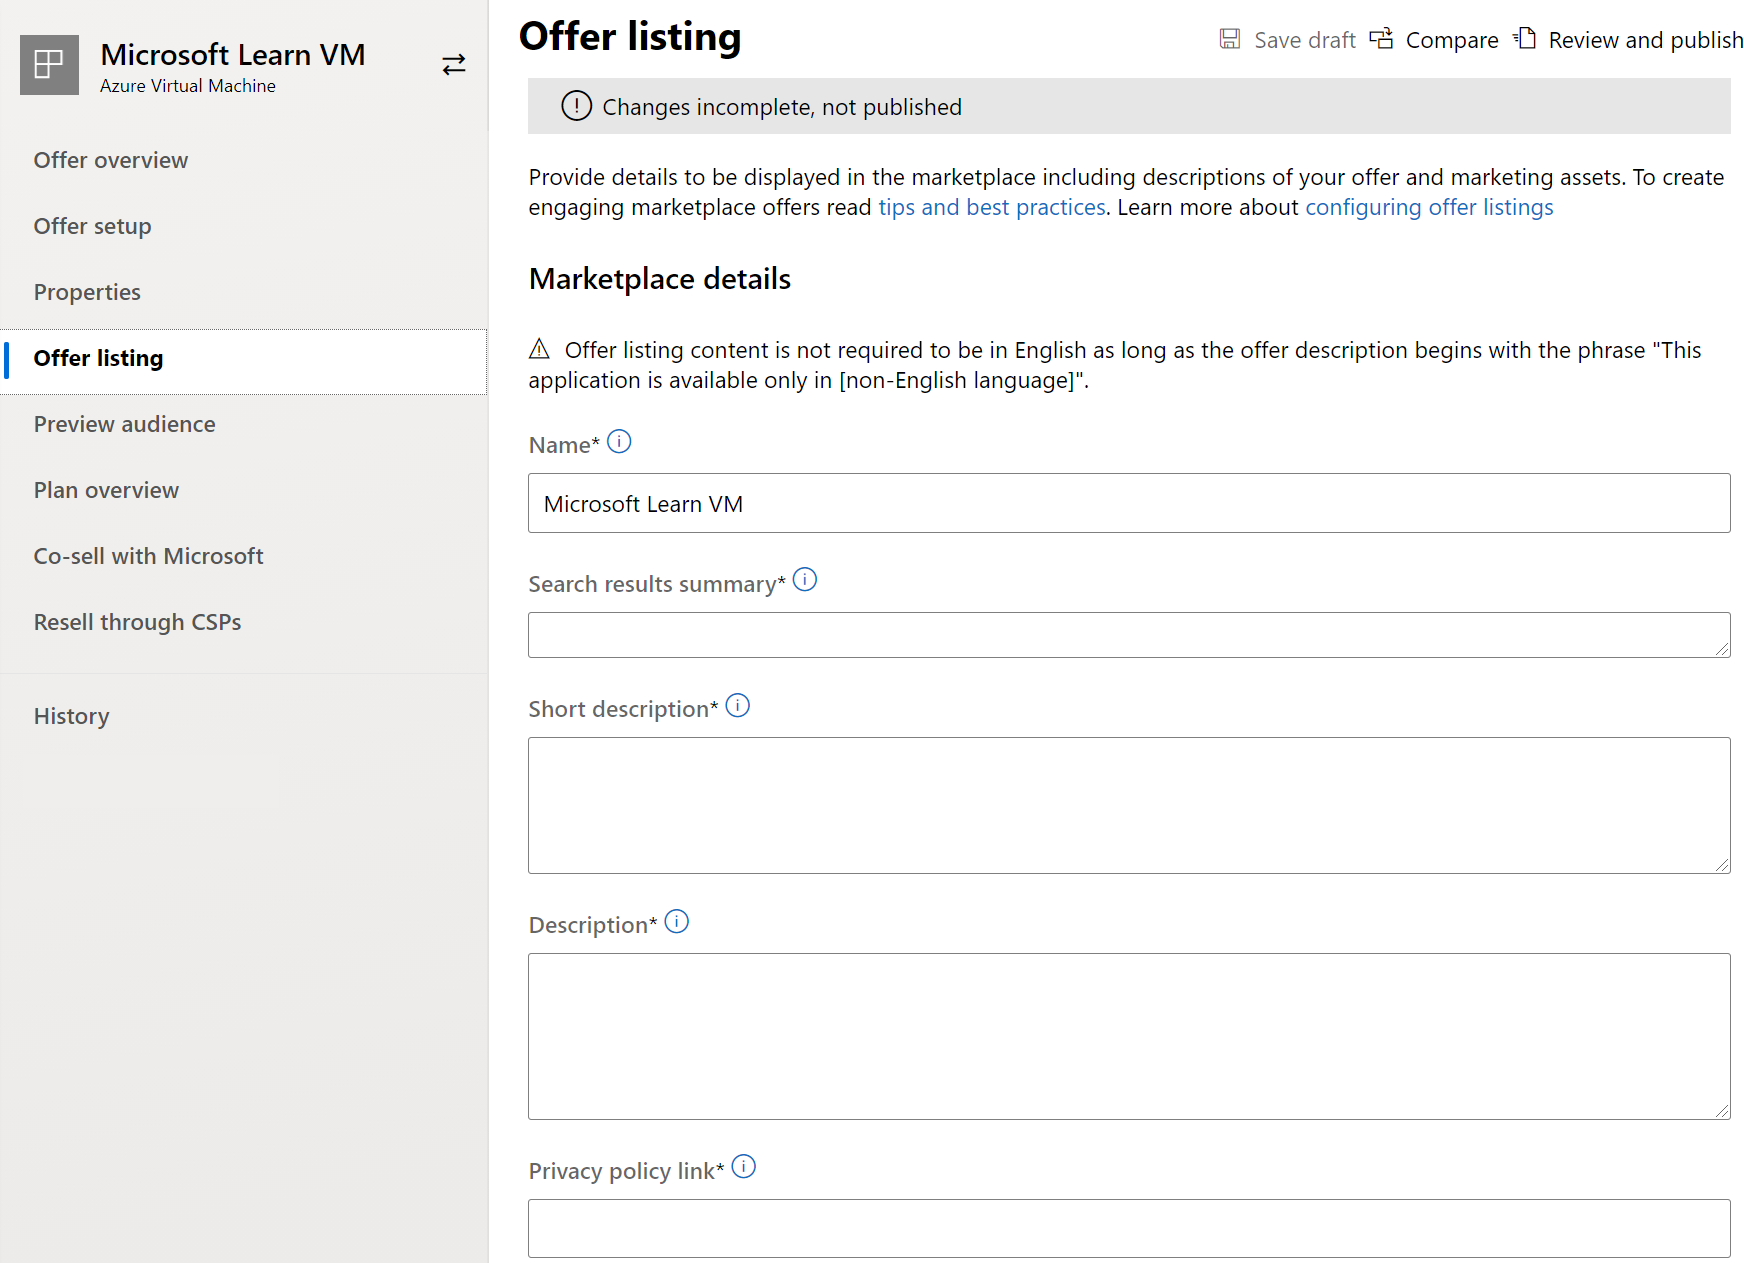
In the offer listing tab, you provide product information that gets displayed to customers in Azure Marketplace. This information includes descriptions of your VM-based software, user instructions, links to useful product information, and support & engineering contacts for customers. This page is also where you provide media - such as logos, screenshots, and videos - to display on your product page in Azure Marketplace.
For guidance to help you complete this step, reference our documentation on offer listing best practices and marketing best practices.
Adding a preview audience
When you publish your offer, you can identify a preview audience that gets access to review your VM offer before it's available in Azure Marketplace. For more information, review our documentation on adding a preview audience for your VM offer.
Creating VM offer plans
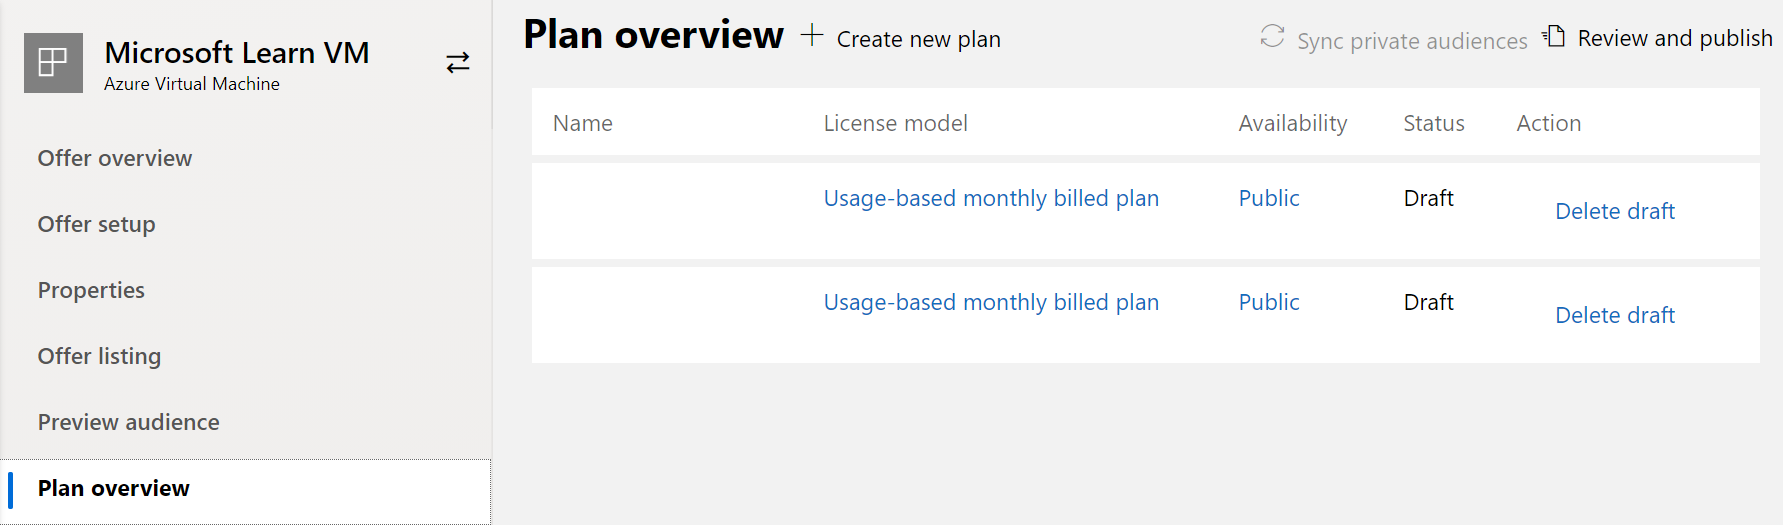
In the plan overview, you create your VM offer's plans. Remember, all VM offers must have at least one plan. Your VM offer's plans define the pricing and availability of your product to customers.
You choose the Azure regions in which your plan should be available on the plan setup page. Your plan must be available in at least one of the two following Azure regions:
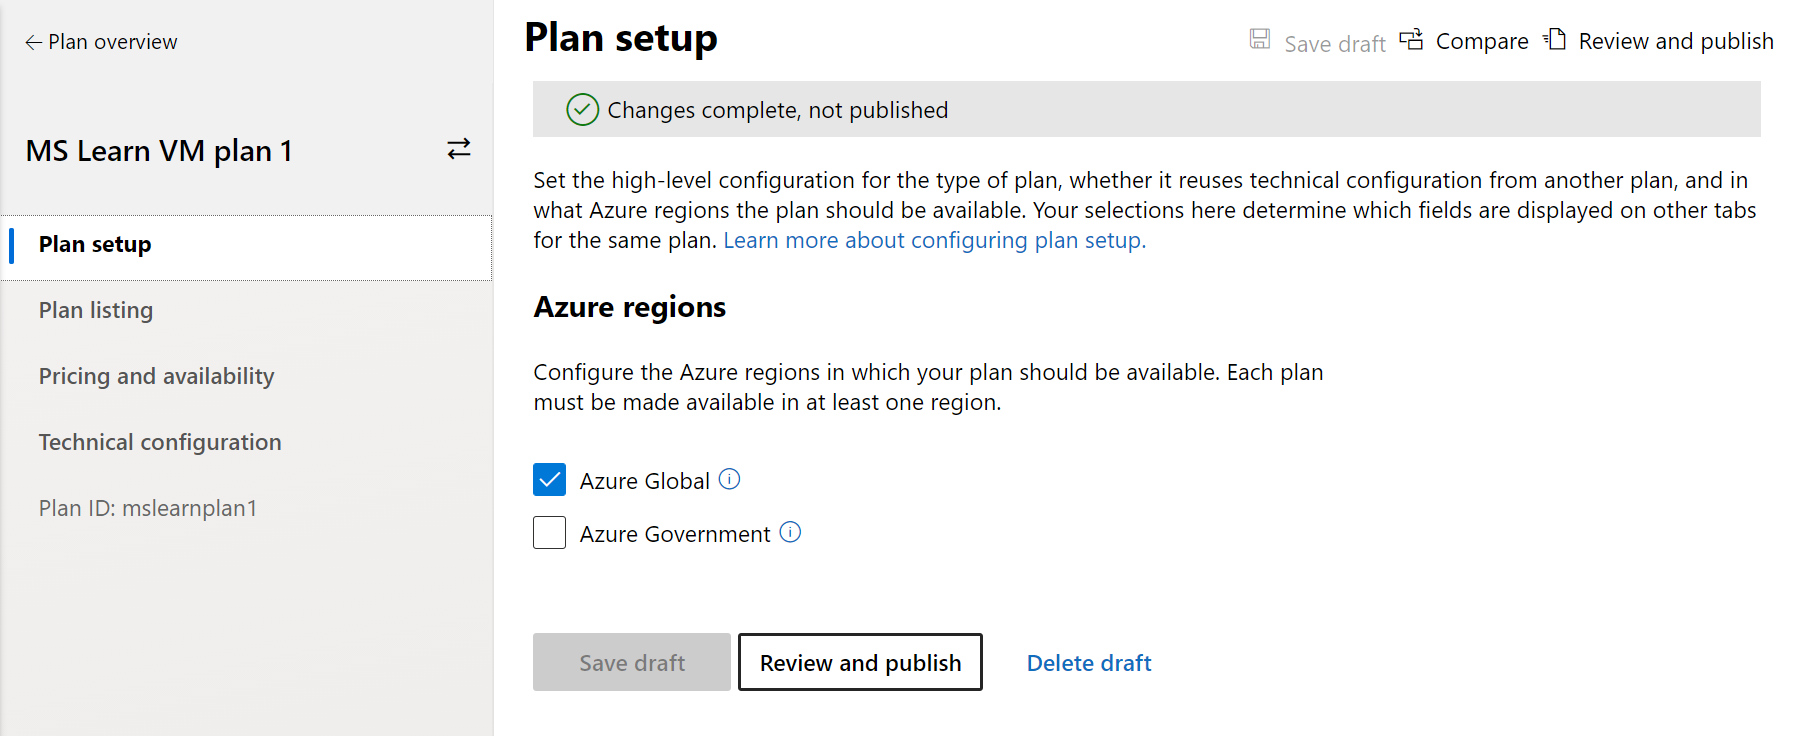
- Azure Global: Makes your plan available to customers in all Azure Global regions that have commercial marketplace integration.
- Azure Government: Makes your plan available in the Azure Government region, which provides controlled access for customers from US federal, state, local, or tribal entities. If you want to make your plan available to these entities, you need to ensure that your company and offer meet all required compliance controls, security measures, and other Azure Government criteria.
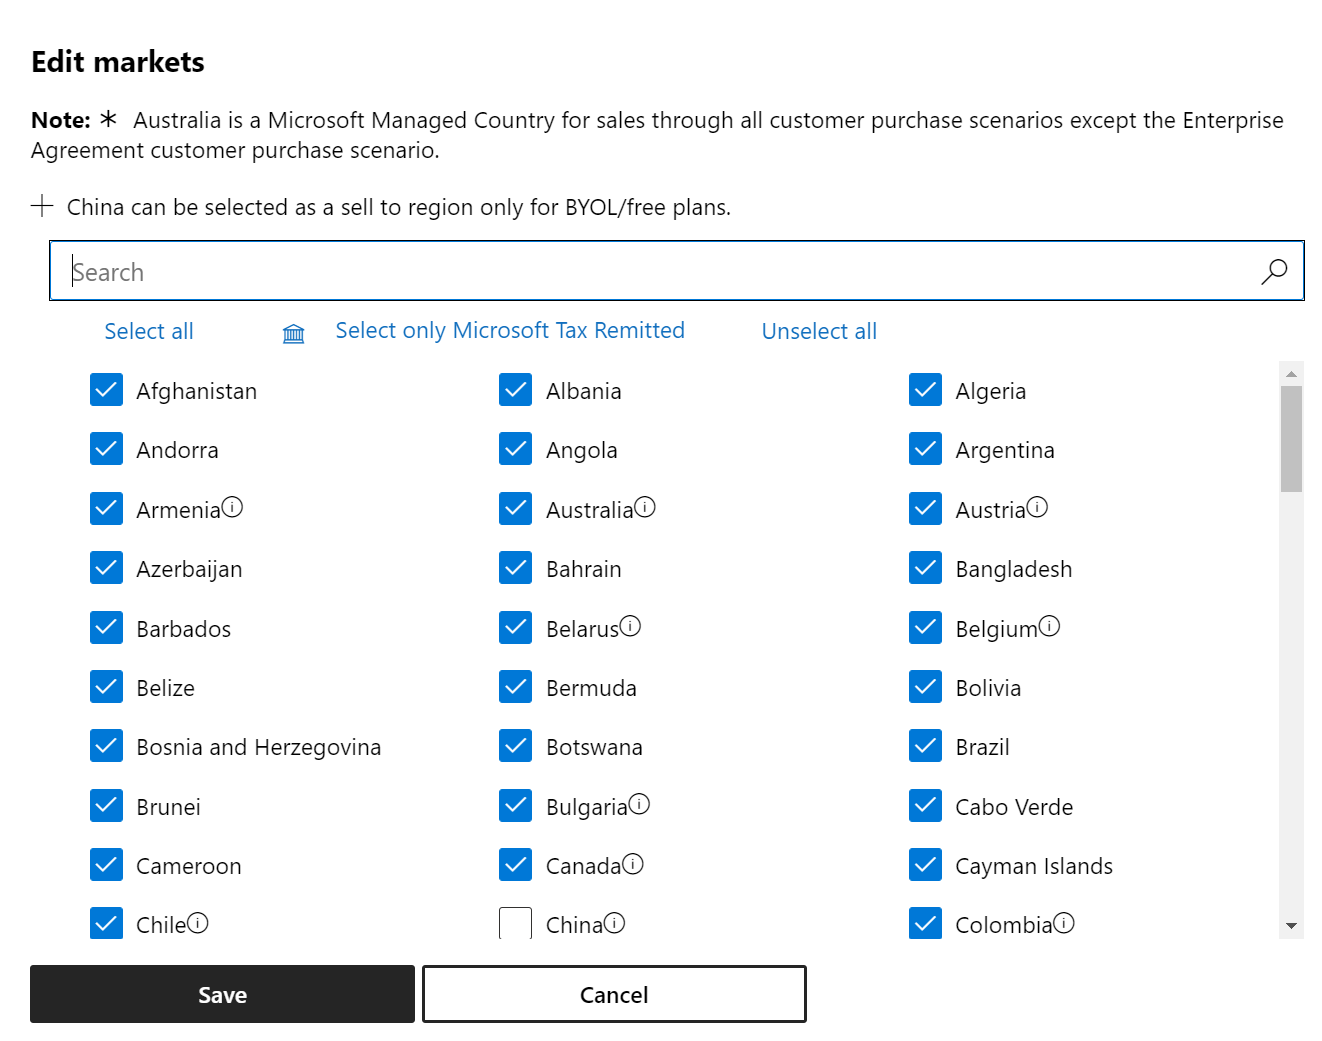
On the pricing and availability tab, you choose in which markets your VM offer should be available from a list of more than 140 countries/regions. Most markets are selected by default. For additional information to help you select market availability, check out our documentation on Azure VM plan pricing and availability.
Here's also where you select your offer's license model. As a reminder, the license model dictates whether your customers can purchase a license to use your software through Microsoft. You have two licensing options:
- Usage-based monthly billed plan: Customers can purchase a license for your software from Azure Marketplace and Microsoft processes payments from customers on your behalf.
- Bring your own license (BYOL): Customers have to purchase a subscription to your application outside of Azure Marketplace. You're responsible for validating customer subscriptions, facilitating payments, managing active subscriptions, metering usages (if applicable), and invoicing over the life of the subscription.
After selecting your license model and entering pricing information, you'll tell us whether you want to enable free trials and whether this is a public or private plan. As a refresher, public plans are made available to all customers, while private plans are only made available to specific customers you choose.
Tip
To publish a private plan, you'll need to know the Azure tenant IDs of your customers.
For more detailed guidance on creating plans for your VM offer, reference our documentation on VM offer plans.
Completing your offer's technical configuration
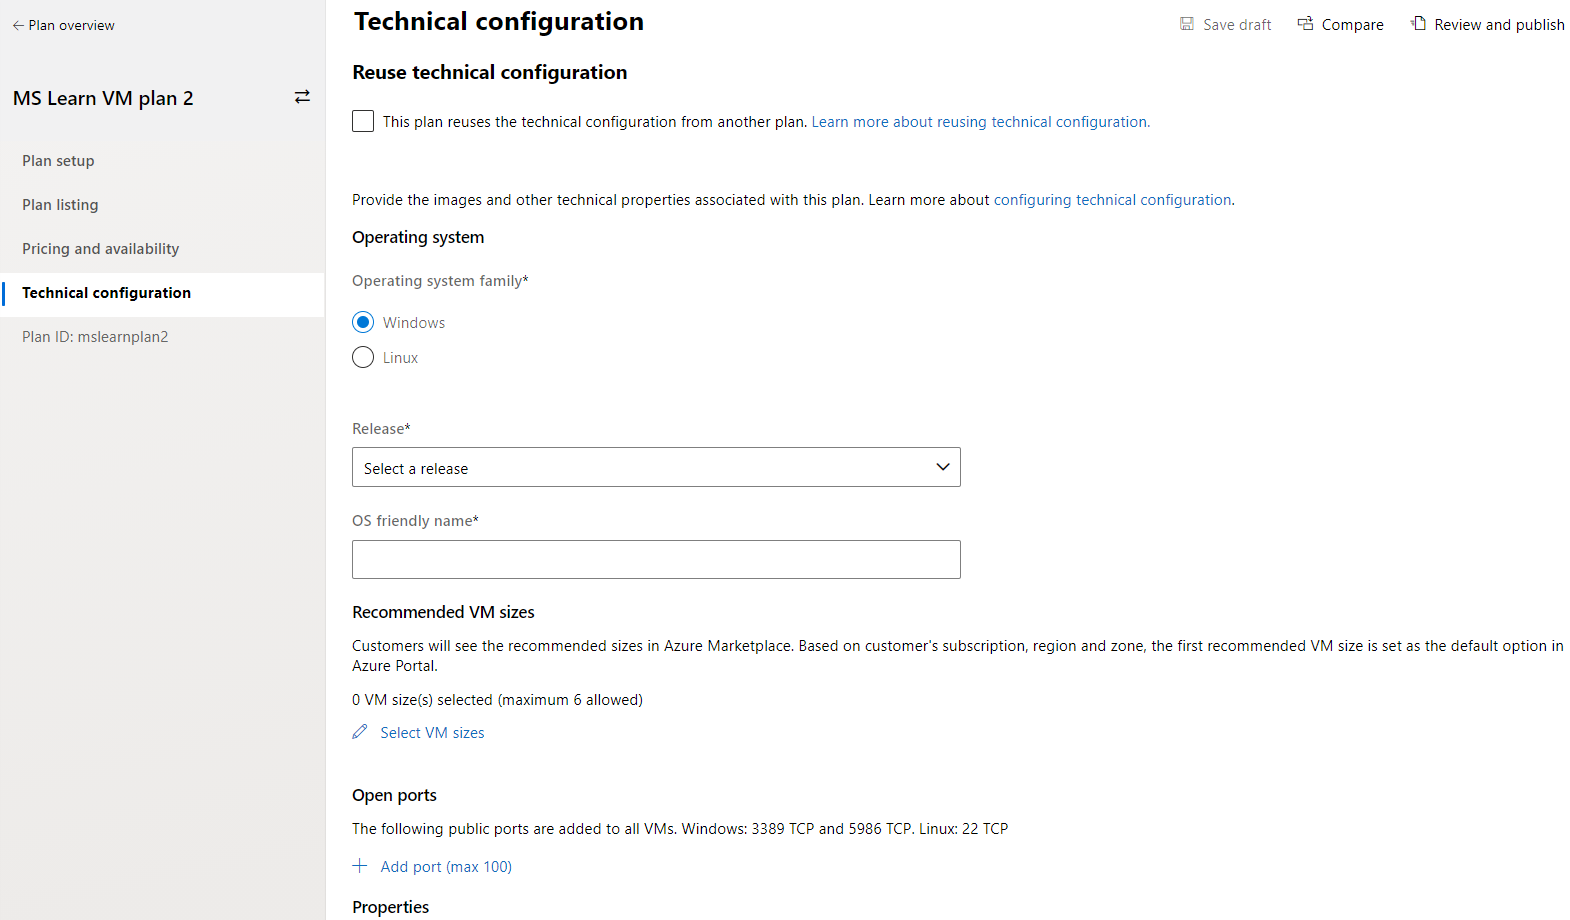
When you get to your offer's technical configuration, you're prompted to provide the following information about your VM offer:
- Your VM's operating system, either Windows or Linux
- Operating-system information for your VM image, including:
- For Windows VMs, select the version of Windows Server you used to create your image in the Release field.
- For Linux VMs, select the version of the Linux OS in the Vendor field.
- Recommended VM sizes to deploy your software. Customers can see these recommendations before they deploy your software from Azure Marketplace. You can provide up to six recommended VM sizes for your offer's plan.
- Add open ports (which are public ports that are automatically opened on a deployed VM). You can specify the ports individually or via a range along with the supported protocol: TCP, UDP, or both. Be sure to use a hyphen if specifying a port range (such as 80-150).
- The VM generation type that you want to publish. This decision should be based on your customers' needs. You can publish a generation 1 VM, a generation 2 VM, or both. For help with understanding the difference between generation 1 and 2 VMs, reference our documentation on support for generation 2 VMs on Azure.
- To wrap up the technical configuration, you provide the VM image that customers use to deploy your offer. This step is where you select your VM image from the shared image gallery (Azure Compute Gallery) associated with your Azure tenant. If you don't see your image, make sure that you have access to the Azure Compute Gallery. For help with accessing your Azure Compute Gallery, reference this documentation.
When creating your plans, you can reuse the technical configuration from another one of your offer's plans. If you choose to reuse a technical configuration from another plan, the technical configuration tab isn't shown for the plan you're creating. The reused technical configuration, including any updates you make in the future, is used for this plan. You won't be able to change this setting after you publish the offer.
Note
You should reuse the technical configuration whenever two or more of your offer's plans use the same VM image. Doing so makes it easier to keep your images up to date; just update the image once and all plans based on that technical configuration will also get updated.