Exercise - Create a business rule
In this exercise, you'll use the Passenger table set up in this learning path. If you didn't create the Cruises and Passenger tables as a part of this learning path, complete the steps in Exercise - Create two tables and relate them by using a one-to-many relationship to complete these exercises.
Sign in to Power Apps maker portal.
Open Tables.
Select the Passengers table.
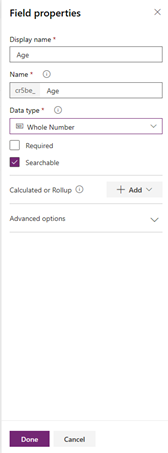
Select + New Column, and enter Age in the Display Name field. In the Data Type drop-down list, select Whole Number, and then select Save to add the new column.
In the + New Column window, add another column. Enter ID Required in the Display Name field, select Choice > Yes/No in the Data Type drop-down list.
Select Save to save the column.
Select the Business rules and then select + New business rule on the menu. Be patient; it will take time to load the business rule designer.
In the main design area, select Condition. This selection opens a panel to let you set the condition for the business rule.
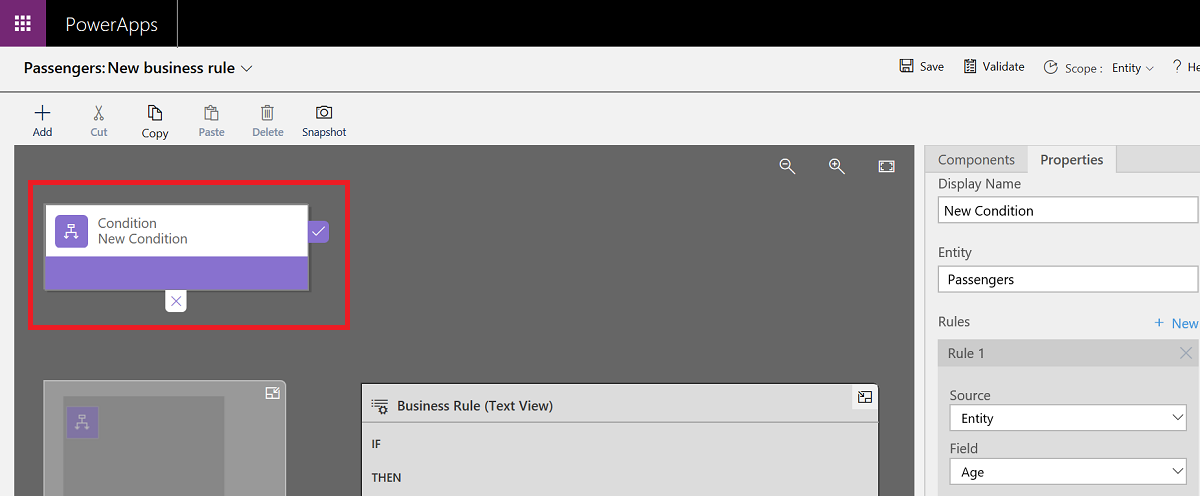
Add the following information into the fields on the Condition panel.
Condition panel field Value Entity Passengers Source Entity Field Age Operator Is Greater Than Type Value Value 18 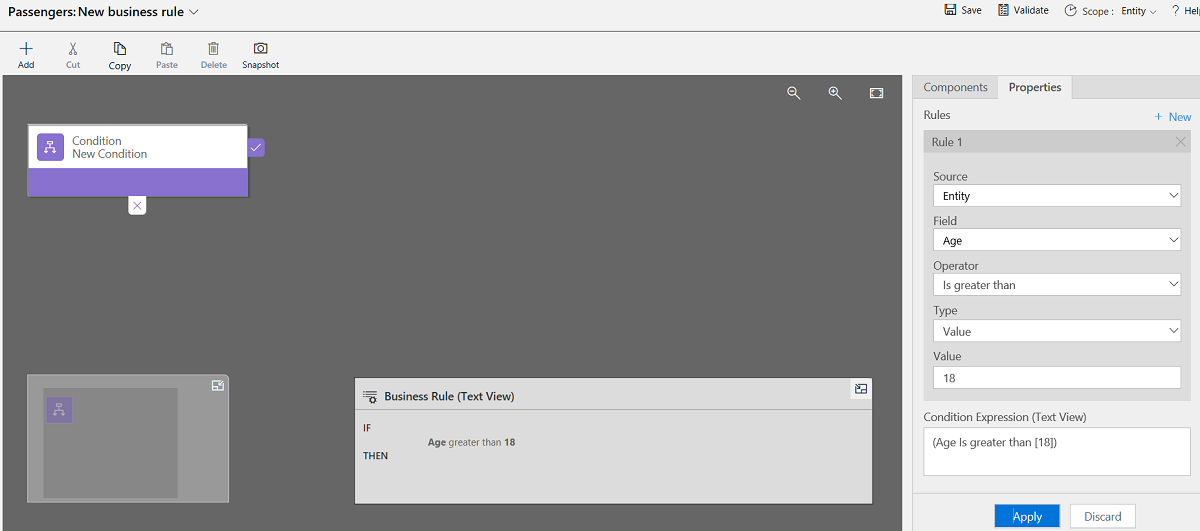
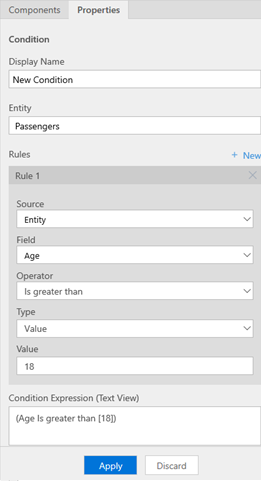
Select the Apply button at the bottom of the panel.
Now, you'll define action for the Yes or No branch, meaning that you'll indicate what you want to happen if the age of the person who is entered is 18 or under or over 18.
Select the Components tab and then select the Set Field Value new action and drag it to the right-hand side of the Conditions panel.
[
 ]](../media/unit-3-8.png#lightbox)
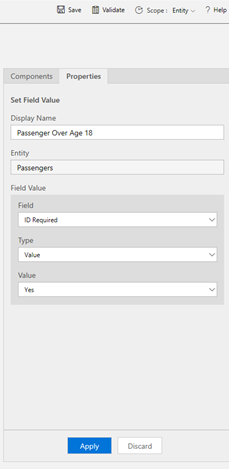
On the Set Field Value component, enter Passenger Over Age 18 in the Display Name field to indicate that the passenger's age is greater than 1. In the Entity field, enter Passengers. Select ID Required in the Field drop-down menu, and then select Yes in the Value drop-down menu, and select Apply.

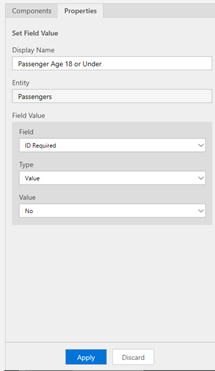
Select the Set Field Value component and drag it under the Condition, as shown in the following screenshot. Then, on the Components panel on the right, in the new Set Field Value component, enter Passenger Age 18 or Under in the Display Name field, and then set the Value option to No.
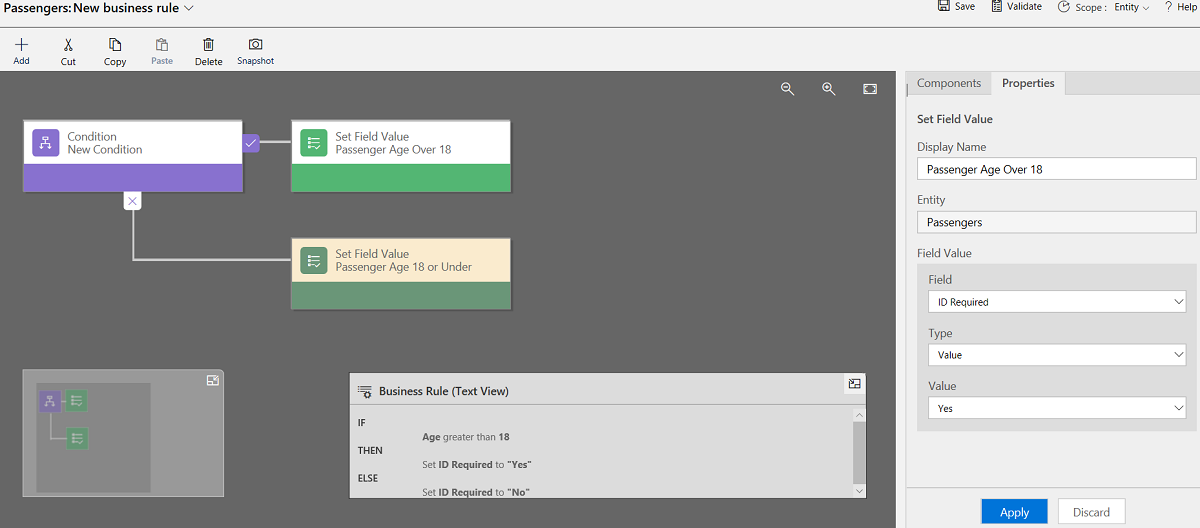
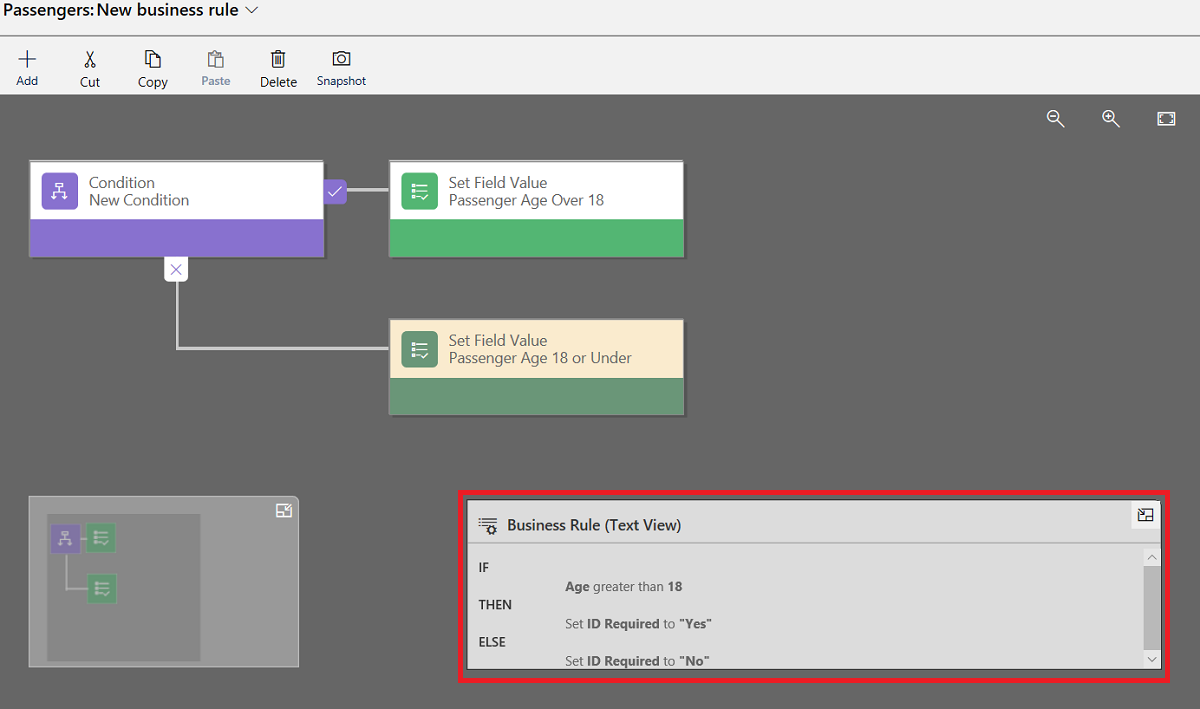
Now that the rule is set, notice that the business rule formula is shown in the window.
If you receive no errors, select Validate and then select Save.

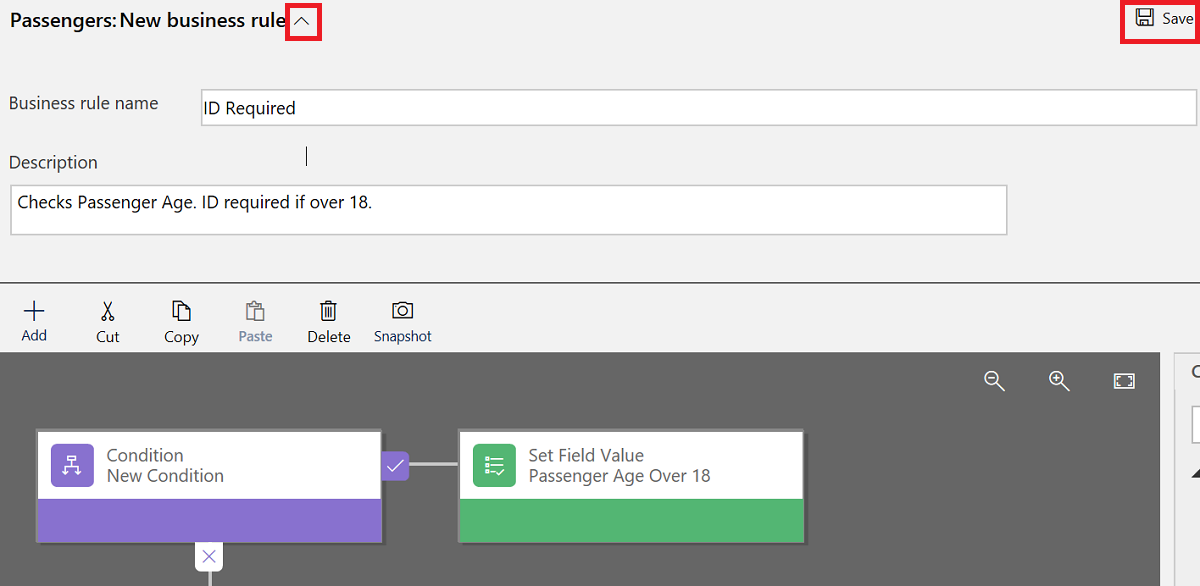
Select the arrow next to Passengers: New business rule in the top left of the screen. Enter a name in the Business rule name field and a description for the business rule in the Description field. Select Save.
Close the browser window. Return to browser, select Tables > Passengers, and then select the Business rules. In the Currently creating a new business rule window, select the Done button.
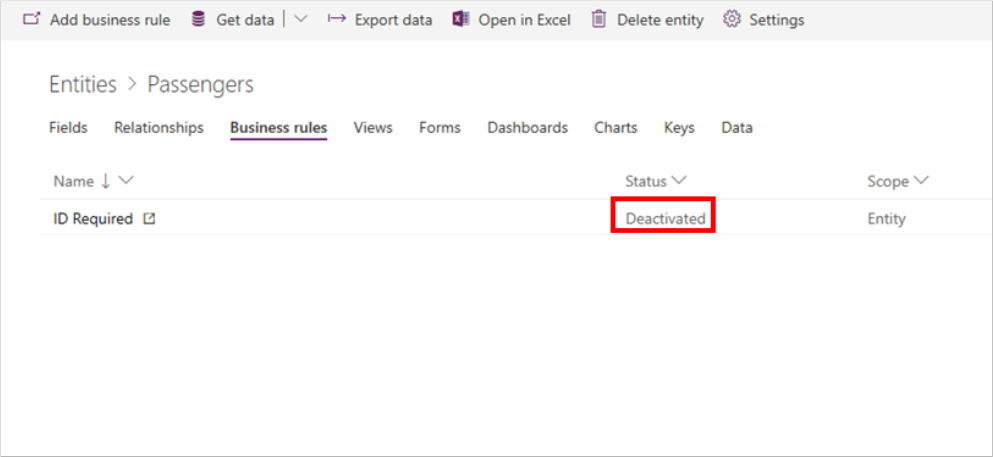
The business rule that you created will appear on the list as Deactivated. To activate it, you'll need to reset the ID Required field value. To start the process, select the new business rule that you created.
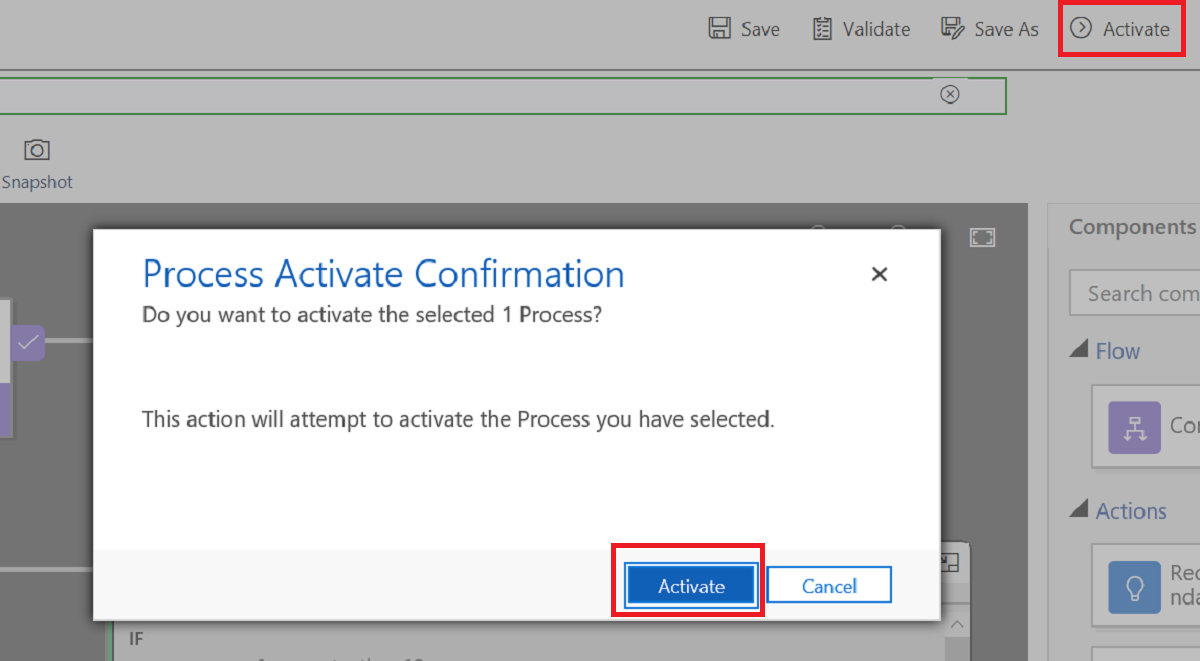
Select the Activate button on the menu bar at the top right. This will cause a Process Activate Confirmation dialog box to appear. Confirm activation by selecting the Activate button at the bottom of the dialog box.
Close the Browser tab and select Tables > Passengers > Business rules tab, which shows that the business rule that you created now has the status of Activated.


Congratulations, you've created a business rule!