Deploy Azure VMware Solution
- 5 minutes
You can build the Azure VMware Solution private cloud environment after all planning steps are complete. Azure VMware Solution gives your company the ability to deploy a vSphere cluster in Azure. Azure VMware Solution also provides an easy migration path to bring workloads into Azure. You'll use all the information gathered from the planning units to successfully deploy Azure VMware Solution.
Register the resource provider
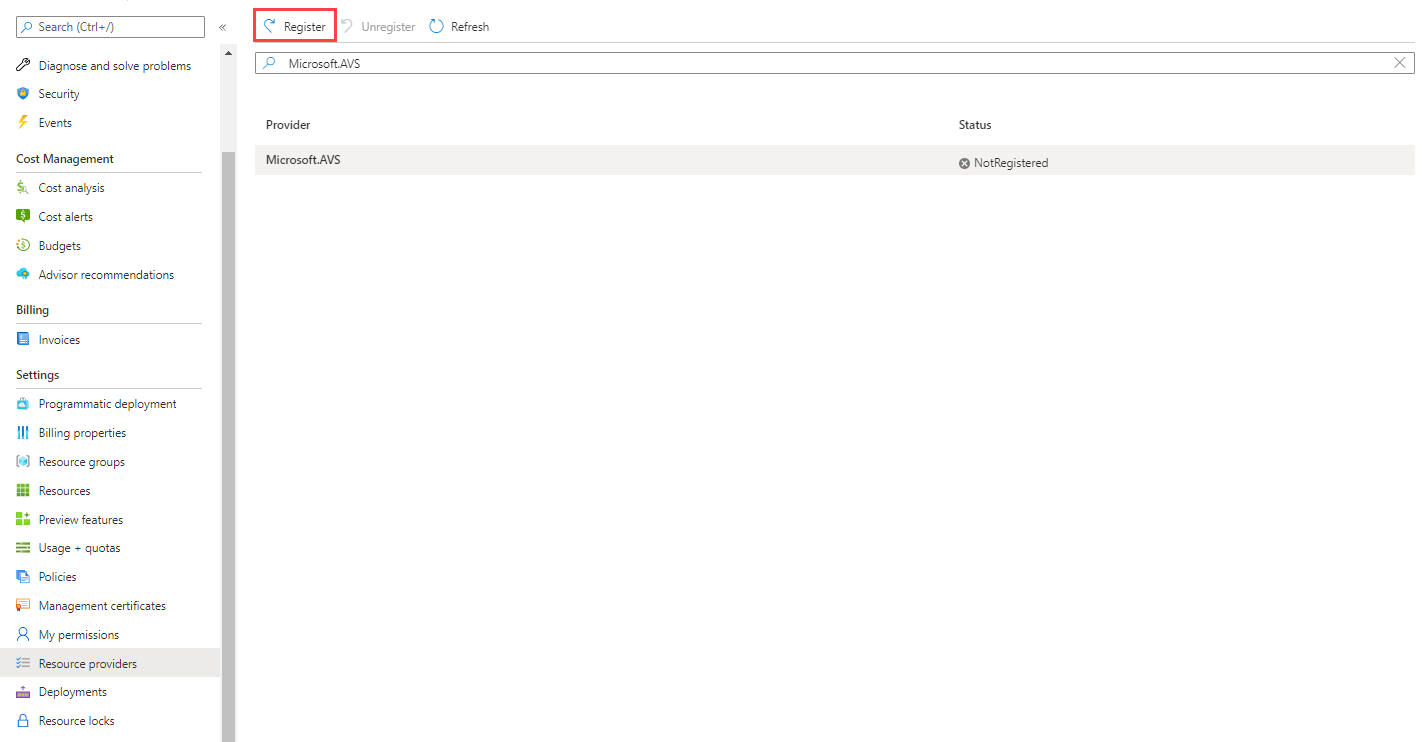
The resource provider must be registered within the subscription. You can register the resource provider by using the Azure CLI, PowerShell, or the Azure portal.
Azure CLI
To register the resource provider by using the Azure CLI:
Start Azure Cloud Shell.
Sign in to your Azure subscription.
Run this command for the Azure CLI:
az provider register -n Microsoft.AVS --subscription <your subscription ID>
PowerShell
To register the resource provider by using PowerShell:
Start Azure Cloud Shell.
Sign in to your Azure subscription.
Run this command for PowerShell:
Register-AzResourceProvider -ProviderNamespace Microsoft.AVS
Azure portal
To register the resource provider by using the Azure portal:
Search for Subscriptions.
Select the subscription for which you want to register the provider.
Select Resource providers and enter Microsoft.AVS in the search bar. If the resource provider isn't registered, select Register.
Deploy Azure VMware Solution using the Azure portal
When you're ready to deploy Azure VMware Solution, make sure you at least have contributor rights to the subscription. Be ready to use some of the information you gathered during the planning phase of the Azure VMware Solution deployment to create the resource in Azure.
Follow these steps:
On the Azure portal menu, select Create a resource.
In the Search the Marketplace text box, enter Azure VMware Solution, select the resource, and then select Create.
On Azure VMware Solution, select Create.
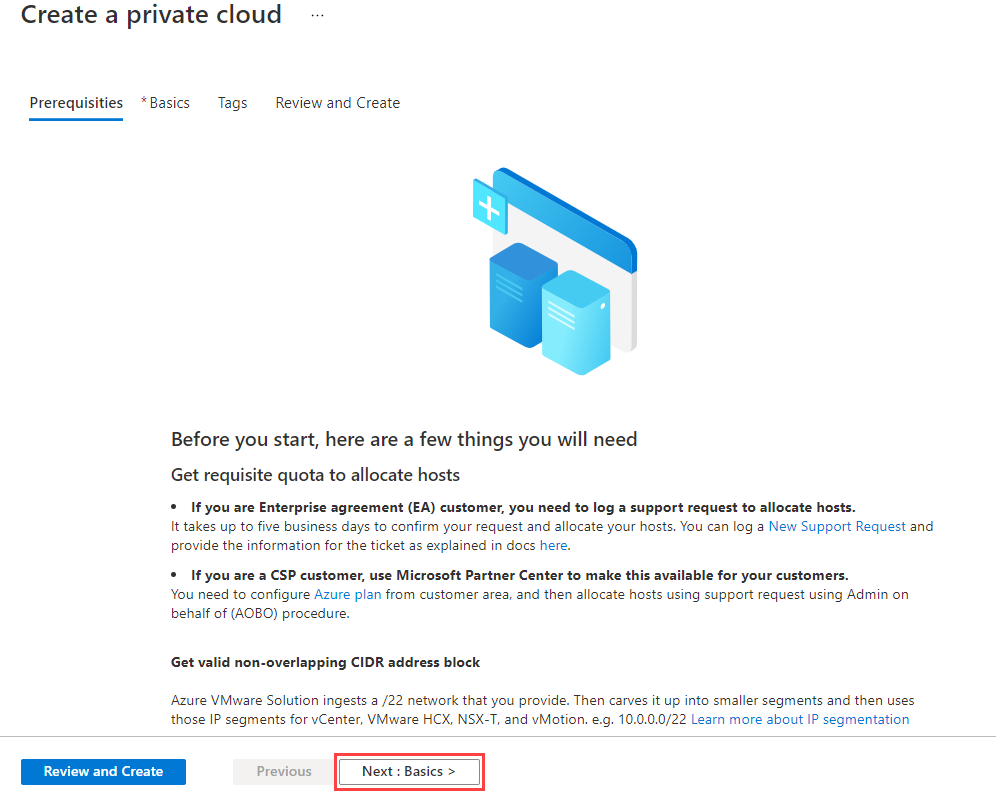
The prerequisites we covered earlier in the module are highlighted in the first screen for the deployment.
If you missed any of these steps, now is a good time to review before building the Azure VMware Solution private cloud environment.
After reviewing all pre-requisites one last time, select Next: Basics >.
On the Basics tab, enter values for the fields:
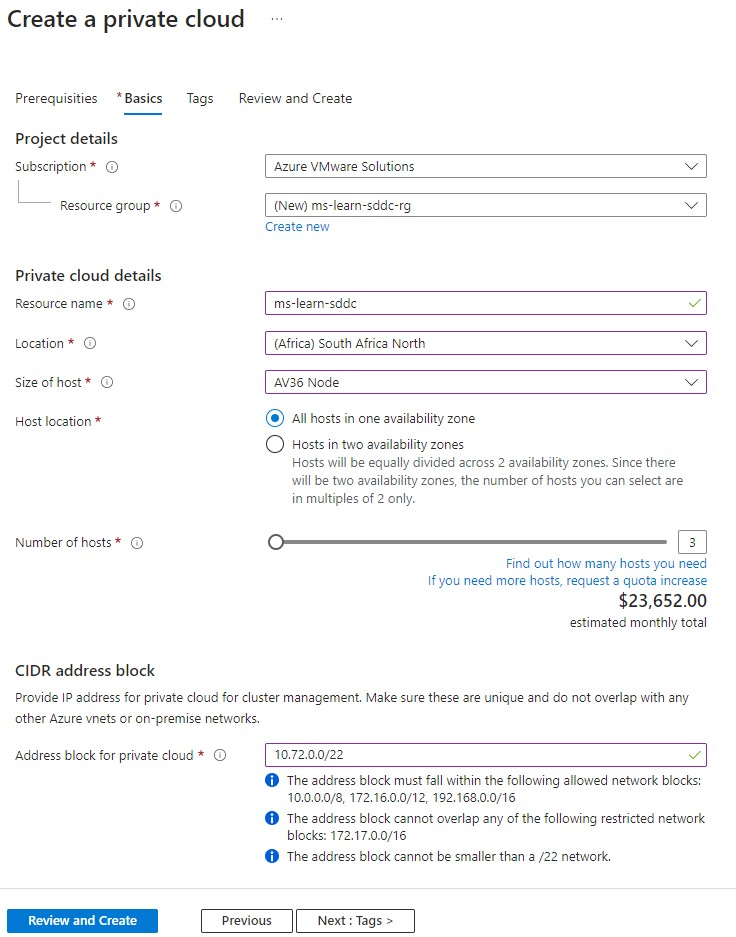
Here's a description of the value expected in each field:
Field Value Subscription The subscription for the deployment. Resource group The resource group for private cloud resources. Select an existing resource group or create a new one. Resource name A name for the Azure VMware Solution private cloud. Location The location (Azure region) where Azure VMware Solution can be deployed. Size of host The SKU value for the bare metal nodes. Host location Select whether to deploy your private cloud in a single availability zone or across two availability zones in the same region (stretched cluster feature). Number of hosts The number of hosts to add to the private cloud cluster. With a stretched cluster feature requires 2x number of hosts needed to support your workload, equally split between the two availability zones. Address block for private cloud An IP address block for the CIDR network used by the private cloud. Use /22 address space. The address should be unique and not overlap with other Azure Virtual Networks and with on-premises networks. After all fields are filled in, select Review + Create. The Azure VMware Solution deployment can take between three to four hours before completion.
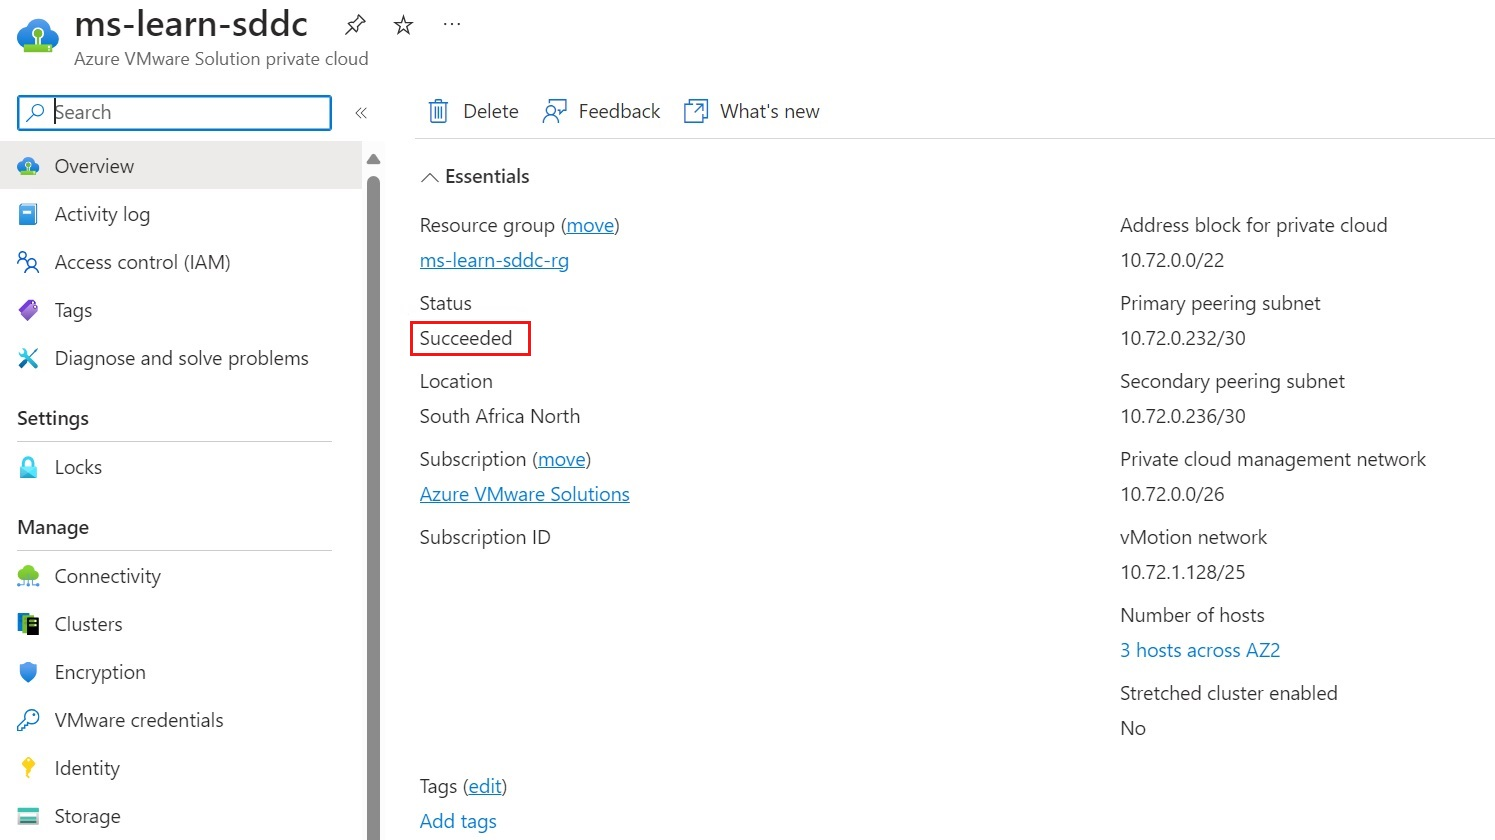
When the deployment finishes, select the resource group, and then select the private cloud. The Status will show as Succeeded:
Next, you'll need to connect the Azure VMware Solution ExpressRoute circuit to an Azure virtual network.
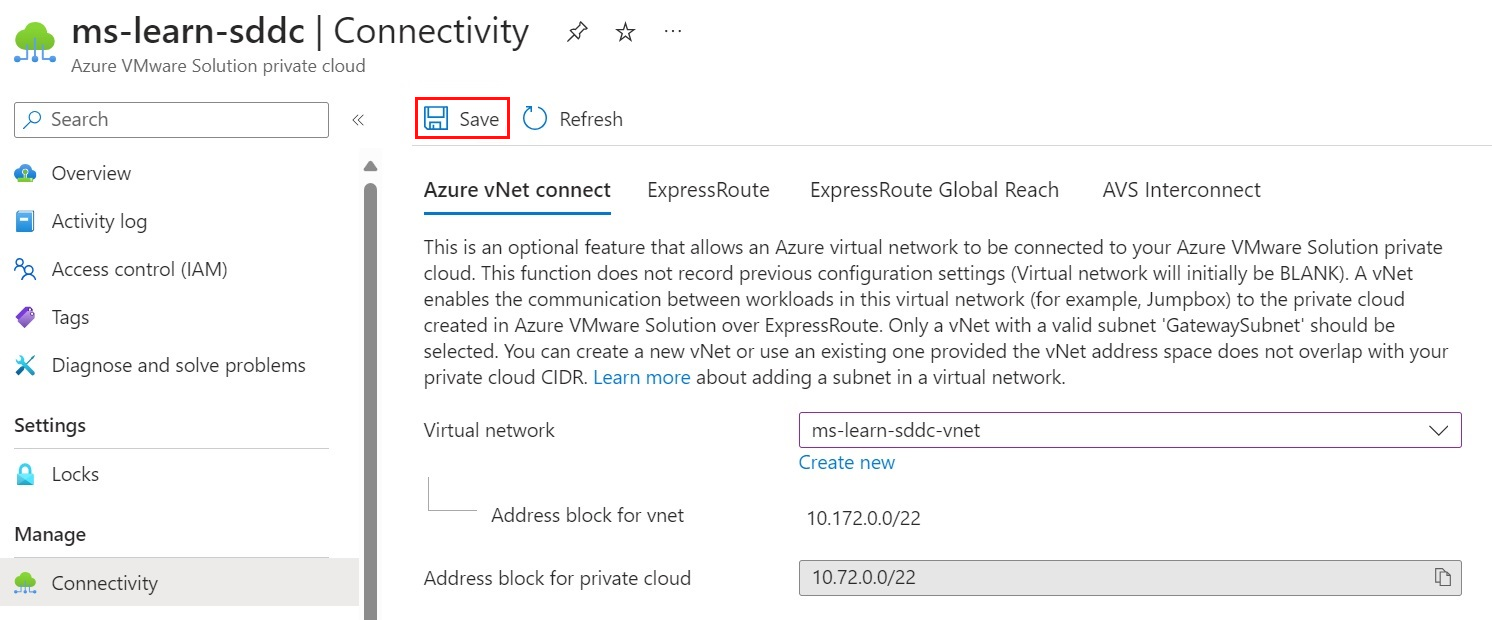
Under Manage, select Connectivity.
For Azure vNet connect, you'll need to create a new virtual network or select an existing virtual network. The virtual network needs a GatewaySubnet configured for ExpressRoute peering.
After the virtual network is configured, select Save.
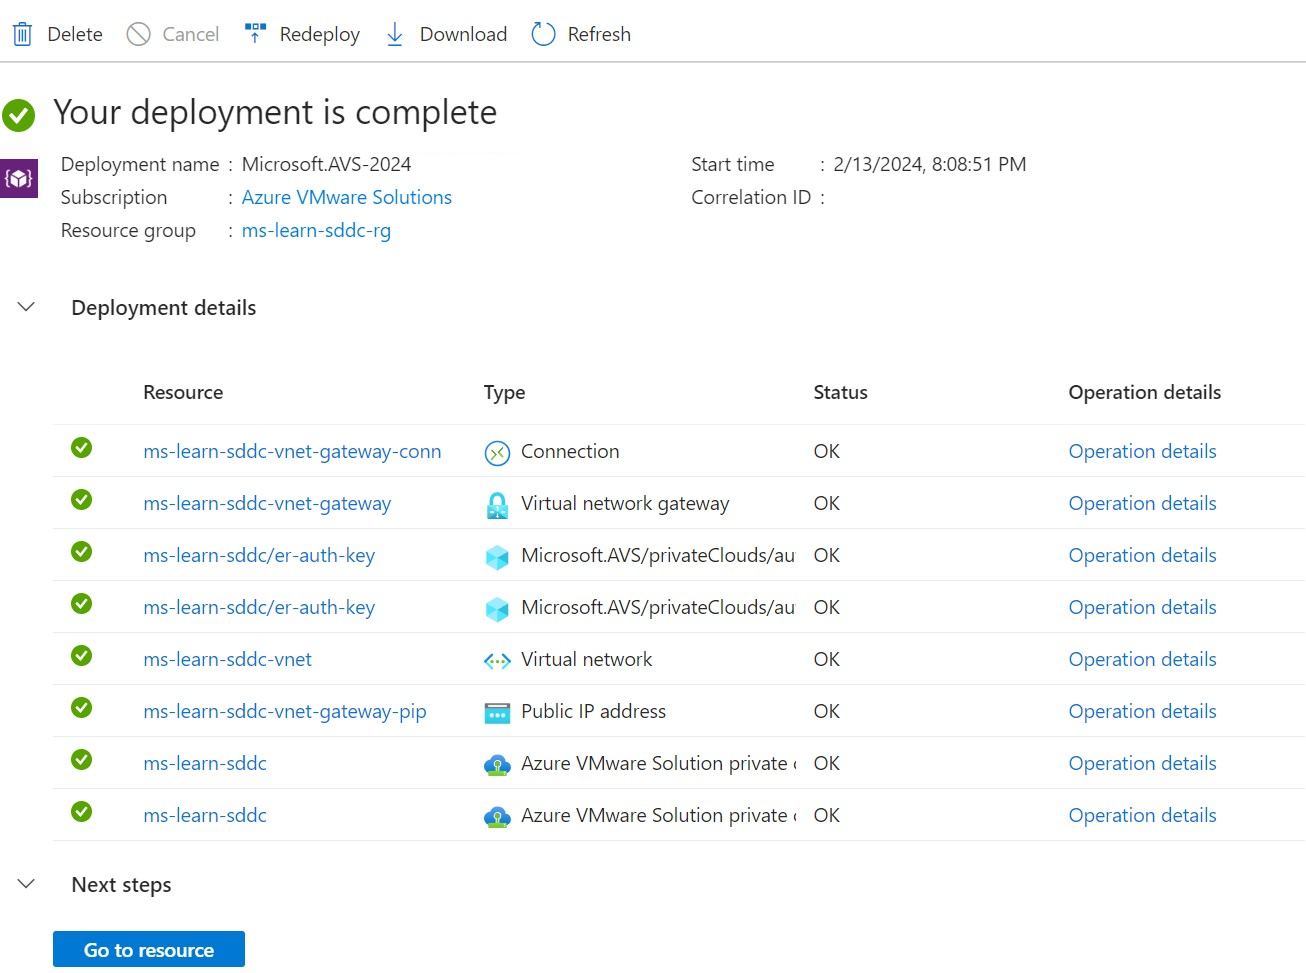
Saving the configuration triggers a build of a few different Azure resources:
Azure resource Description Virtual network If you're building a new virtual network with a GatewaySubnet, the virtual network will deploy first. If you're using an existing virtual network, the build process will move to the next resource that doesn't yet exist. Virtual network gateway This resource provides a way for the Azure VMware Solution ExpressRoute circuit to connect to an Azure virtual network. Virtual network gateway public IP This resource provides a public IP used to establish a peering between the Azure virtual network and the Azure VMware Solution ExpressRoute circuit. ExpressRoute authorizations There are two authorizations that get created: one for inbound and one for outbound connectivity, both to and from the Azure VMware Solution private cloud. After the build finishes, connectivity between the Azure VMware Solution private cloud and Azure have been established. The deployment complete page appears displaying your Deployment name, Subscription, Resource group, Correlation ID, and the resources deployed.
Azure VMware Solution connectivity will require further configuration to communicate with the on-premises VMware environment. In the next unit, we'll go through network-configuration steps. You'll take those steps to successfully connect to the Azure VMware Solution private environment, both from within Azure and from your on-premises environment.
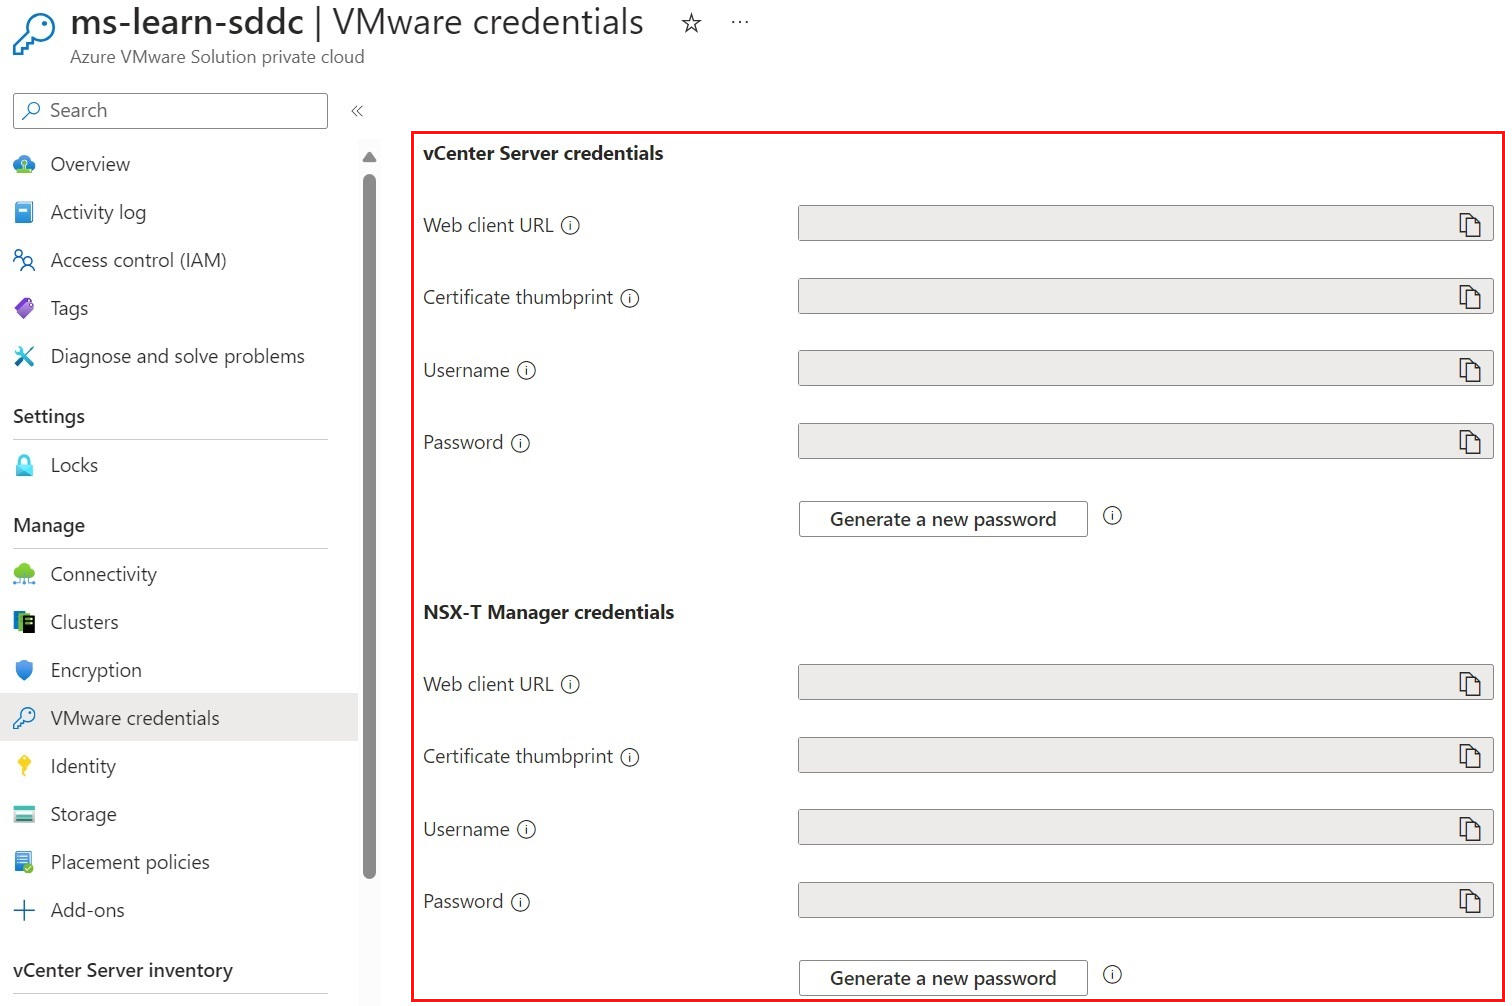
Once you have the connectivity between Azure VMware Solution and Azure services established, you can use an Azure VM as a jumpbox, to access vCenter Server and NSX Manager. The management components of the Azure VMware Solution private cloud are not publicly accessible, so you need that L3 connectivity in place to reach them. One way of doing that is through a jumpbox VM in the connected virtual network in Azure.
Create an Azure Bastion resource
The Azure Bastion resource provides secure Remote Desktop (RDP) connectivity to your Azure infrastructure as a service (IaaS) environment. You use Azure Bastion initially to connect to the jump host that will allow you to sign in to the Azure VMware Solution vCenter and NSX Manager environments.
When the ExpressRoute circuits and ExpressRoute Global Reach have been configured for hybrid connectivity, you no longer need the Azure Bastion resource. Your company might want to keep the resource as a backup in case you have connectivity issues with the ExpressRoute circuits in the future.
To create an Azure Bastion resource:
In the Azure portal, search for Bastions.
Select Create in the menu bar.
On the Create a Bastion page, configure a new Azure Bastion resource with the following details:
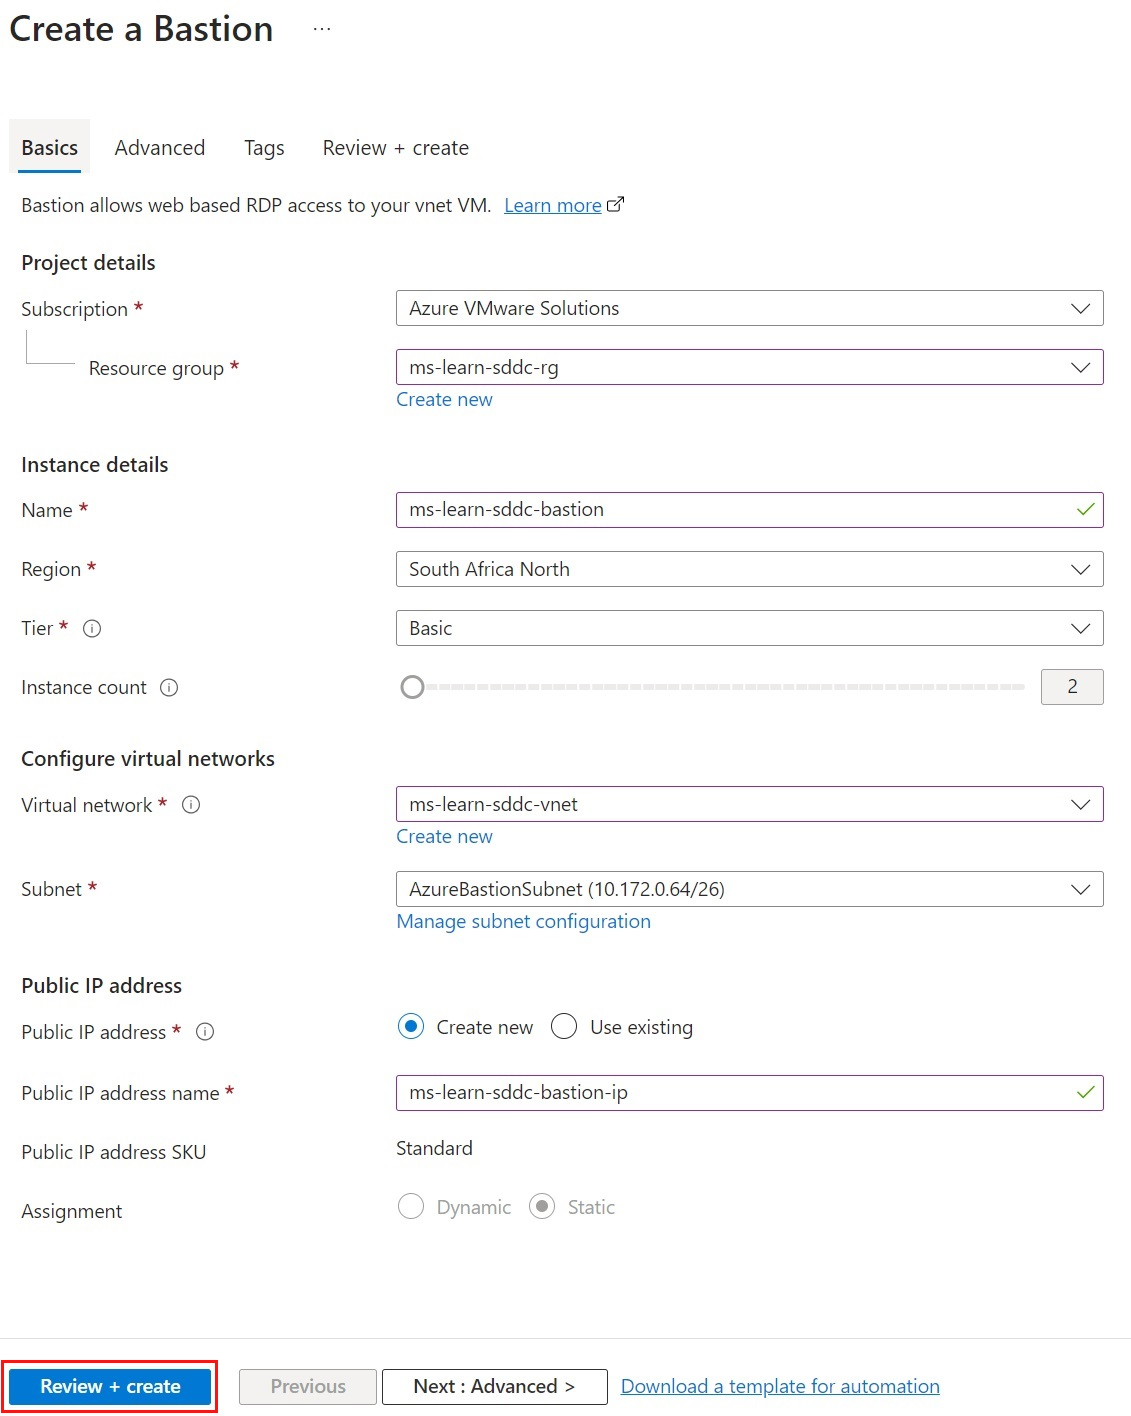
Field Value Subscription Select the same subscription where Azure VMware Solution is deployed. Resource group Select an existing resource group or create a new one. Name Specify a name for the new Bastion resource. Region Select the same region where Azure VMware Solution is deployed. Tier Select Basic. This provides the functionality we need for this example. You can always upgrade Bastion to Standard to have more instance counts. Instance Count Defaults to 2 when Basic is chosen. Virtual network Select the virtual network that was created when you deployed Azure VMware Solution. Subnet Azure Bastion requires a dedicated subnet. For the virtual network created during the Azure VMware Solution deployment, select Manage subnet configuration to create the dedicated subnet. Select +Subnet, then create a subnet with the name AzureBastionSubnet and at /27 or higher. Public IP address The public IP allows RDP and SSH over port 443 to Azure Bastion. Create a new public IP and place the resource in the same region as both Azure VMware Solution and Azure Bastion. This new public IP is separate from the Azure VMware Solution deployment. Public IP address name Provide a name for the public IP-address resource. Public IP address SKU By default, this setting is prepopulated to Standard because Azure Bastion supports only the Standard Public IP SKU. Assignment By default, this setting is pre-populated to Static. The best practice is to leave assignment at static.
Create an Azure VM to use as a jumpbox VM
After Azure VMware Solution private cloud and the Azure Bastion resource are deployed, create a jump host to access to the private cloud. The jumpbox VM must be located in the same virtual network and subscription as Azure VMware Solution and the Azure Bastion resource. The jumpbox VM can be either a desktop or server version of Windows. The jumpbox VM will be deployed behind the Azure Bastion resource. You'll use Azure Bastion to access the jumpbox VM via RDP in the Azure portal over Transport Layer Security (TLS).
Use Azure Bastion and sign in to vCenter and NSX Manager
Use Azure Bastion to sign in to the jumpbox VM. Then, open a web browser, go to both vCenter and NSX Manager, and sign in to each. The Azure portal will provide the vCenter IP address, the NSX Manager console's IP addresses, and credentials used for deployment. Accessing the jump host through Azure Bastion will allow you to configure NSX and vCenter.