Exercise - Create a storage blob
Create a storage account
In this task, you'll create a new storage account.
Sign in to the Azure portal at https://portal.azure.com
Select Create a resource.
Under Categories, select Storage.
Under Storage account, select Create.
On the Basics tab of the Create a storage account blade, fill in the following information. Leave the defaults for everything else.
Setting Value Subscription Concierge Subscription Resource group Select the resource group that starts with learn Storage account name Create a unique storage account name Region Leave default Performance Standard Redundancy Locally redundant storage (LRS) On the Advanced tab of the Create a storage account blade, fill in the following information. Leave the defaults for everything else.
Setting Value Allow enabling anonymous access on individual containers Checked 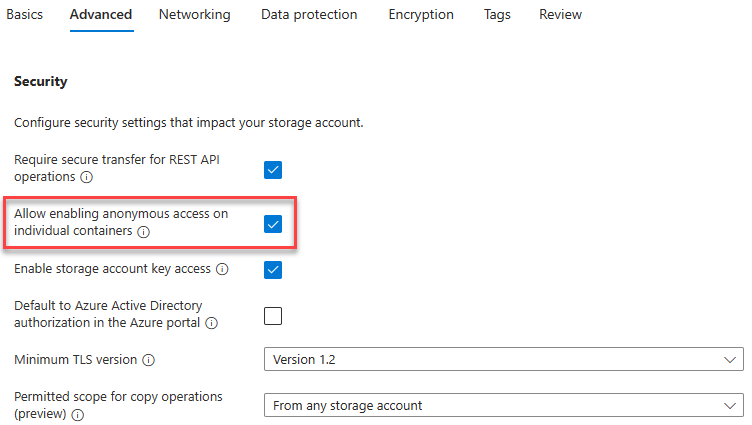
Select Review to review your storage account settings and allow Azure to validate the configuration.
Once validated, select Create. Wait for the notification that the account was successfully created.
Select Go to resource.
Work with blob storage
In this section, you'll create a Blob container and upload a picture.
Under Data storage, select Containers.
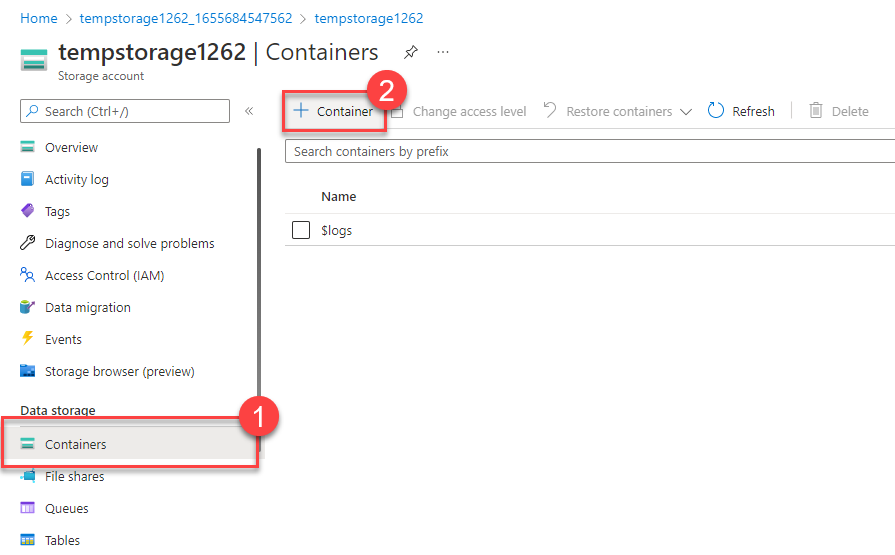
Select + Container and complete the information.
Setting Value Name Enter a name for the container Anonymous access level Private (no anonymous access) Select Create.
Note
Step 4 will need an image. If you want to upload an image you already have on your computer, continue to Step 4. Otherwise, open a new browser window and search Bing for an image of a flower. Save the image to your computer.
Back in the Azure portal, select the container you created, then select Upload.
Browse for the image file you want to upload. Select it and then select upload.
Note
You can upload as many blobs as you like in this way. New blobs will be listed within the container.
Select the Blob (file) you just uploaded. You should be on the properties tab.
Copy the URL from the URL field and paste it into a new tab. You should receive an error message similar to the following.
<Error>
<Code>ResourceNotFound</Code>
  <Message>The specified resource does not exist. RequestId:4a4bd3d9-101e-005a-1a3e-84bd42000000</Message>
</Error>
Change the access level of your blob
Go back to the Azure portal.
Select Change access level.
Set the Anonymous access level to Blob (anonymous read access for blobs only).
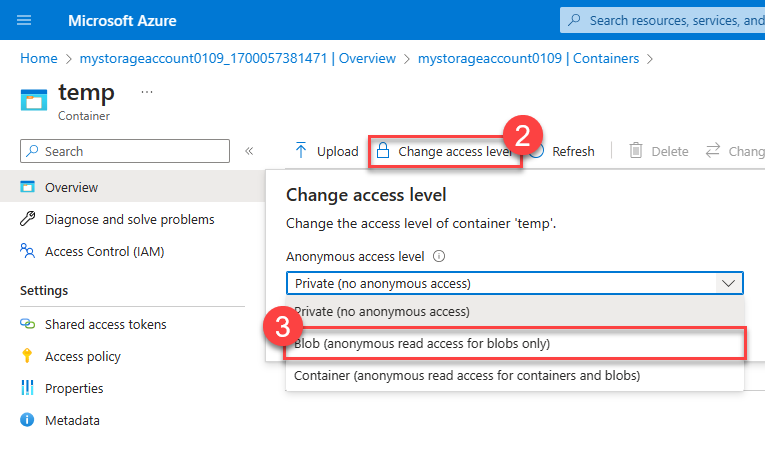
Select OK.
Refresh the tab where you attempted to access the file earlier.
Congratulations - you've completed this exercise. You created a storage account, added a container to the storage account, and then uploaded blobs (files) to your container. Then you changed the access level so you could access your file from the internet.
Clean up
The sandbox automatically cleans up your resources when you're finished with this module.
When you're working in your own subscription, it's a good idea at the end of a project to identify whether you still need the resources you created. Resources that you leave running can cost you money. You can delete resources individually or delete the resource group to delete the entire set of resources.