Implement a Web Application Firewall
- 7 minutes
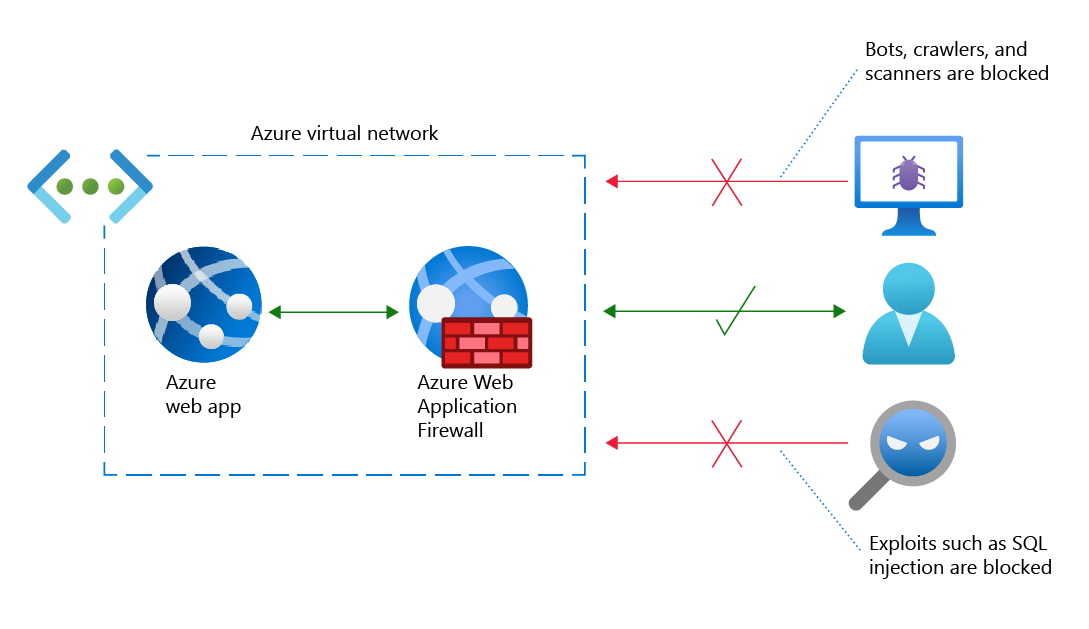
Web Application Firewall (WAF) provides centralized protection of your web applications from common exploits and vulnerabilities. SQL injections and cross-site scripting are among the most common attacks.
Preventing attacks in application code is challenging. Prevention can require rigorous maintenance, patching, and monitoring at multiple layers of the application. A centralized WAF helps make security management simpler. A WAF also gives application administrators better assurance of protection against threats and intrusions. A WAF solution can react to a security threat faster by centrally patching a known vulnerability, instead of securing each individual web application.
Web Application Firewall policy modes
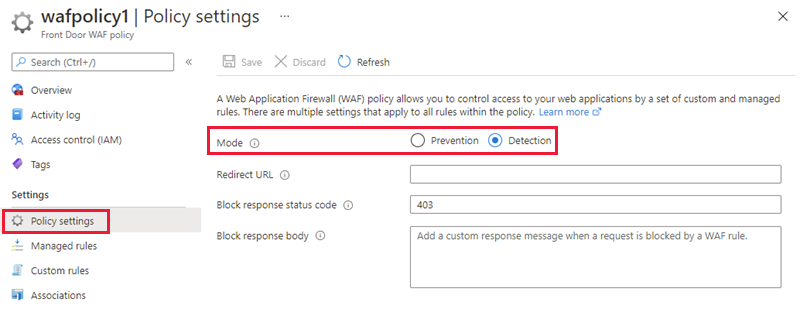
There are two WAF policy modes: Detection and Prevention. By default, the WAF policy is in Detection mode. In Detection mode, WAF doesn't block any requests. Instead, requests matching the WAF rules are logged. In Prevention mode, requests that match rules are blocked and logged.
The Web Application Firewall works with the Application Gateway, Azure Front Door Service, and the Azure CDN Service.
Microsoft managed rule sets, rule groups, and rules
Azure Web Application Firewall thwarts known exploits by applying rules to an app's incoming HTTP/HTTPS requests. A rule is designed to recognize and prevent a particular threat.
The rules that Azure Web Application Firewall uses to detect and block common vulnerabilities are mostly managed rules that belong to various rule groups. Each rule group is a collection of rules, and a managed rule set is collection of rule groups. Managed rule sets include Microsoft Threat Intelligence based rule groups, CVE (Common Vulnerabilities and Exposures) rule groups, and core rule groups (CRS). Common threats the WAF checks for are:
- Cross-site scripting. A threat actor uses a web application to send malicious code to another user's web browser.
- Local file inclusion. An attacker exploits vulnerabilities in a server's handling of include statements, most often in PHP scripts.
- PHP injection attacks. The attacker inserts text specially configured to trick the server into running PHP commands.
- Remote command execution. The attacker tricks a server into running commands associated with the server's operating system.
- Session fixation. An attacker exploits a web app vulnerability that allows the attacker to obtain a valid session ID.
- SQL injection protection. In a web form field, the attacker inserts (or "injects") text specially configured to trick the server into running SQL commands.
- Protocol attackers. An attacker inserts specially configured text into an HTTP/HTTPS request header.
Tip
Learn more about the Web Application Firewall in the Introduction to Azure Web Application Firewall module.