Develop AI agents in Visual Studio Code
Creating and configuring AI agents in Visual Studio Code using the Microsoft Foundry extension provides a streamlined development experience that combines the power of Microsoft Foundry Agent Service with the familiar Visual Studio Code environment. This approach enables you to design, configure, and test agents without leaving your development environment.
Understanding Microsoft Foundry Agent Service
Microsoft Foundry Agent Service is a managed service in Azure designed to provide a comprehensive framework for creating, managing, and deploying AI agents. The service builds on the OpenAI Assistants API foundation while offering enhanced capabilities including:
- Expanded model choice - Support for multiple AI models beyond OpenAI
- Enterprise security - Built-in security features for production environments
- Advanced data integration - Seamless connection to Azure data services
- Tooling ecosystem - Access to a various built-in and custom tools
The Visual Studio Code extension provides direct access to these capabilities through an intuitive interface that simplifies the agent development process.
Creating agents with the extension
The Microsoft Foundry extension provides multiple ways to create AI agents, whether you're starting from scratch or building on existing work. The flexible approach accommodates different development preferences and scenarios.
Prerequisites for agent creation
Before creating an agent, complete the following steps:
- Complete the extension setup and sign in to your Azure account
- Create a default Microsoft Foundry project, or select an existing one
- Select and deploy the model for your agent to use, or use an existing deployment
Creating a new agent
To create a new AI agent, follow these steps:
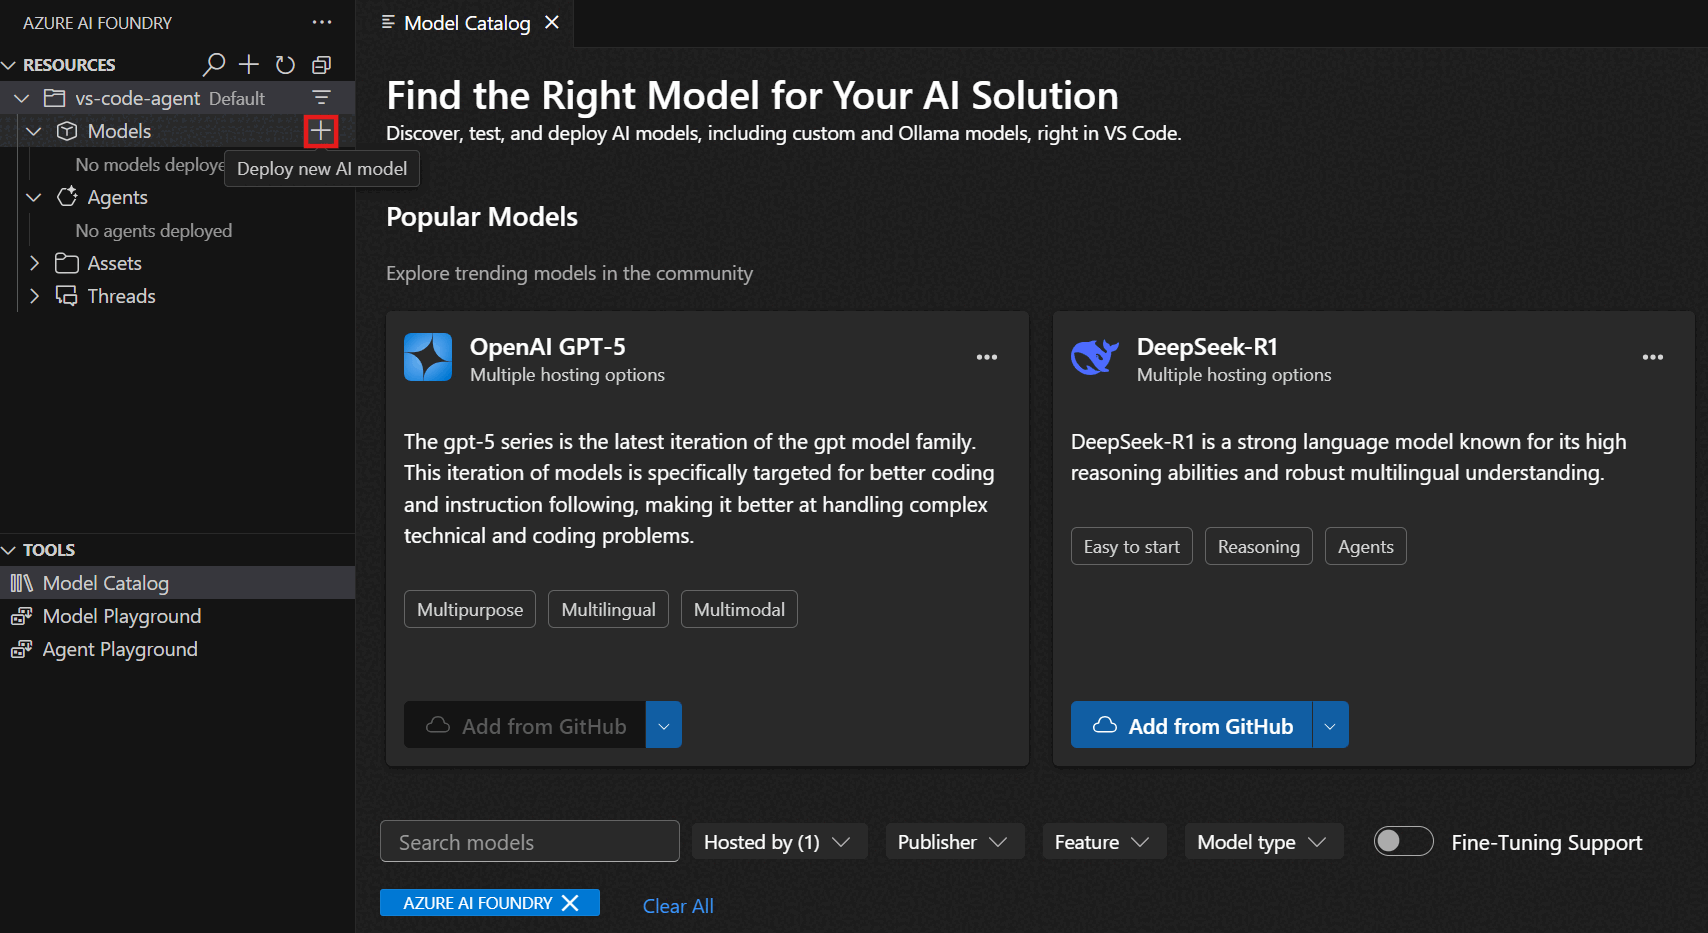
- Open the Microsoft Foundry Extension view in Visual Studio Code
- Navigate to the Resources section
- Select the + (plus) icon next to the Agents subsection to create a new AI agent
- Configure the agent properties in the Agent Designer view that opens
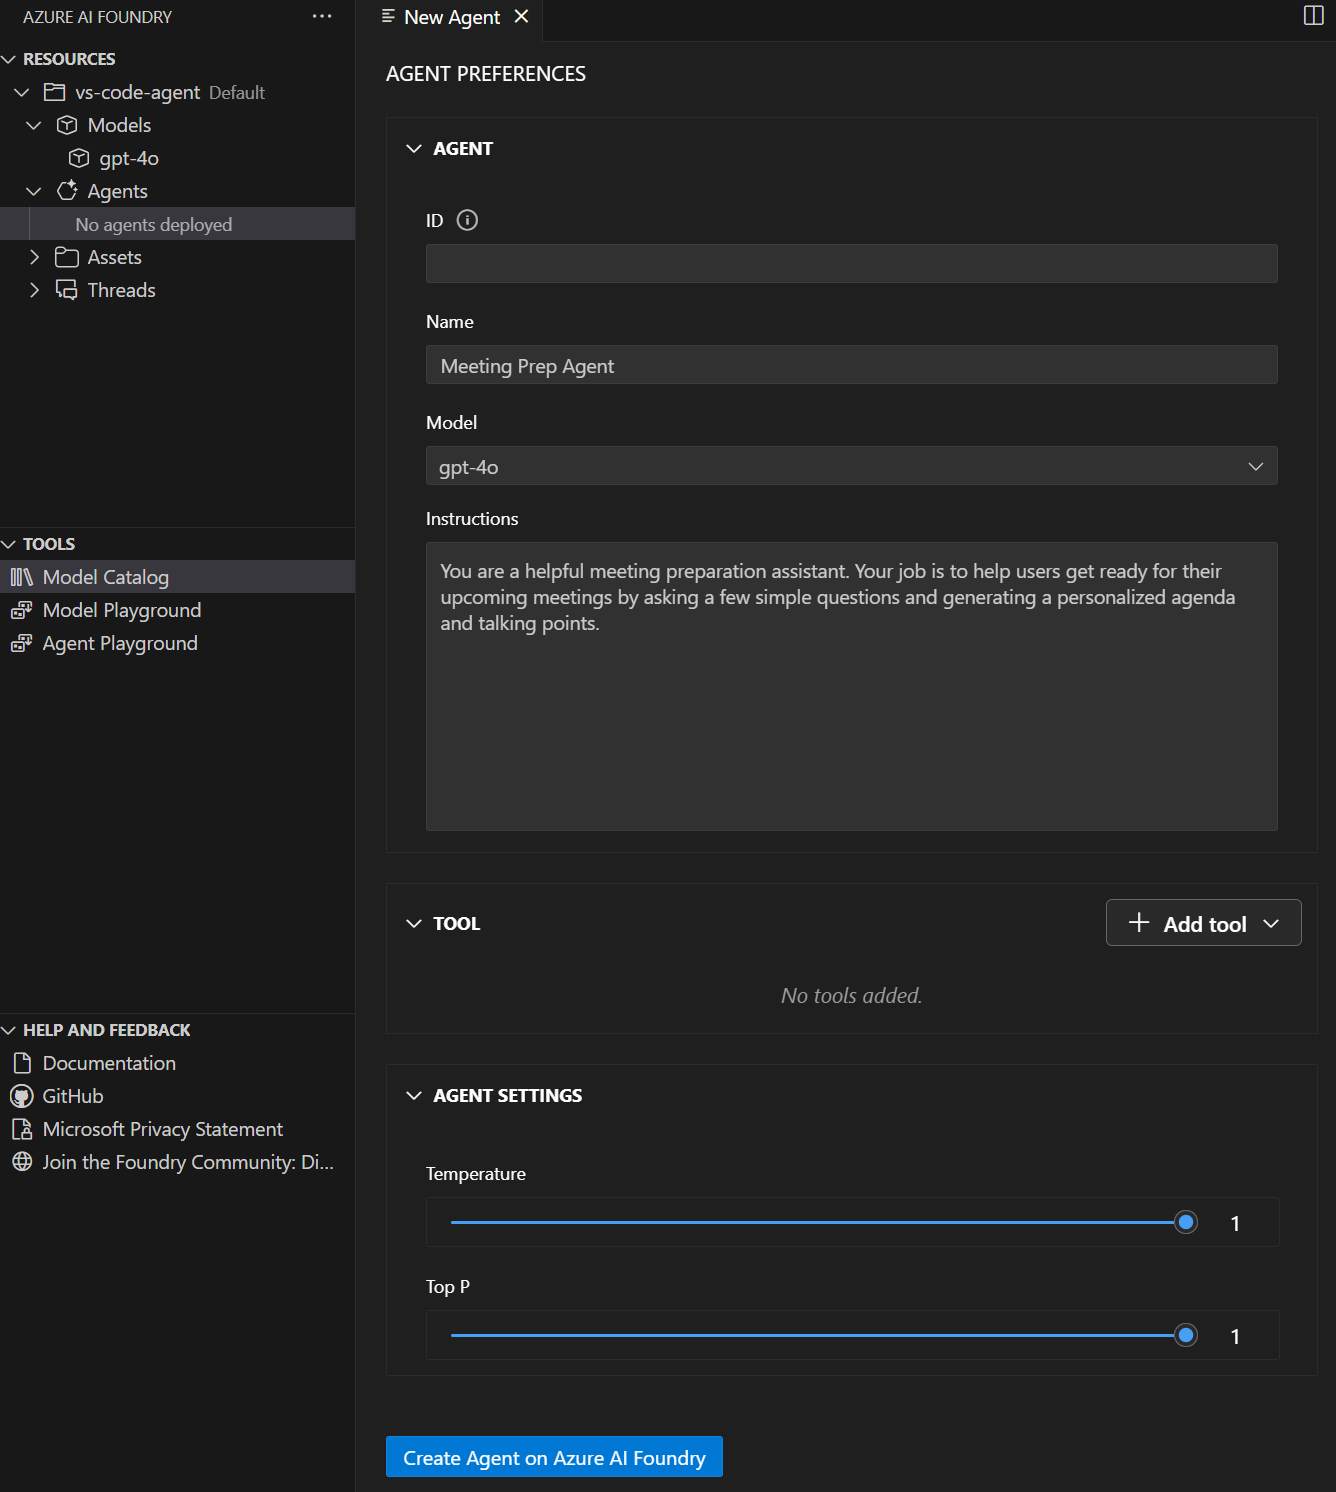
When you create an agent, the extension opens both the agent .yaml file and the Designer view, providing you with both a visual interface and direct access to the configuration file.
Configuring agent properties
Once you create an agent, the extension provides comprehensive configuration options to define how your agent behaves and interacts with users. The Agent Designer provides an intuitive interface for setting up these properties.
Basic Configuration
In the Agent Designer, configure the following essential properties:
- Agent name - Enter a descriptive name for your agent in the prompt
- Model selection - Choose your model deployment from the dropdown (this is the deployment name you chose when deploying a model)
- Description - Add a clear description of what your agent does
- System instructions - Define the agent's behavior, personality, and response style
- Agent ID - Automatically generated by the extension
Understanding the agent YAML file
Your AI agent is defined in a YAML file that contains all configuration details. Here's an example structure:
# yaml-language-server: $schema=https://aka.ms/ai-foundry-vsc/agent/1.0.0
version: 1.0.0
name: my-agent
description: Description of the agent
id: ''
metadata:
  authors:
    - author1
    - author2
  tags:
    - tag1
    - tag2
model:
  id: 'gpt-4o-1'
  options:
    temperature: 1
    top_p: 1
instructions: Instructions for the agent
tools: []
This YAML file is opened automatically alongside the Designer view, allowing you to work with either the visual interface or edit the configuration directly.
Agent instruction design
Well-crafted instructions are the foundation of effective AI agents. They define how your agent understands its role, responds to users, and handles various scenarios.
Best practices for instructions
When writing system instructions for your agent:
- Be specific and clear - Define exactly what the agent should do and how it should behave
- Provide context - Explain the agent's role and the environment it operates in
- Set boundaries - Clearly define what the agent should and shouldn't do
- Include examples - Show the agent examples of desired interactions when helpful
- Define personality - Establish the tone and style of responses
Instruction examples
For a customer service agent, effective instructions might include:
- The agent's role and purpose
- Guidelines for handling different types of customer inquiries
- Escalation procedures for complex issues
- Tone and communication style preferences
Deploying agents
Once you configure your agent, you can deploy it to Microsoft Foundry.
Deployment process
To deploy your agent:
- Select the "Create on Microsoft Foundry" button in the bottom-left of the Designer
- Wait for deployment completion - The extension handles the deployment process
- Refresh the Azure Resources view in the Visual Studio Code navbar
- Verify deployment - The deployed agent appears under the Agents subsection
Managing deployed agents
After deployment, you can:
- View agent details - Select the deployed agent to see the Agent Preferences page
- Edit the agent - Select "Edit Agent" to modify configuration and redeploy with the Update on Microsoft Foundry button
- Generate integration code - Select "Open Code File" to create sample code for using the agent
- Test in playground - Select "Open Playground" to interact with the deployed agent
Testing and iteration
The integrated playground enables immediate testing of your agent configuration, allowing you to validate behavior and make adjustments in real-time.
Using the playground
After configuring your agent, you can test it using the built-in playground:
- Real-time conversations - Chat with your agent to test responses
- Instruction validation - Verify the agent follows its configured instructions
- Behavior testing - Test how the agent handles different types of requests
- Iterative refinement - Make adjustments based on testing results
Working with agent threads
When you interact with deployed agents, the system creates threads to manage conversation sessions:
- Threads - Conversation sessions between an agent and user that store messages and handle context management
- Messages - Individual interactions that can include text, images, and files
- Runs - Single executions of an agent that use the agent's configuration and thread messages
You can view and manage these threads through the Azure Resources view in the extension.
Creating and configuring AI agents with the Microsoft Foundry Visual Studio Code extension provides a powerful yet accessible approach to agent development. The extension provides visual design tools, direct YAML editing, comprehensive configuration options, and integrated testing capabilities. These features enable developers to rapidly prototype and deploy sophisticated AI agents that can handle complex real-world scenarios.