Exercise - Set room virtual thermostat with Azure IoT Hub device twins
Step 1: Open the project
Start Visual Studio Code to open your project.
From the menu, click File, then Open Folder.
Open the Azure-Sphere lab folder.
Open the Lab_3_Device_Twins folder.
Click Select Folder or the OK button to open the project.
Step 2: Set your developer board configuration
These labs support developer boards from Avnet and Seeed Studio. Set the configuration that matches your developer board.
The default developer board configuration is for the Avnet Azure Sphere Starter Kit Revision 1. If you have this board, there's no additional configuration required.
Open the CMakeList.txt file.
Add a
#at the beginning of the set Avnet line to disable it.Uncomment the
setcommand that corresponds to your Azure Sphere device developer board.set(AVNET TRUE "AVNET Azure Sphere Starter Kit Revision 1 ") # set(AVNET_REV_2 TRUE "AVNET Azure Sphere Starter Kit Revision 2 ") # set(SEEED_STUDIO_RDB TRUE "Seeed Studio Azure Sphere MT3620 Development Kit (aka Reference Design Board or rdb)") # set(SEEED_STUDIO_MINI TRUE "Seeed Studio Azure Sphere MT3620 Mini Dev Board")Save the file. The CMake cache with be autogenerated.
Step 3: Configure the Azure IoT connection information
Open the app_manifest.json file.
You'll need to redo the settings for the app_manifest.json file. Either copy the settings from Notepad if you still have it open, or copy them from the app_manifest.json file you created in the previous exercise.
Replace the existing configuration by pasting the contents of the clipboard into app_manifest.json.
Save the updated app_manifest.json file.
Step 4: Start the app build deploy process
Open main.c.
Select CMake: [Debug]: Ready from the Visual Studio Code Status Bar.
From Visual Studio Code, press F5 to build, deploy, start, and attach the remote debugger to the application.
Step 5: Set the desired temperature
Start Azure IoT Explorer.
Click View devices in this hub.
Click your on your device.
Click IoT Plug and Play components from the side menu.
Click Default component.
Select Properties (writable) from the menu.
Set the Desired Temperature property.
Click the Update desired value button.
Click Refresh to display the latest reported values.
The device will acknowledge the property update by setting the reported value, along with an acknowledgment code and version. This behavior is defined as part of the IoT Plug and Play conventions.
Step 6: Expected device behavior
The Avnet Azure Sphere Starter Kit, revisions 1 and 2, have a built-in temperature sensor. For other boards, a random temperature of 25 +/- 5 degrees Celsius is generated.
Azure Sphere MT3620 Starter Kit Revision 1 and 2
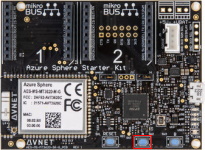
The WLAN LED will blink every 5 seconds when connected to Azure.
The RGB LED will turn red if the measured temperature is less than the desired temperature, blue if the measured temperature is greater than the desired temperature and green if the measured temperature is the same as the desired temperature.
Seeed Studio Azure Sphere MT3620 Development Kit
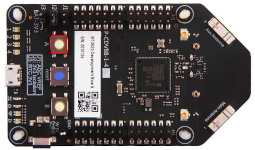
The WLAN LED will blink every 5 seconds when connected to Azure.
The RGB LED will turn red if the measured temperature is less than the desired temperature, blue if the measured temperature is greater than the desired temperature and green if the measured temperature is the same as the desired temperature.
Seeed Studio MT3620 Mini Dev Board
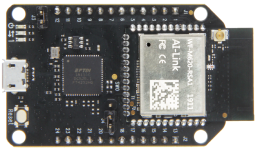
- The User LED will blink every 5 seconds when connected to Azure.
Close Visual Studio
Now close Visual Studio.