Exercise - Connect a room environment monitor to Azure IoT Hub
In this exercise, we'll build a high-level Azure Sphere application that connects and sends environment telemetry to Azure IoT Hub.
Step 1: Sign into the Azure web portal
You need an Azure account for this learning module. If you do not have an Azure account, then create a free account. If you are a student, then sign up for a free Azure for Students account (no credit card required). Otherwise, sign up for a free Azure account.
From your web browser, navigate to https://portal.azure.com and sign in.
Step 2: Prepare Azure resources
You can prepare Azure cloud resources with the Azure CLI, the Azure portal (a web interface), or deployment templates. For this module, you'll use an Azure deployment template. Select Deploy to Azure to deploy a Device Provisioning Service (DPS) and a linked Azure IoT Hub.
Select or create a new resource group.
Choose the site located closest to you.
Select the tier for Azure IoT Hub. The default tier is F1, which is free. You can only have one free IoT Hub per subscription. If you already have a free IoT Hub, then either select S1 (pricing) or delete your existing free IoT Hub before proceeding.
Select Next > Deploy. The deployment will take three to four minutes to complete.
When the deployment has completed, select Go to resource group. You will see two services listed in the Azure portal: the Device Provisioning Service (DPS) and IoT Hub. Appended to the resource names is a random string to ensure that the names are globally unique.
Tip
If you don't see the two services listed then click the fresh button.


Don't close the Azure Web portal. You will need to access it again.
Step 3: Establish trust between your Azure Sphere tenant and DPS
You need to establish a trust relationship between your Azure Sphere tenant and your Device Provisioning Service.
Devices claimed by your Azure Sphere tenant are automatically enrolled with the linked IoT Hub by the Device Provisioning Service when the device first connects.
Download the Azure Sphere tenant authentication CA certificate
If you're using Windows, open a Windows PowerShell command line. If you're using Linux, open Terminal.
Log in to your Azure Sphere tenant if you have not already done so.
azsphere loginMake a note of the current directory or change to the Azure-Sphere directory. You'll need the name of this directory in the next step.
Download the certificate authority (CA) certificate for your Azure Sphere tenant:
azsphere ca-certificate download --destination CAcertificate.cerThe output file must have the .cer extension.
Upload the Azure Sphere tenant certificate to DPS
Switch back to the Azure portal.
Select DPS > Certificates > + Add.

Name your certificate, and then select the CAcertificate.cer file you downloaded in the previous step to upload into the device provisioning service.
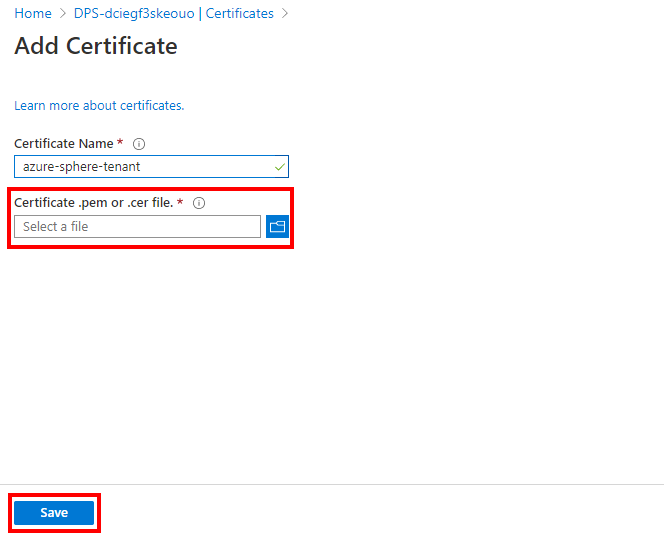
Then select Save.


Verify the uploaded certificate
Select the certificate you just uploaded to display the certificate details.
From the certificate details panel, scroll down and select Generate Verification Code.
Copy the verification code to the clipboard.


Verify the tenant CA certificate
Return to the PowerShell Command Line or Linux Terminal.
Download a validation certificate that proves that you own the tenant CA certificate. Replace <code> in the command with the verification code from the previous step.
azsphere ca-certificate download-proof --destination ValidationCertification.cer --verification-code <code>The Azure Sphere Security Service signs the validation certificate with the verification code to prove that you own the Certificate Authority (CA).
Upload the verification certificate
Return to the Azure portal.
Select the Verification Certificate file selector icon.
From the file manager, select the ValidationCertification.cer certificate that you generated in the previous step.
Select Verify.


Step 4: Create a DPS enrollment group
From the Azure portal:
Select Manage Enrollments from the device provisioning service sidebar menu.
Select + Add enrollment group, and name the enrollment group.
Select the primary certificate you just uploaded.
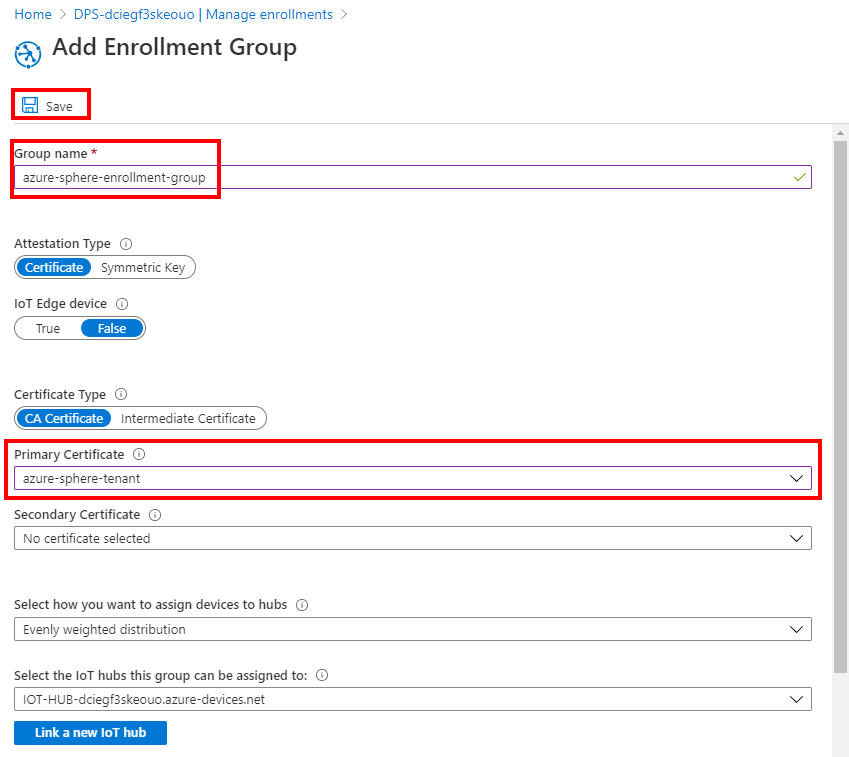
Then select Save.
Step 5: Configure Azure IoT Explorer
This learning module uses Azure IoT Explorer to work with Azure IoT Hub devices. You should have already installed Azure IoT Explorer in the previous exercise.
You need the connection string for your IoT Hub.
From the Azure web portal.
Select the IoT Hub you created at the beginning of this unit.
Select Shared access policies, then iothubowner.
Copy the Connection string--primary key to the clipboard.

Start Azure IoT Explorer.
Select + Add connection.
Paste your IoT Hub connection string in the connection string dialogue box.
Then select Save

Select Home.
Select IoT Plug and Play Settings.

Select + Add.
Select Public repository.
Then select Save.


