Set up the Visual Studio Code WSL extension
The Visual Studio Code WSL extension lets you use the Windows Subsystem for Linux (WSL) as your full-time development environment right from Visual Studio Code. You get all the productivity of Windows while developing with Linux-based tools, runtimes, and utilities.
This integration allows developers to utilize the full range of Linux tools and utilities while benefiting from the rich features of Visual Studio Code.
Seamless Integration: While you can edit files in Linux using Windows-based tools, you can’t easily run or debug on Windows; you'd have to install all the same tools on Windows as you did on Linux, defeating the purpose of having an isolated Linux environment.
Unified Development Experience: With Visual Studio Code and the WSL extension combined, Visual Studio Code’s UI runs on Windows, and all your commands, extensions, and even the terminal run on Linux. You get the full Visual Studio Code experience, including autocomplete and debugging, powered by the tools and compilers installed on Linux.
Install the Visual Studio Code WSL extension
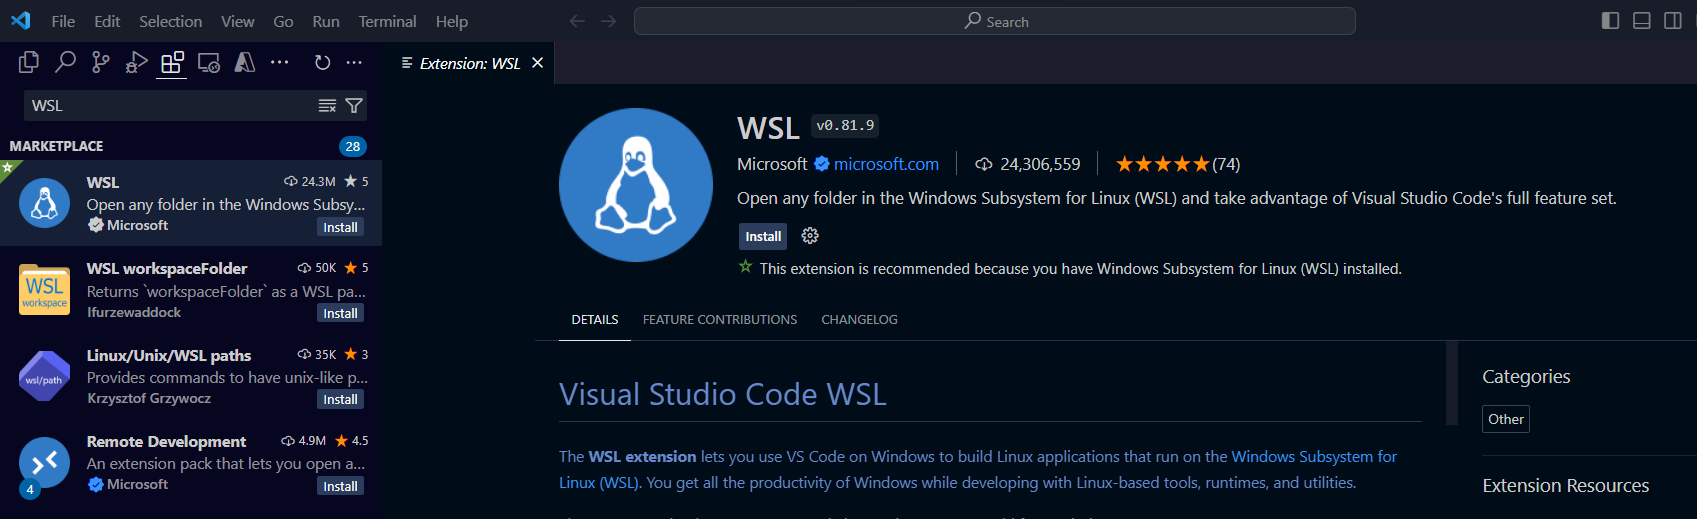
In Visual Studio Code, go to the Extensions view by selecting the Extensions icon in the Activity Bar on the left side of the window.
- Select Extensions from the sidebar.
- Search for WSL in the Extensions view search bar.
- Find the extension published by Microsoft.
- Select the Install button.
Connect to WSL in Visual Studio Code

In Visual Studio Code, open your Command Palette (Ctrl + Shift + P) and type WSL: Connect to WSL.
- Your Visual Studio Code will reload and connect to WSL.
- Notice the remote indicator on the bottom right corner displays that Visual Studio Code is connected to WSL: Ubuntu.
Note
If you experience an error connecting to WSL, try opening the Command Palette and typing WSL: Connect to WSL using Distro, then selecting Ubuntu.
Open a new terminal (Ctrl + `) and notice the path corresponds to a file path in WSL.
- In the terminal, type
unameand press Enter; the output should be Linux.
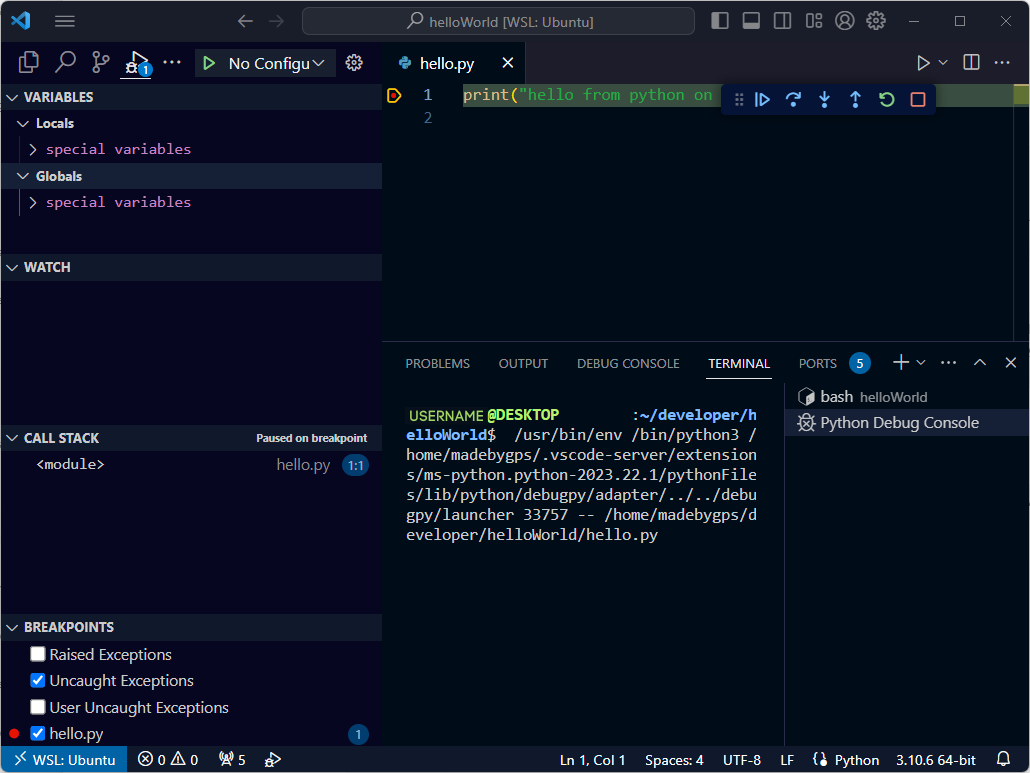
Open your Python project from WSL in Visual Studio Code
Open your Command Palette (Ctrl + Shift + P) and type WSL: Open folder in WSL.
Select the helloWorld folder. If you don’t see it in the drop-down, you can type the path /home/your-username/helloWorld/.
Select OK. Visual Studio Code will reload and open your folder.
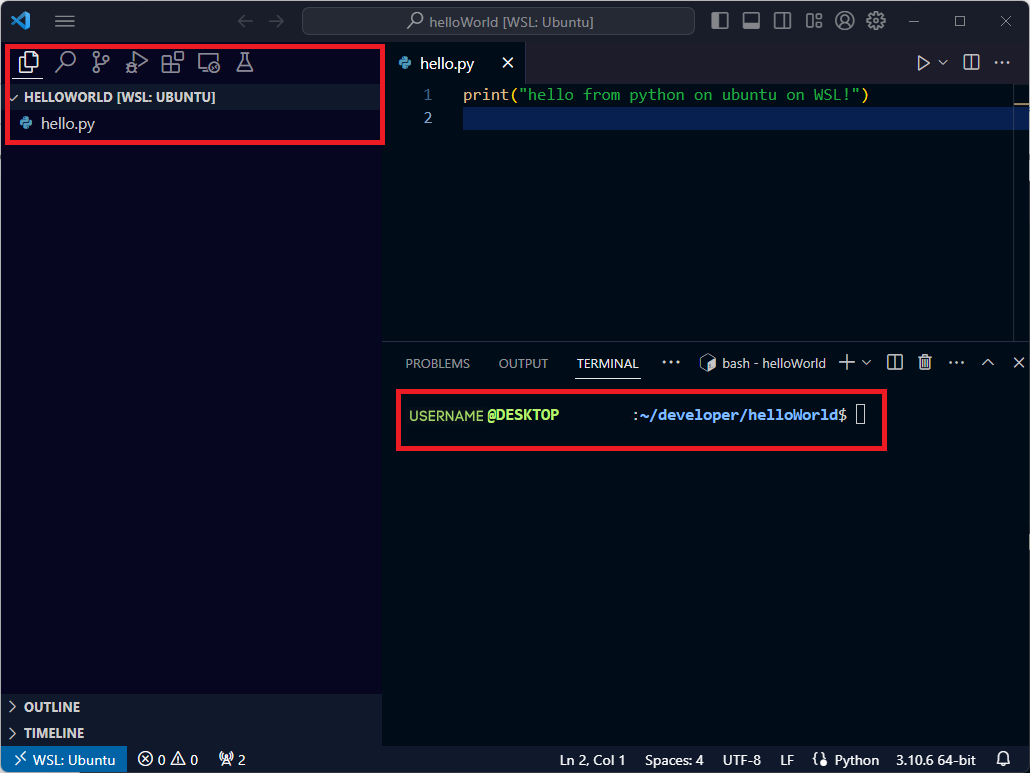
In the Explorer (Ctrl + Shift + E), verify you see your hello.py file.
- Also notice that your terminal (Ctrl + `) displays that you're in the helloWorld folder.
We now have our project open and ready to work with.