Exercise - Create a Docker Compose file for orchestration
The Contoso outdoor equipment company has two services that they'd like to group together to build and deploy as a single unit. The company decides to use Docker Compose to build the services together.
In this exercise, you create a Docker Compose YAML file. Then you use the Docker Compose utility to both build the Docker container images and run them.
Connect to the codespace
If you disconnected from the codespace you used in the previous exercise, reconnect now:
- Open a browser and go to the eShopLite repository.
- Select Code, and then select the Codespaces tab.
- Select the codespace that you created in the previous exercise. GitHub opens the codespace.
- Go to the /dotnet-docker directory.
Create the Docker Compose file
Use the docker-compose file to configure images for both the back-end and front-end services:
In the dotnet-docker folder of the codespace, open the file named ./dotnet-docker/docker-compose.yml. This file is empty.
Add the following code to the docker-compose.yml file:
version: '3.4'

services:

    frontend:
        image: store:latest
        environment:
            - ProductEndpoint=http://backend:8080
        ports:
            - "32000:8080"
        depends_on:
            - backend
    backend:
        image: products:latest
        ports:
            - "32001:8080"
This code does several things:
- It creates the front-end website and names it frontend.
- The code sets an environment variable for the website:
ProductEndpoint=http://backend:8080. This code is how the front-end service finds the Products back-end service. - The code opens a port and declares that it depends on the back-end service.
- The back-end service named backend is created next.
- The last command specifies which port to open.
In comparison, the docker-compose.yml file you would need to use if you had dockerfiles:
version: '3.4'

services:

    frontend:
        image: storeimage
        build:
            context: .
            dockerfile: ./Store/Dockerfile
        environment:
           - ProductEndpoint=http://backend:8080
        ports:
           - "32000:8080"
        depends_on:
           - backend
    backend:
        image: productservice
        build:
            context: .
            dockerfile: ./Products/Dockerfile
        ports:
           - "32001:8080"
The code is almost identical. The only difference is the need to have the build phases that point to each dockerfile.
Build the images and run the containers
Now, use Docker Compose to build and start both front-end and back-end components.
To build the container images with .NET container support, select the Terminal tab, and then run the following command. Note, if your app is still running, first close with CTRL+C.
dotnet publish /p:PublishProfile=DefaultContainerTo start both the front-end website and the back-end web API, run this command:
docker compose upSome output appears, and then the website and web API are running. You should see output that's similar to this example:
[+] Running 2/0
    ✔ Container finished-files-backend-1   Created                                                                                   0.0s
    ✔ Container finished-files-frontend-1  Created                                                                                   0.0s
Attaching to backend-1, frontend-1
...
backend-1   | info: Microsoft.Hosting.Lifetime[0]
backend-1   |       Hosting environment: Production
backend-1   | info: Microsoft.Hosting.Lifetime[0]
backend-1   |       Content root path: /app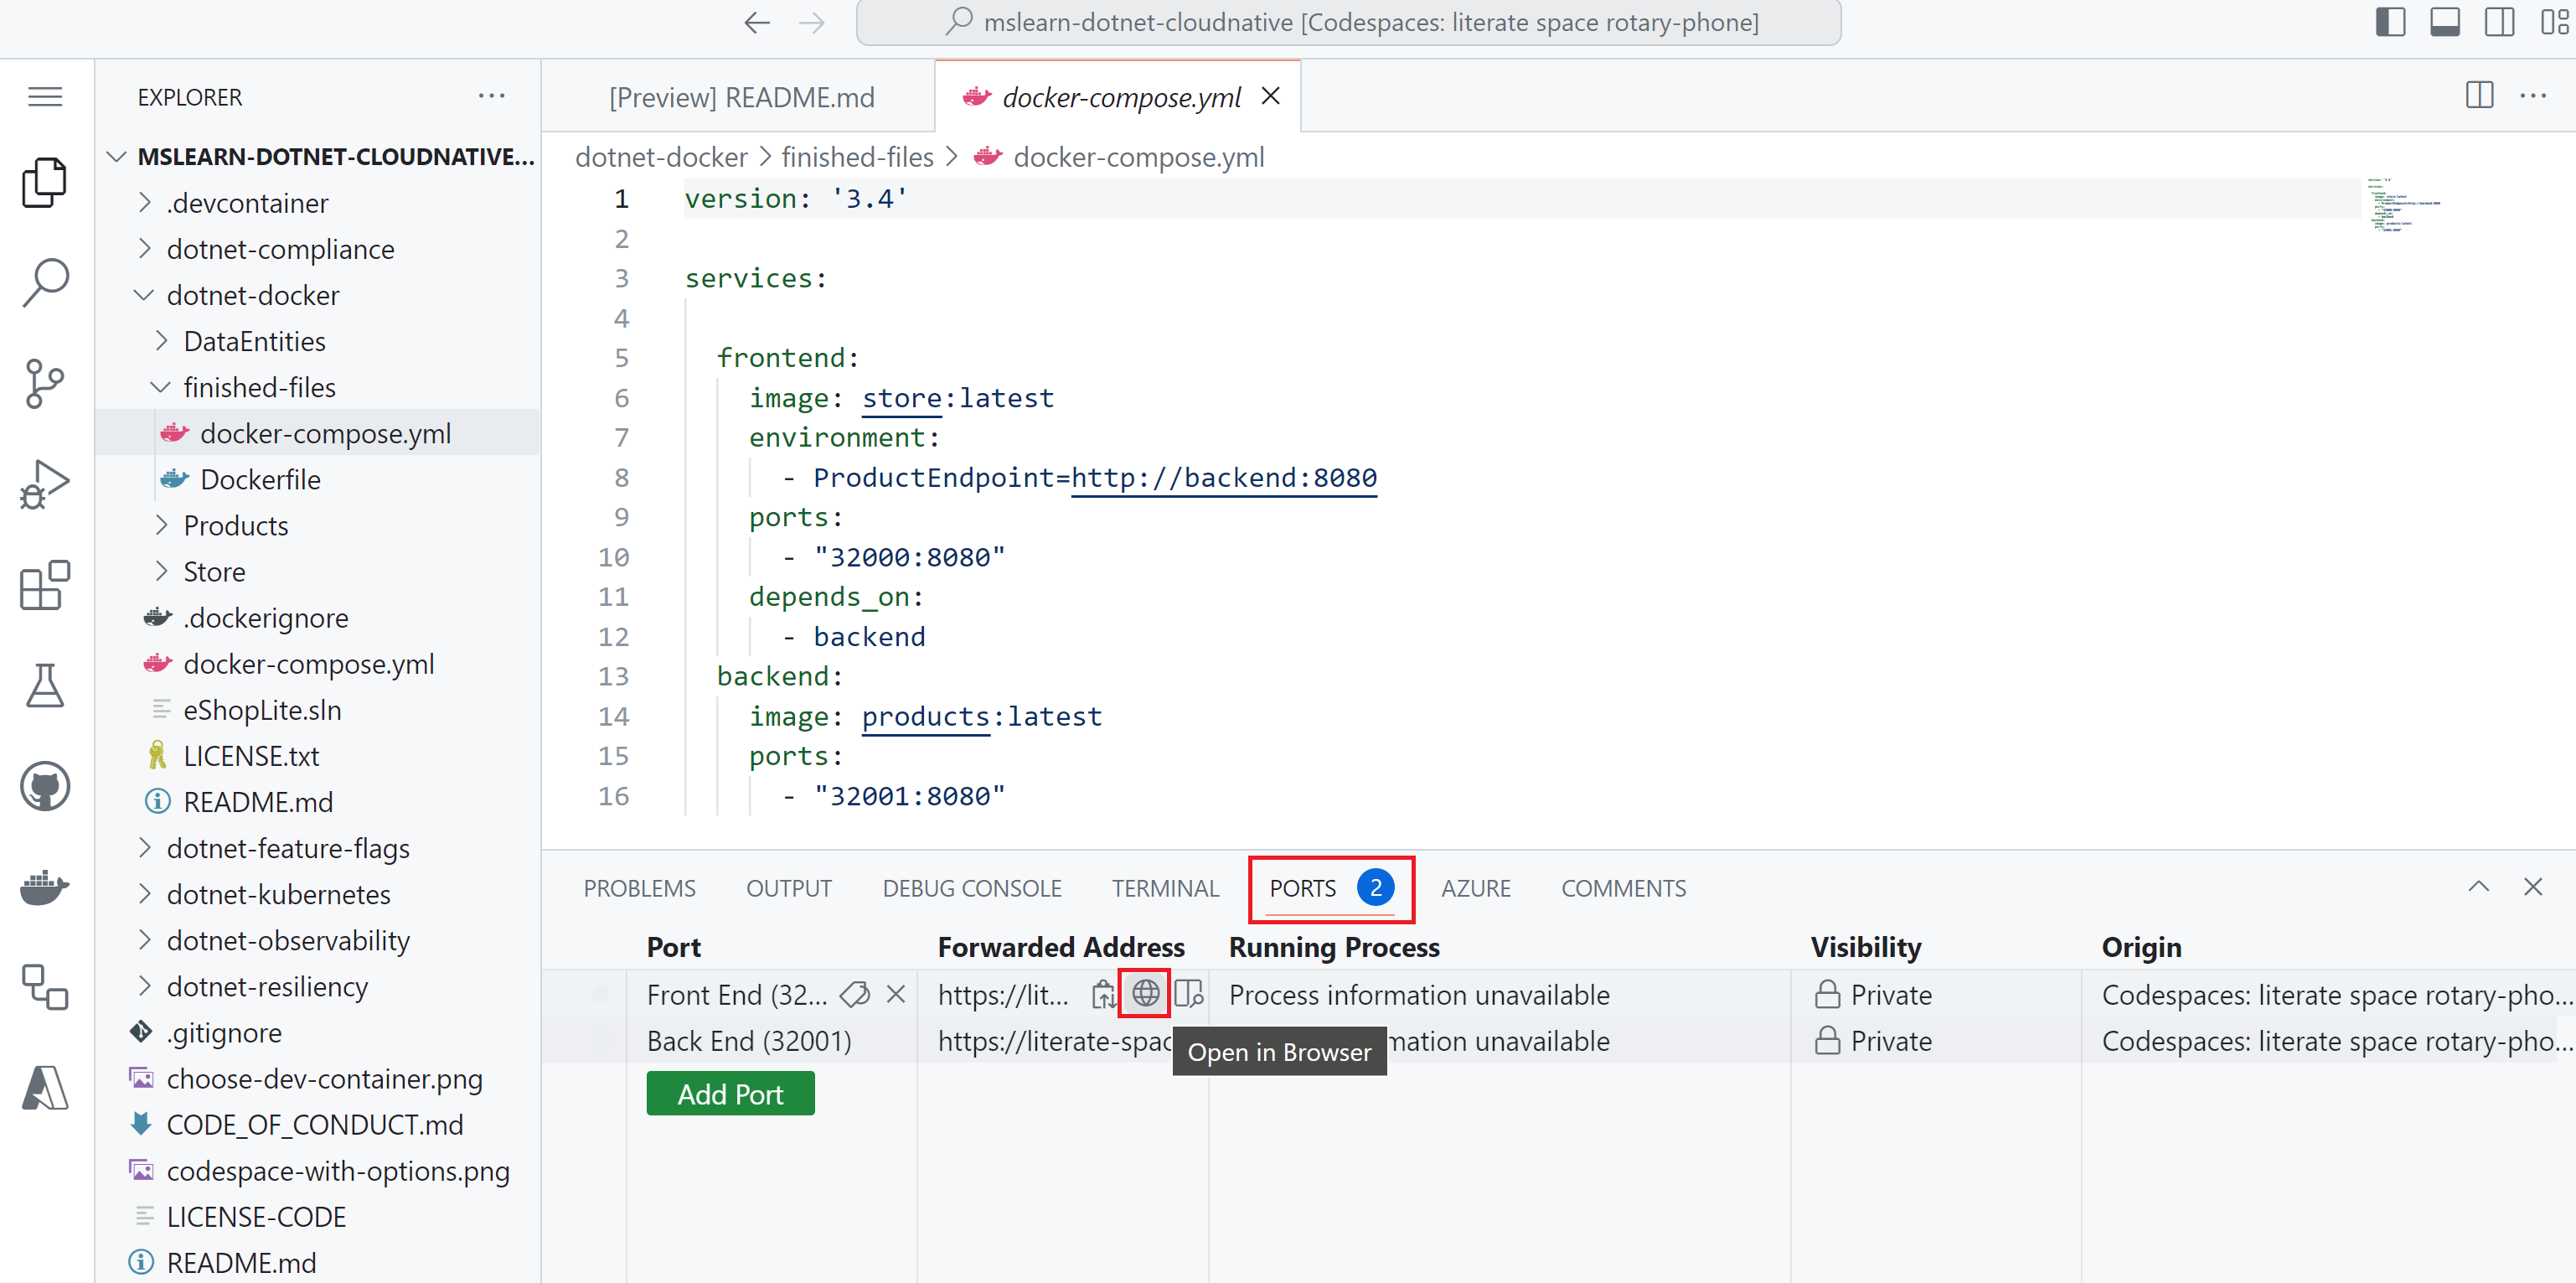
To test the front-end service, select the Ports tab. Then, to the right of the local address for the Front End port, select the globe icon. The browser displays the home page.
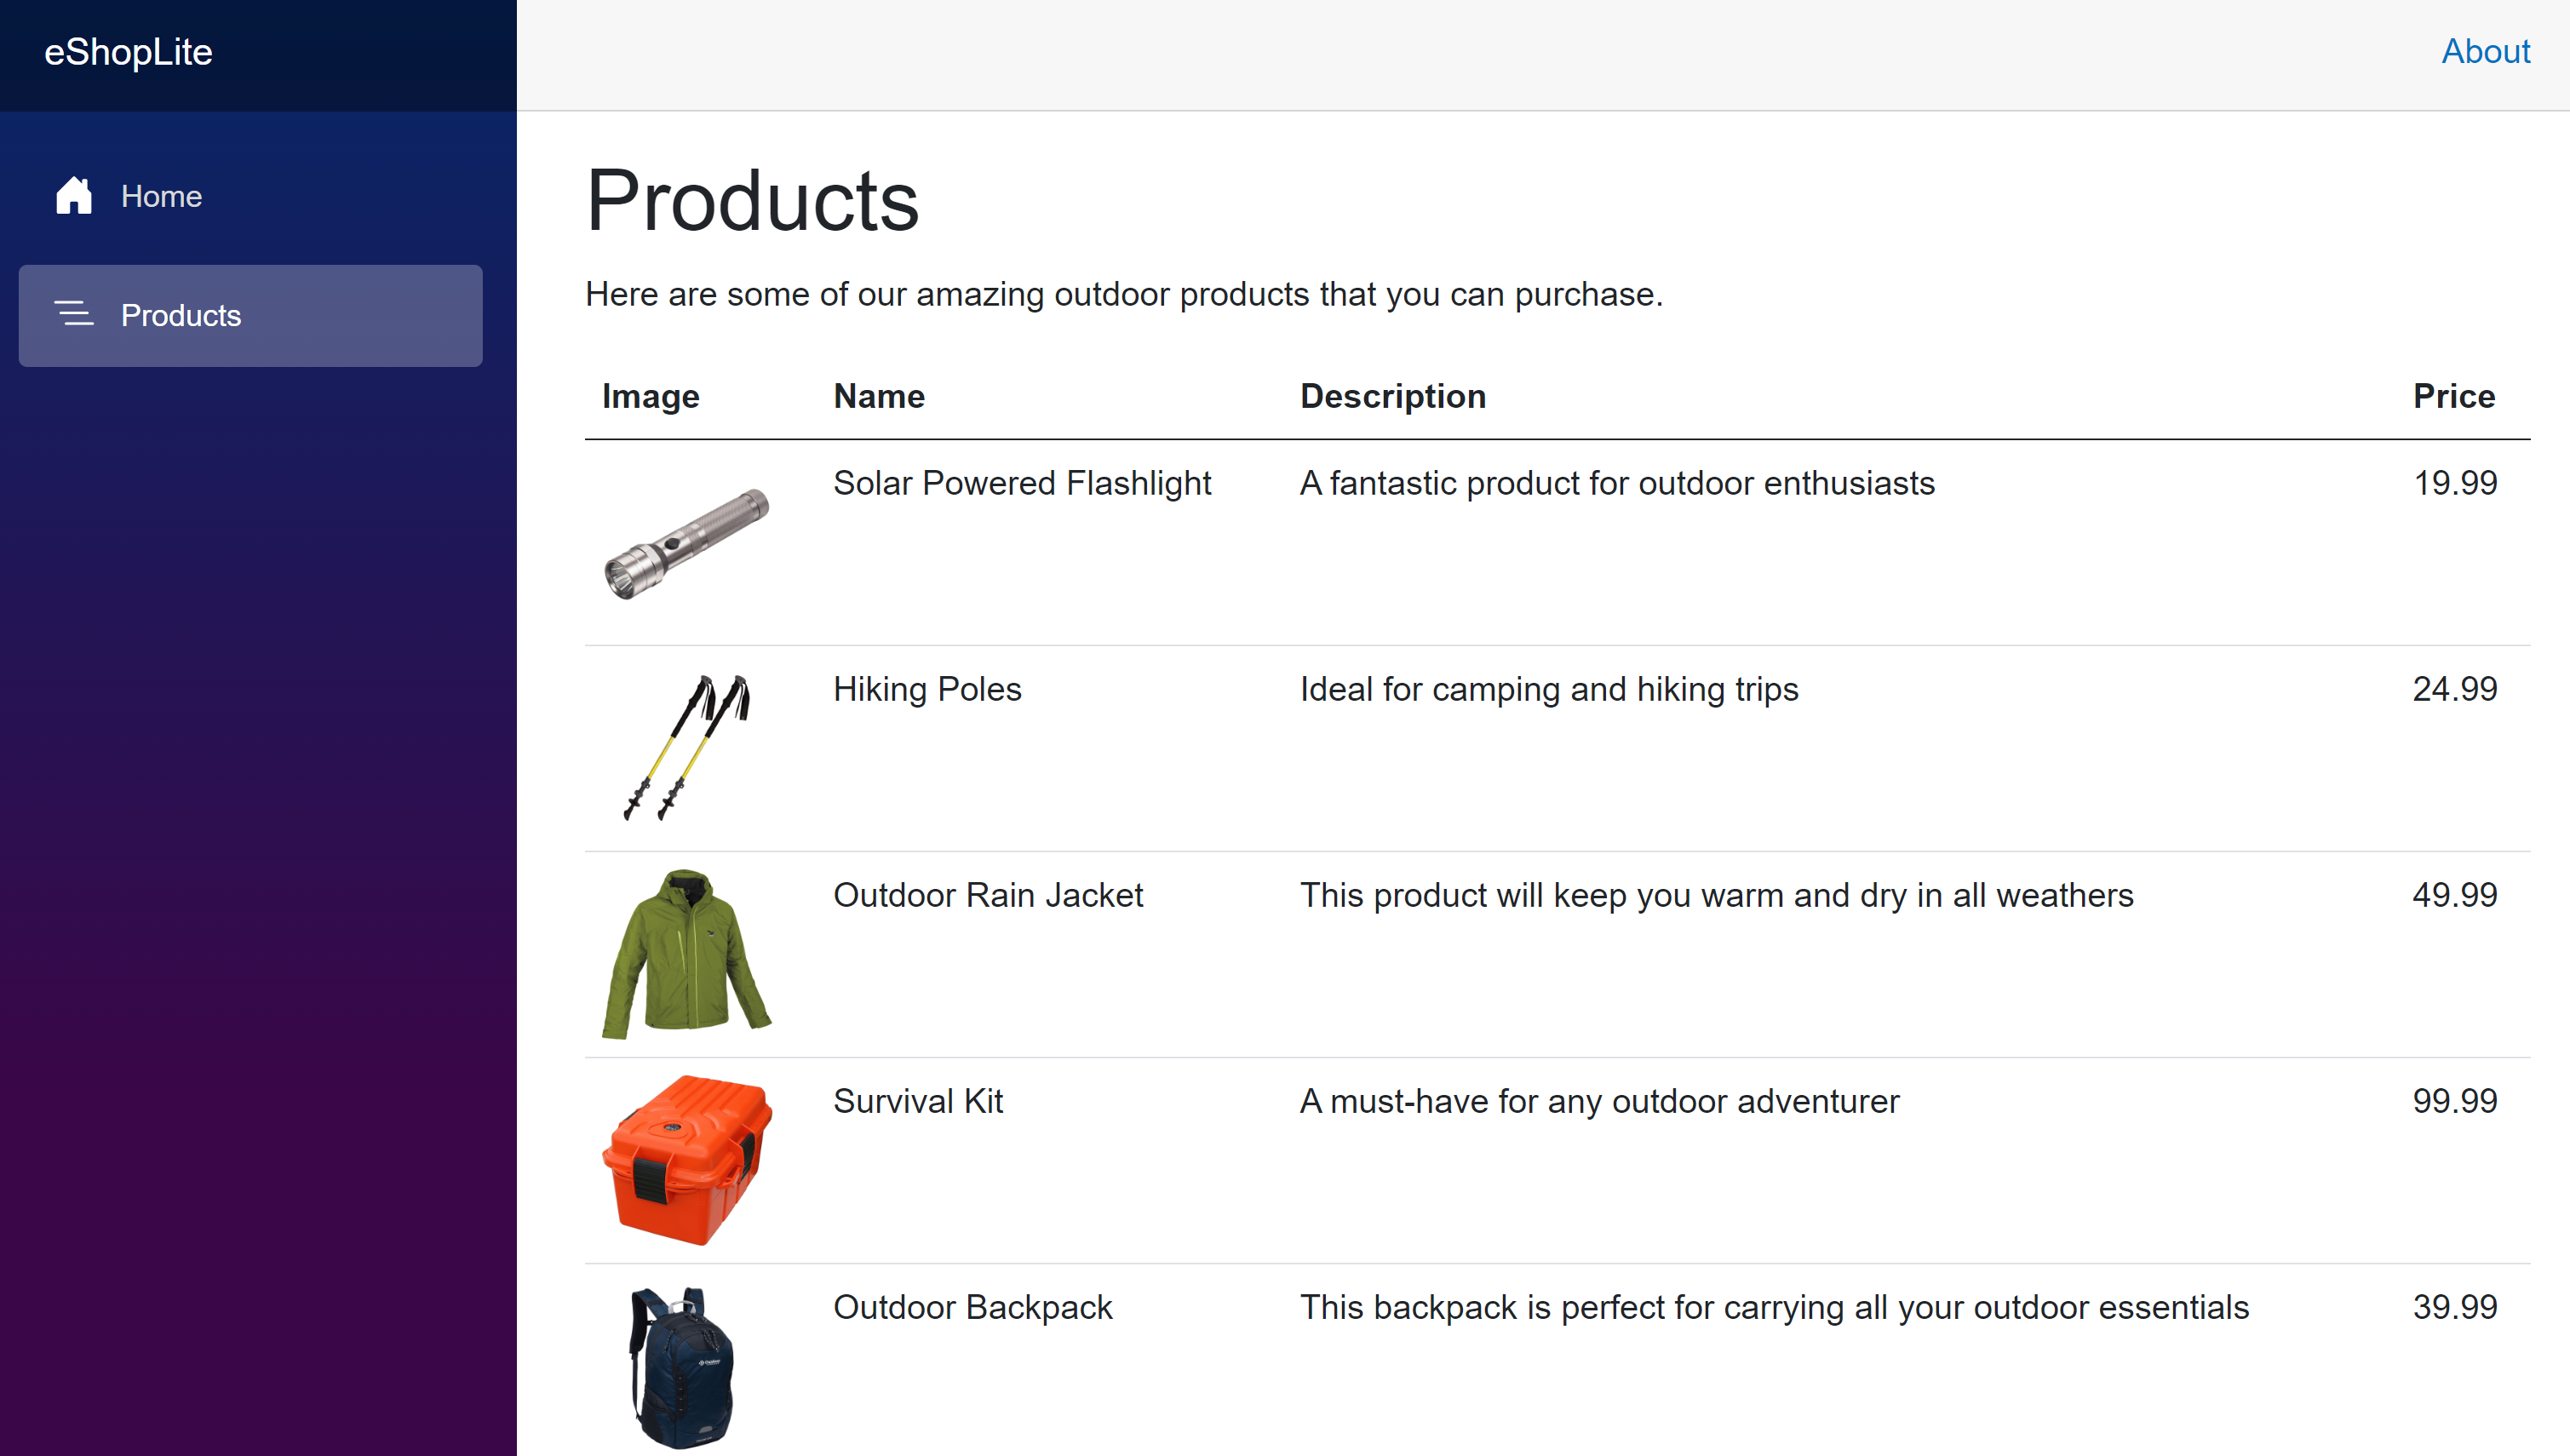
Select Products. The catalog shows Contoso's merchandise.