Exercise - Create a backend API
In this exercise you learn how to perform the following actions:
- Create an API Management (APIM) instance
- Import an API
- Configure the backend settings
- Test the API
Prerequisites
- An Azure account with an active subscription. If you don't already have one, you can sign up for a free trial at https://azure.com/free.
Sign in to Azure
Sign in to the Azure portal and open the Cloud Shell.

After the shell opens be sure to select the Bash environment.

Create an API Management instance
Let's set some variables for the CLI commands to use to reduce the amount of retyping. Replace
<myLocation>with a region that makes sense for you. The APIM name needs to be a globally unique name, and the following script generates a random string. Replace<myEmail>with an email address you can access.myApiName=az204-apim-$RANDOM myLocation=<myLocation> myEmail=<myEmail>Create a resource group. The following commands create a resource group named az204-apim-rg.
az group create --name az204-apim-rg --location $myLocationCreate an APIM instance. The
az apim createcommand is used to create the instance. The--sku-name Consumptionoption is used to speed up the process for the walkthrough.az apim create -n $myApiName \ --location $myLocation \ --publisher-email $myEmail \ --resource-group az204-apim-rg \ --publisher-name AZ204-APIM-Exercise \ --sku-name ConsumptionNote
The operation should complete in about five minutes.
Import a backend API
This section shows how to import and publish an OpenAPI specification backend API.
In the Azure portal, search for and select API Management services.
On the API Management screen, select the API Management instance you created.
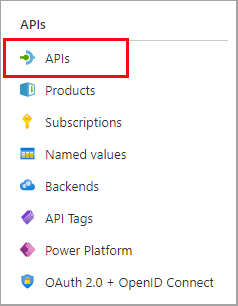
Select APIs in the API management service navigation pane.

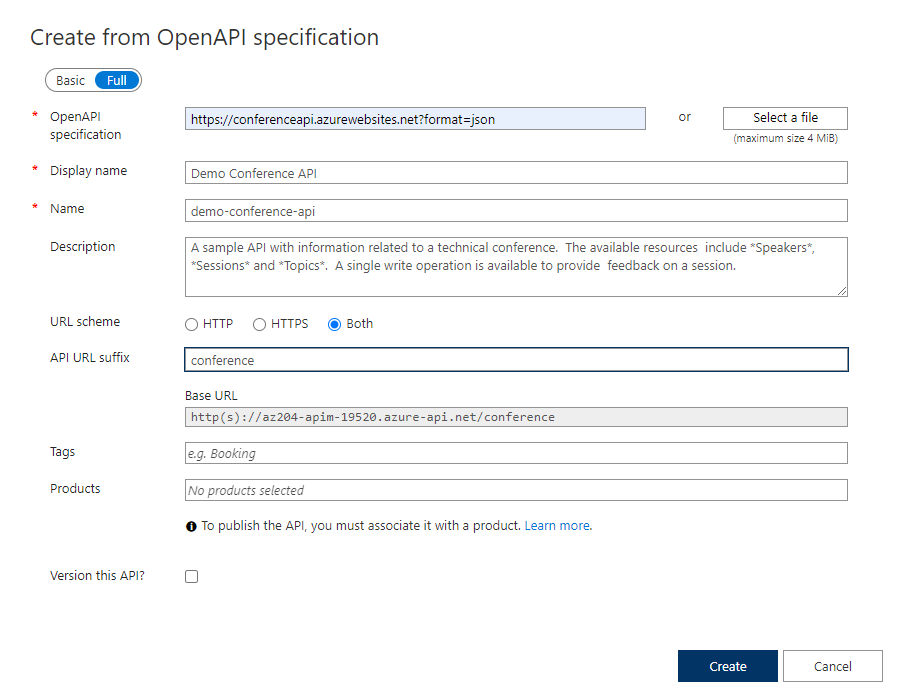
Select OpenAPI from the list and select Full in the pop-up.

Use the values from the table below to fill out the form. You can leave any fields not mentioned their default value.
Setting Value Description OpenAPI Specification https://conferenceapi.azurewebsites.net?format=jsonReferences the service implementing the API, requests are forwarded to this address. Most of the necessary information in the form is automatically populated after you enter this. Display name Demo Conference API This name is displayed in the Developer portal. Name demo-conference-api Provides a unique name for the API. Description Automatically populated Provide an optional description of the API. API URL suffix conference The suffix is appended to the base URL for the API management service. API Management distinguishes APIs by their suffix and therefore the suffix must be unique for every API for a given publisher. Select Create.
Configure the backend settings
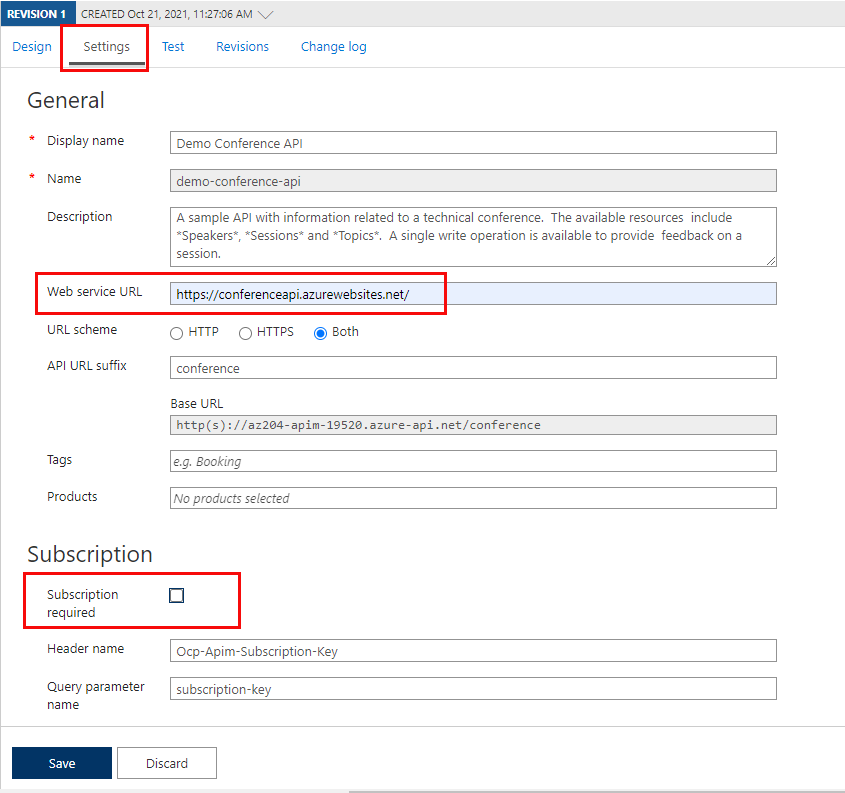
The Demo Conference API is created and a backend needs to be specified.
Select Settings in the blade to the right and enter
https://conferenceapi.azurewebsites.net/in the Web service URL field.Deselect the Subscription required checkbox.

Select Save.
Test the API
Now that the API has been imported and the backend configured it's time to test the API.
Select Test.

Select GetSpeakers. The page shows Query parameters and Headers, if any. The
Ocp-Apim-Subscription-Keyis filled in automatically for the subscription key associated with this API.Select Send.
Backend responds with 200 OK and some data.
Clean up Azure resources
When you're finished with the resources you created in this exercise you can use the command below to delete the resource group and all related resources.
az group delete --name az204-apim-rg