Create your first Power Apps application with SharePoint
You can create a Power Apps application from SharePoint in multiple ways. However, you might first need to create a data source for the app, such as a list.
On the SharePoint home page, select New > List.
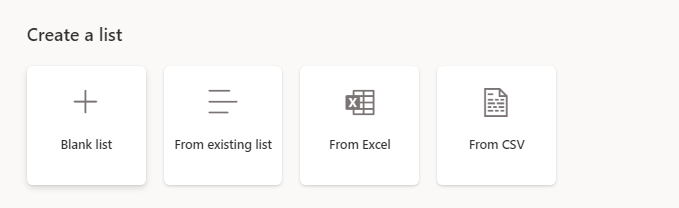
You can choose from any of the following options:
Blank list creates an empty list where you can add columns.
From existing list copies the structure from another list that you have access to and creates a new list with the same structure.
From Excel imports an Excel table into SharePoint and creates columns and data from that table.
From CSV imports a CSV file into SharePoint and creates columns and data from that file.
For a sample Excel workbook that you can download and import, go to the Machine Order Data Excel file.
Create apps
After you have created a SharePoint list, you can choose from several options to create a corresponding Power Apps application.

On the SharePoint list, select Integrate > Power Apps > Create an app.
Enter a name for your app and then select Create to create a predesigned app that's already connected to your list. You can use this app to quickly add, edit, or delete existing records.
Add features or design elements as needed.
Alternatively, on the SharePoint list, select Integrate > Power Apps > Customize forms to go directly to the Power Apps editor. By using this method, you can quickly customize the form that's associated with that SharePoint list. When you add or edit an item directly in the list, SharePoint uses this customized form instead of the default form.
Go to https://make.powerapps.com (make.us.powerapps.gov for GCC), select Create on the left, select Blank app, select blank canvas app, and then enter a name and format. This step creates a blank canvas to design the app as needed. After connecting the app to a SharePoint list, you can design the app to meet specific requirements.
If your company is part of GCC, GCC High, or DoD, the URLs for Power Apps differ, as shown in the following image.
