Configure Web IQ
Tip
See the Text and images tab for more details!
Configuring Web IQ involves two connected environments. The Azure portal is where you create the resource used for billing and management. The Web IQ portal connects that resource to an application profile, provides credentials, and lets you test retrieval.
Important
Web IQ requires a paid Azure subscription. Free trials and subscriptions funded through Azure credits aren't supported. Review the service terms and pricing before creating resources.
Create an Azure resource
At a high level, create the resource as follows:
- Sign in to the Azure portal with an account that has permission to create resources in your subscription.
- Search for Microsoft Web IQ and select Create.
- Select the paid subscription and a resource group, and enter a resource name. If prompted for a region, select Global.
- Review and accept the Web IQ terms of use, then select Review + create and Create.
- Wait for deployment to finish and open the resource.
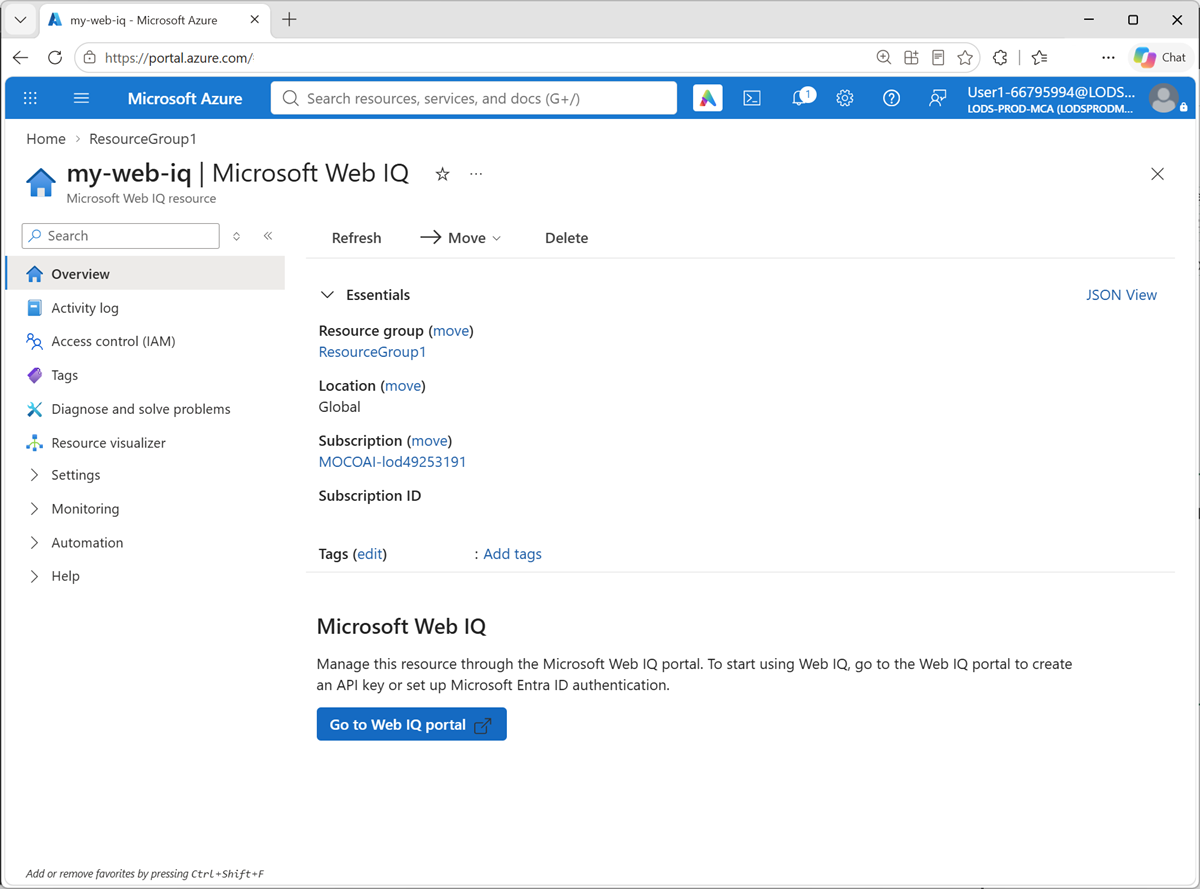
The Azure resource associates Web IQ usage with your subscription. Applications call the Web IQ API service directly; the Azure resource isn't a custom search index or a model deployment.
Connect the resource and obtain an AppID
Next, open the Web IQ portal, either directly or through Go to Web IQ portal on the Azure resource page.
- Select Get Started and sign in with the account associated with the subscription.
- If prompted, provide the Microsoft Entra tenant ID for that subscription.
- Select the same subscription and the Web IQ resource you created.
- Complete the connection by selecting Finish.
- Confirm that the new Web IQ AppID appears in the selector at the top left of the portal.
A Web IQ AppID identifies the application's Web IQ profile. It determines allowed APIs, rate limits, API keys, and any bound Microsoft Entra application client IDs. Record the AppID for client configurations that require it, and select the correct profile when testing or managing credentials.
Note
A Web IQ AppID, a Microsoft Entra application (client) ID, and an API key aren't interchangeable. The AppID identifies the Web IQ profile; an Entra client ID identifies a registered application; an API key is a secret used to authenticate requests.
Test in the Web IQ portal
Use the Playground to verify retrieval before connecting an agent:
- Make sure the intended AppID is selected.
- Select an available method or search vertical, such as Web, News, Images, or Videos.
- Enter a query, such as the name of a band and "upcoming tour dates." Review the available parameters, including language, region, and result limits.
- Send the request and inspect the JSON response or formatted preview.
- Check relevance, source URLs, dates, and the amount of content returned. Refine the query or settings and compare results.
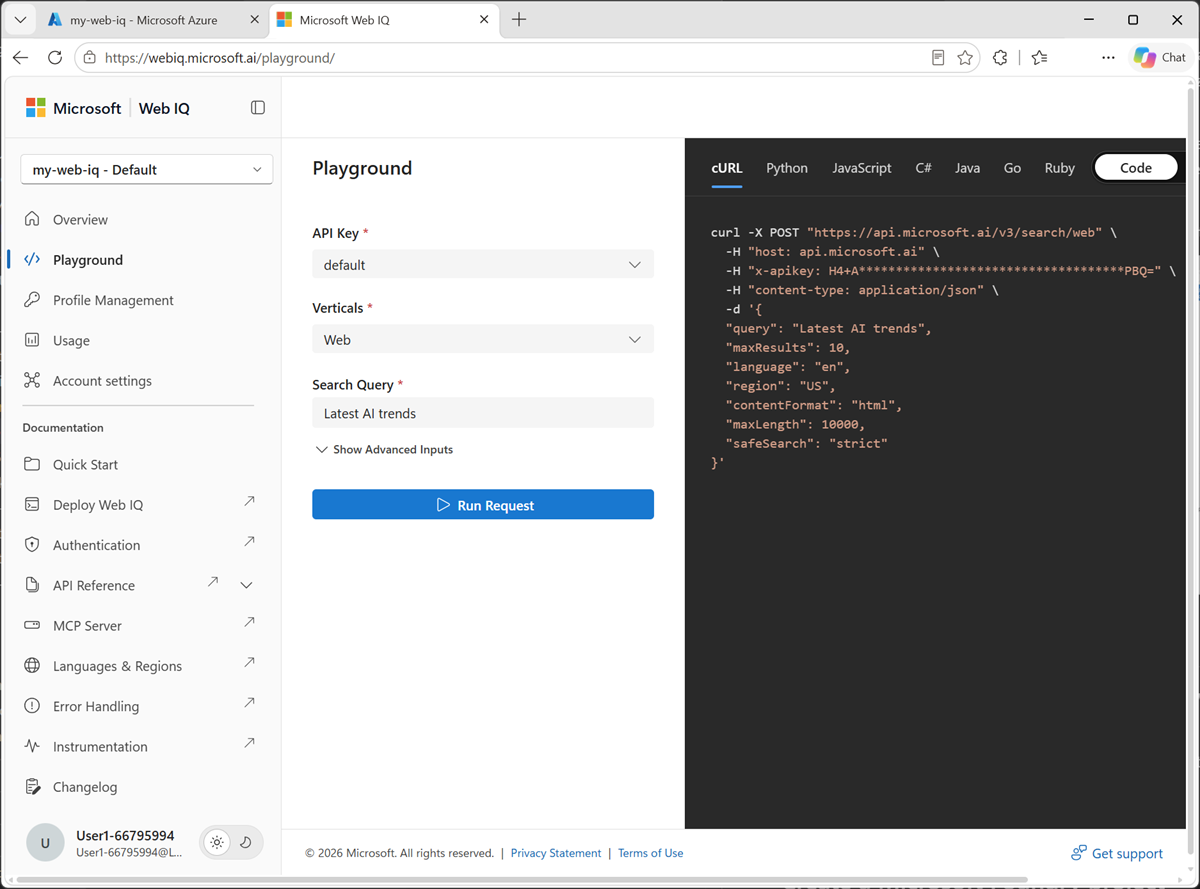
A successful request confirms that the resource, subscription, AppID, and credentials are connected. If the resource doesn't appear, check that you selected the same tenant and subscription used during deployment. Method availability depends on the profile's enabled services.
Prepare credentials for clients
For a quick start, open Profile management in the Web IQ portal and obtain an API key for the selected profile. A key-authenticated REST or MCP client sends this secret in the x-apikey header. The key already belongs to one AppID; don't add an APPID query parameter to key-authenticated requests.
For production applications, consider Microsoft Entra ID authentication. Register an application, bind its Application (client) ID to the Web IQ profile, and configure the client to obtain an access token for Web IQ. If the same Entra client ID is bound to multiple Web IQ AppIDs, token-authenticated requests must specify the intended Web IQ AppID using the APPID query parameter.
Keep credentials in secure connection settings or a secret manager, not in agent instructions, source code, or browser-side applications.
For detailed setup guidance, see Deploy Microsoft Web IQ with the Azure portal and Authenticate with Microsoft Web IQ.