Enable GitHub Advanced Security
You learned in the previous unit how GitHub Advanced Security fits into your software-development lifecycle and which features are included for different GitHub plans. It's now time to take the first step towards implementing GitHub Advanced Security in your organization.
In this unit, you learn how to enable GitHub Advanced Security at the organization level according to your enterprise plan.
Enable GitHub Advanced Security for Enterprise Cloud
Enabling GitHub Advanced Security at the organization level automatically turns on GitHub Advanced Security for all private and internal repositories in your organization.
Note
If you enable GitHub Advanced Security in your organization, committers to the organization repositories will use seats on your GitHub Advanced Security license.
Use the following steps to enable GitHub Advanced Security for all the repositories in your organization.
- In your organization, navigate to Settings > Code security and analysis.
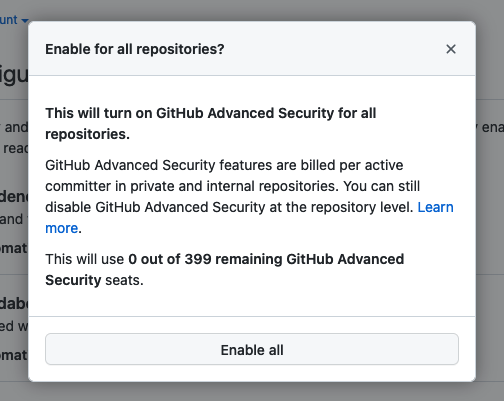
- Under Configure security and analysis features, select the Enable all button next to GitHub Advanced Security. The control for GitHub Advanced Security is disabled if you have no available license instances in your GitHub Advanced Security license.
- Review the message describing the effect of enabling Advanced Security on all repositories and select Enable all.
If you want to automatically enable GitHub Advanced Security on new private and internal repositories added to your organization, select the Automatically enable for new private and internal repositories checkbox under GitHub Advanced Security, review the message describing the effect of enabling Advanced Security on all new private and internal repositories, and select Enable for new repositories.

Enable GitHub Advanced security for Enterprise Server
Before you can enable GitHub Advanced Security for all the repositories in your organization on GitHub Enterprise Server, you must first enable Advanced Security for your GitHub Enterprise Server instance. There are two ways to do this procedure: by using the GitHub user interface or by using the administrative shell (SSH).
Whether you plan on using the user interface or the administrative shell, make sure you meet the following prerequisites before completing one of the procedures described in the next sections:
- Your license for GitHub Enterprise Server is upgraded to include GitHub Advanced Security and you uploaded it to your GitHub Enterprise Server instance.
- You reviewed the prerequisites for the features you plan to enable.
Note
Enabling GitHub Advanced Security features on your Enterprise Server instance will cause user-facing services on GitHub Enterprise Server to restart. You should time this change carefully to minimize downtime for users.
Via the GitHub user interface
Enable the GitHub Advanced Security features on your GitHub Enterprise Server instance by using the following procedure:
In the Site admin page of your GitHub Enterprise Server account, navigate to Management Console.
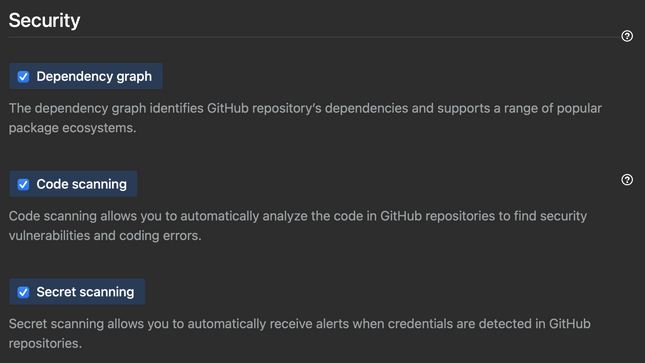
In the left sidebar, select Security.
Under Security, select the features that you want to enable.
Under the left sidebar, select Save settings and wait for the configuration run to complete.
When GitHub Enterprise Server is finished restarting, follow the procedure described in the previous "Enable GitHub Advanced Security for Enterprise Cloud" section to enable GitHub Advanced Security for all the repositories in your organization.
Via the administrative shell
You can enable or disable features programmatically on your GitHub Enterprise Server instance via the administrative shell and command-line utilities for GitHub Enterprise Server. For example, you can enable any GitHub Advanced Security feature with your infrastructure-as-code tooling when you deploy an instance for staging or disaster recovery.
Enable the GitHub Advanced Security features on your Enterprise Server instance by using the following procedure:
- SSH into your GitHub Enterprise Server instance.
- Enable the GitHub Advanced Security features you want to implement in your instance.
- To enable code scanning, enter
ghe-config app.minio.enabled truefollowed byghe-config app.code-scanning.enabled true. - To enable secret scanning, enter
ghe-config app.secret-scanning.enabled true. - To enable the dependency graph, enter
ghe-config app.dependency-graph.enabled true.
- To enable code scanning, enter
- Apply the configuration by entering
ghe-config-apply.
When GitHub Enterprise Server is finished restarting, follow the procedure described in the previous "Enable GitHub Advanced Security for Enterprise Cloud" section to enable GitHub Advanced Security for all the repositories in your organization.