Create order orchestration
This unit describes the steps that are required for creating order orchestration in Intelligent Order Management.
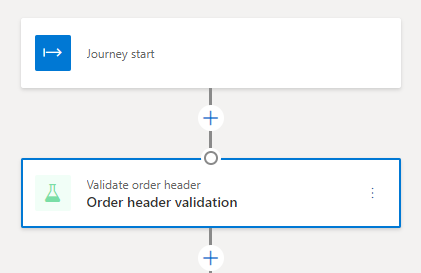
Add the Validate order header tile
To add the Validate order header tile, follow these steps:
Go to Orchestration > Flows and select New.
Enter a name for your new flow and then select Save.
Select the plus (+) symbol and then add the Validate order header tile.
In the Validate order header dialog box, enter the following information:
- For Name, enter Order header validation.
- For Action Type, enter Order Validation.
- For Input Events, enter New Order.
- For Execution Policies, enter Order header validation policy.
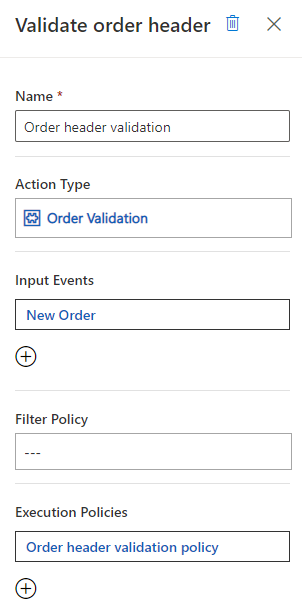
Select Save.


Add the Validate order line tile
To add the Validate order line tile, follow these steps:
Go to Orchestration > Flows and select New.
Select the plus (+) symbol and then add the Validate order line tile.
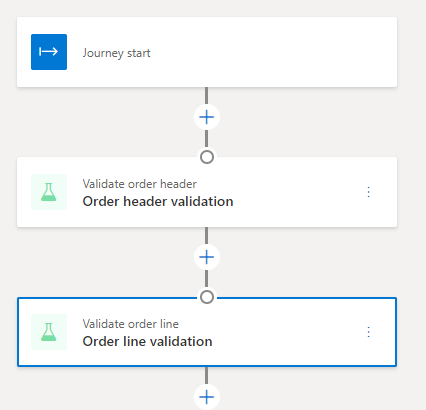
In the Validate order line dialog box, enter the following information:
- For Name, enter Order line validation.
- For Action Type, enter Order Line Validation.
- For Input Events, enter Validation of Order Header has Succeeded.
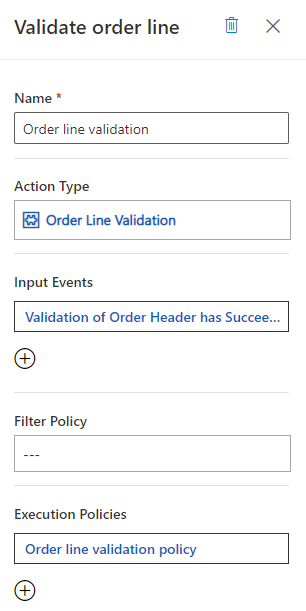
Select Save.


Add a Custom tile
To add a Custom tile, follow these steps:
Go to Orchestration > Flows and select New.
Select the plus (+) symbol and then add a Custom tile.
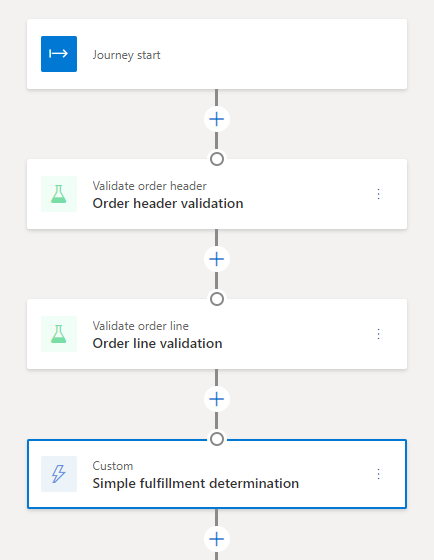
In the Custom dialog box, enter the following information:
- For Name, enter Simple fulfillment determination.
- For Action Type, enter Policy Based Fulfillment Determination.
- For Input Events, enter Validation of Order Lines has Succeeded.
- For Execution Policies, enter Simple fulfillment assignment policy.

Select Save.


Add a Splitter tile
To add a Splitter tile, follow these steps:
Go to Orchestration > Flows and select New.
Select the plus (+) symbol and then add a Splitter tile.
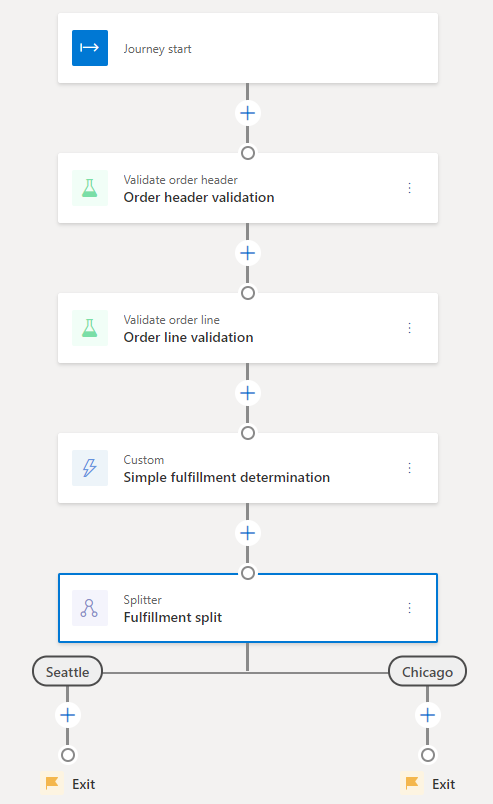
In the Splitter dialog box, enter the following information:
- For Name, enter Fulfillment split.
- For the two Splitter Settings fields, enter Seattle and Chicago.
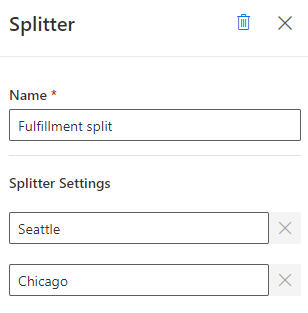
Select Save.


Add a Send to fulfillment tile under the Seattle branch
To add a Send to fulfillment tile under the Seattle branch, follow these steps:
Go to Orchestration > Flows and select New.
Under the Seattle branch, select the plus (+) symbol and then add a Send to fulfillment tile.
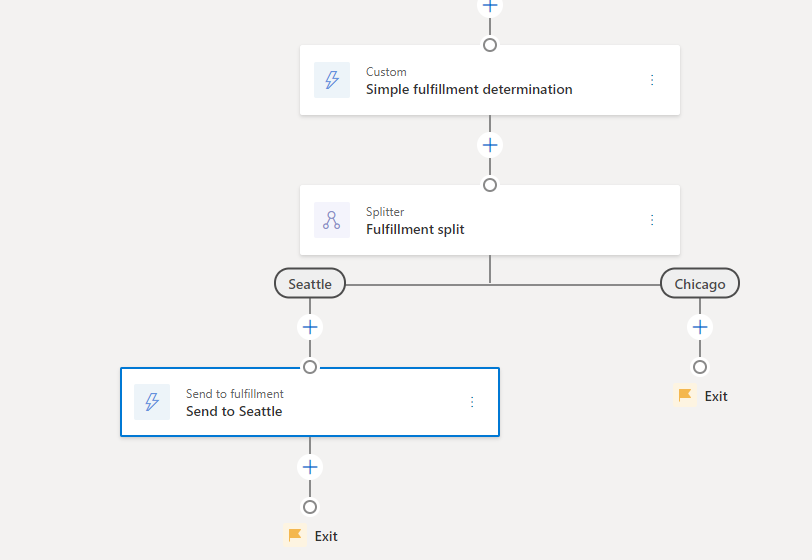
In the Send to fulfillment dialog box, enter the following information:
- For Name, enter Send to Seattle.
- For Action Type, enter Send to Fulfillment.
- For Input Events, enter Creation of Fulfillment Order has Succeeded.
- For Provider Action, enter Lab Send to Fulfillment (Outlook).
- For Filter Policy, enter Fulfillment filter policy Seattle.
Select Save.

Add a Send to fulfillment tile under the Chicago branch
To add a Send to fulfillment tile under the Chicago branch, follow these steps:
Go to Orchestration > Flows and select New.
Under the Chicago branch, select the plus (+) symbol and then add a Send to fulfillment tile.

In the Send to fulfillment dialog box, enter the following information:
- For Name, enter Send to Chicago.
- For Action Type, enter Send to Fulfillment.
- For Input Events, enter Creation of Fulfillment Order has Succeeded.
- For Provider Action, enter Lab Send to Fulfillment (RequestBin).
- For Filter Policy, enter Fulfillment filter policy Chicago.
Select Save.

Publish the orchestration flow
After you've finished creating the order orchestration flow, select Publish to publish the flow.
If you've followed along, the compiled Power Automate cloud flows will display, as shown in the following image.
