Create and configure managed identities
A common challenge when creating a cloud solution is the management of secrets, credentials, certificates, and keys. These secure elements are used to secure communication between services. Managed identities eliminate the need for developers to manage these credentials.
While developers can securely store the secrets in Azure Key Vault, services need a way to access Azure Key Vault. Managed identities provide an automatically managed identity in Microsoft Entra ID for applications to use when connecting to resources. The managed identity supports authentication via Microsoft Entra ID. Applications can use managed identities to obtain Microsoft Entra tokens without having to manage any credentials.
Benefits of using managed identities
- You don't need to manage credentials. Credentials aren’t even accessible to you.
- You can use managed identities to authenticate to any resource that supports Microsoft Entra authentication, including your own applications. Managed identities can be used without any extra cost.
Types of managed identity
| Identity type | Description and usage |
|---|---|
| System-assigned | Some Azure services allow you to enable a managed identity directly on a service instance. When you enable a system-assigned managed identity, an identity is created in Microsoft Entra ID. The identity is tied to the lifecycle of that service instance. When the resource is deleted, Azure automatically deletes the identity for you. By design, only that Azure resource can use this identity to request tokens from Microsoft Entra ID. |
| User-assigned | You might also create a managed identity as a standalone Azure resource. You can create a user-assigned managed identity and assign it to one or more instances of an Azure service. For user-assigned managed identities, the identity is managed separately from the resources that use it. |
Always remember that managed identities are assigned to an application. So, you need to configure and manage the identity within the services they're being used. If you have an application running in a virtual machine (Linux or Windows), then you add and configure the identity there. If you're using a managed identity with a cloud-app, function, or app service, then you configure and manage it there. Let's look at adding a managed identity to a cloud-built app using the App Service.
Managed identity in Azure portal for an App Service
The basic steps, to create and add an identity to your app, are:
- Build your App.
- Open the App in the Azure portal.
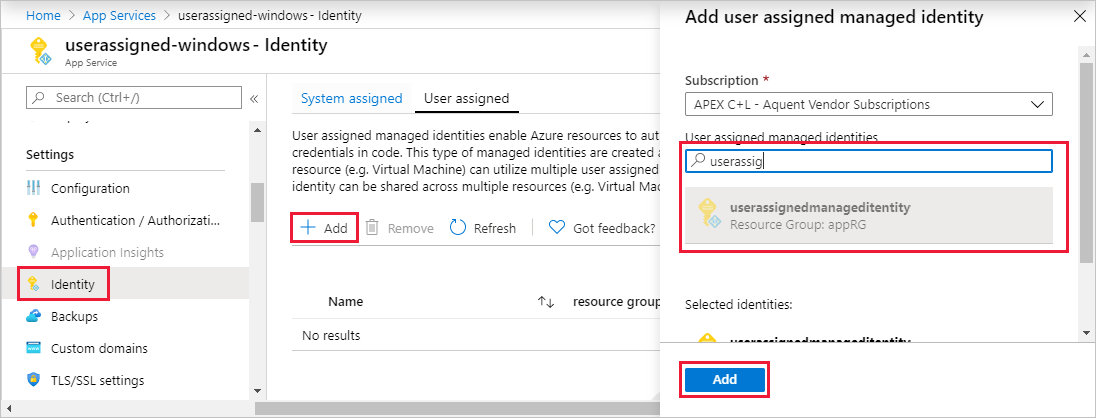
- Select Identity from the menu then select either System assigned or User assigned.
- Select the + Add item and complete the wizard.
You can perform a similar action using script within the CLI, PowerShell, or with a template. Sample could look like:
Using the CLI
az webapp identity assign --resource-group <group-name> --name <app-name> --identities <identity-name>
Or using PowerShell with the AZ.ManagedServiceIdentity module installed
Update-AzFunctionApp -Name <app-name> -ResourceGroupName <group-name> -IdentityType UserAssigned -IdentityId $userAssignedIdentity.Id
Or within a template
"identity": {
    "type": "UserAssigned",
    "userAssignedIdentities": {
        "<RESOURCEID>": {}
    }
}
Value of managed identity
As stated at the beginning of this page, when you build an app, you need a method to grant it access to resources. To take advantage of the concepts of zero trust you can use managed identities. You only assign the minimum privileges that the managed identity needs. Then only assign access the minimum resources needed. Least-privilege will keep your applications and data protected.