Exercise - Create Bicep templates
It's time to create your first Bicep template. After following this unit, you'll learn how the Bicep extension in VS Code simplifies development by providing type safety, syntax validation, and autocompletion.
Prerequisites
To follow along, you'll need to have access to an Azure subscription. You also need to have:
- VS Code.
- Azure CLI.
- Bicep extension for VS Code.
Create your first template
Open your VS Code and create a new file called main.bicep. When it's done, open the file and start typing storage. You should see a menu appears from which you select the first option res-storage by pressing Enter or Tab. You should end up with a snippet that looks like:
resource storageaccount 'Microsoft.Storage/storageAccounts@2021-02-01' = {
    name: 'name'
    location: location
    kind: 'StorageV2'
    sku: {
        name: 'Premium_LRS'
    }
}
This file will deploy an Azure Storage Account. However, we need to modify the file to make it ready for deployment. First, let's add two parameters: one for the name since it should be unique, and one for the location.
param storageName string = 'stg${uniqueString(resourceGroup().id)}'
param location string = resourceGroup().location
The value you assign to the parameters is the default value that makes the parameters optional. Replace the name property with storageName and since the location is already used, you're good to go ahead with the deployment.
Visualize resources
You can use VS Code to visualize the resources defined in your Bicep file. Click on the Visualizer button at the top right-hand corner:
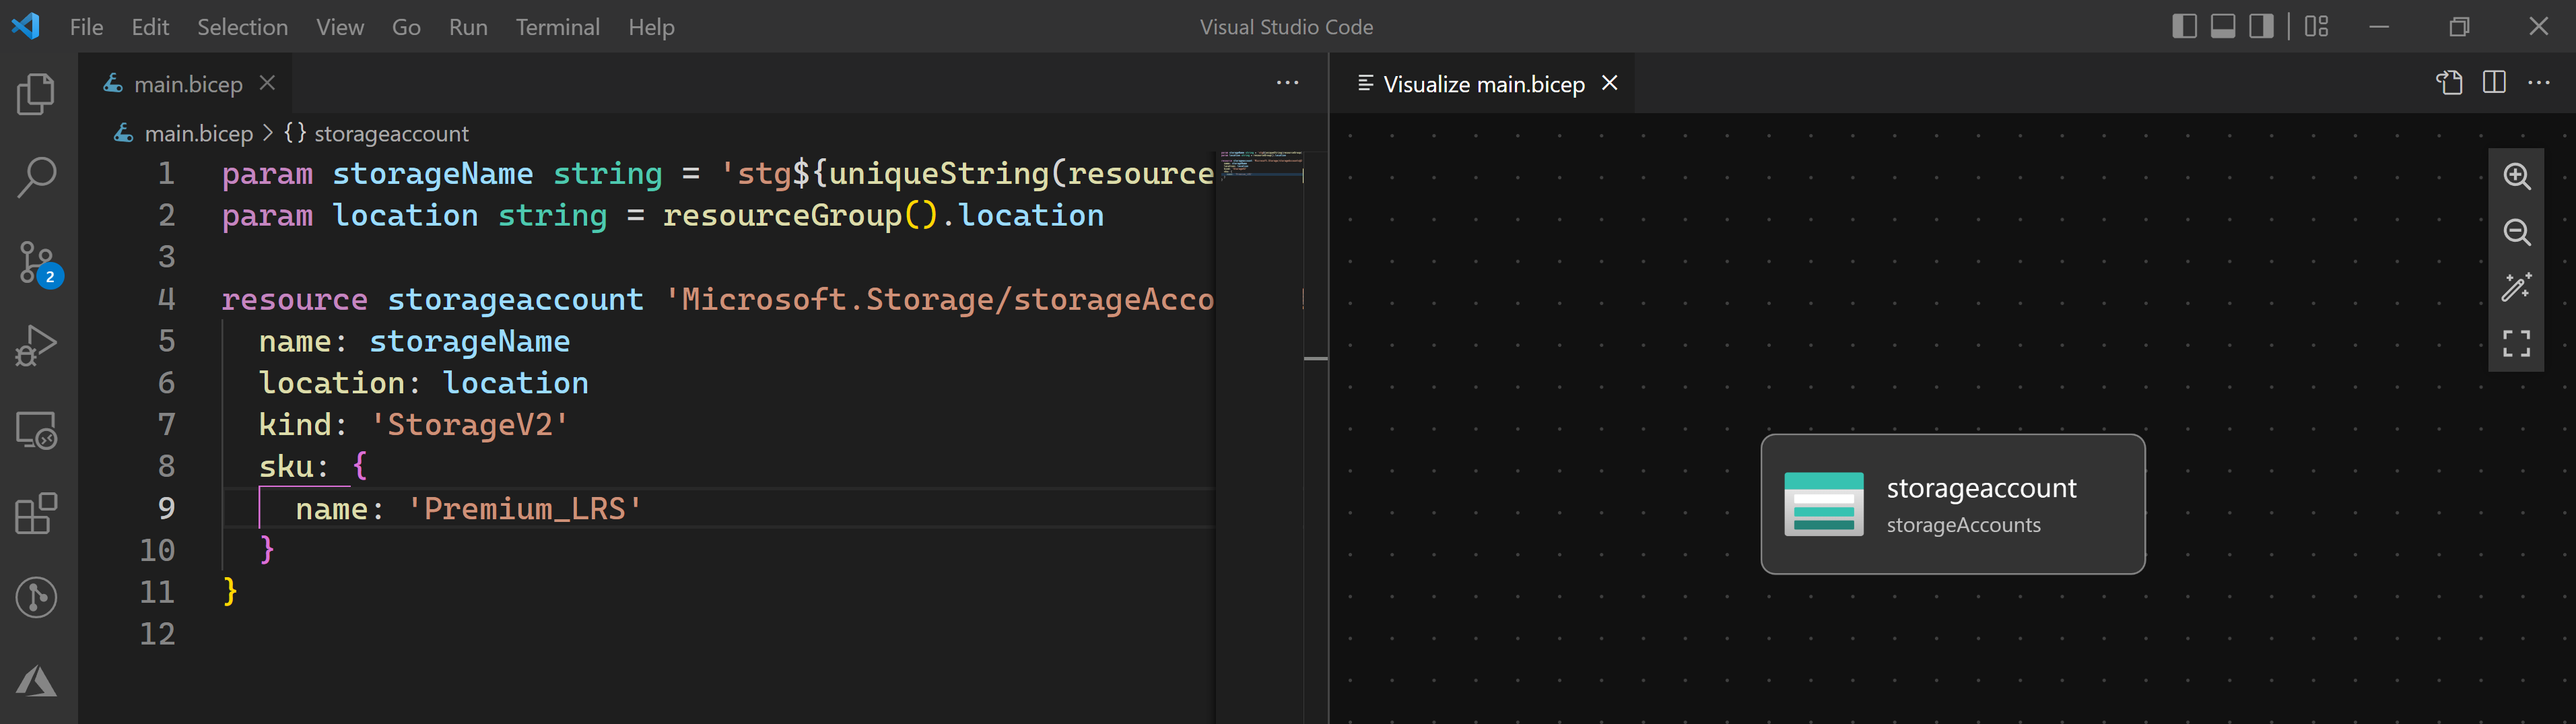
The Visualizer displays:
- Resource dependencies: How resources reference each other.
- Resource types: The kind of Azure resources defined.
- Resource names: Identifiers for each resource.
Compile the file
You don't need to compile the file to be able to deploy it, but it's good to know how you can do it.
Open the integrated terminal in VS Code by right-clicking on your Bicep file and selecting the Open in Integrated Terminal menu.
Use the build command as follows:
az bicep build -f ./main.bicep
This command generates a JSON ARM template from your Bicep file. Feel free to take a look at the resulting ARM template and compare the two formats.
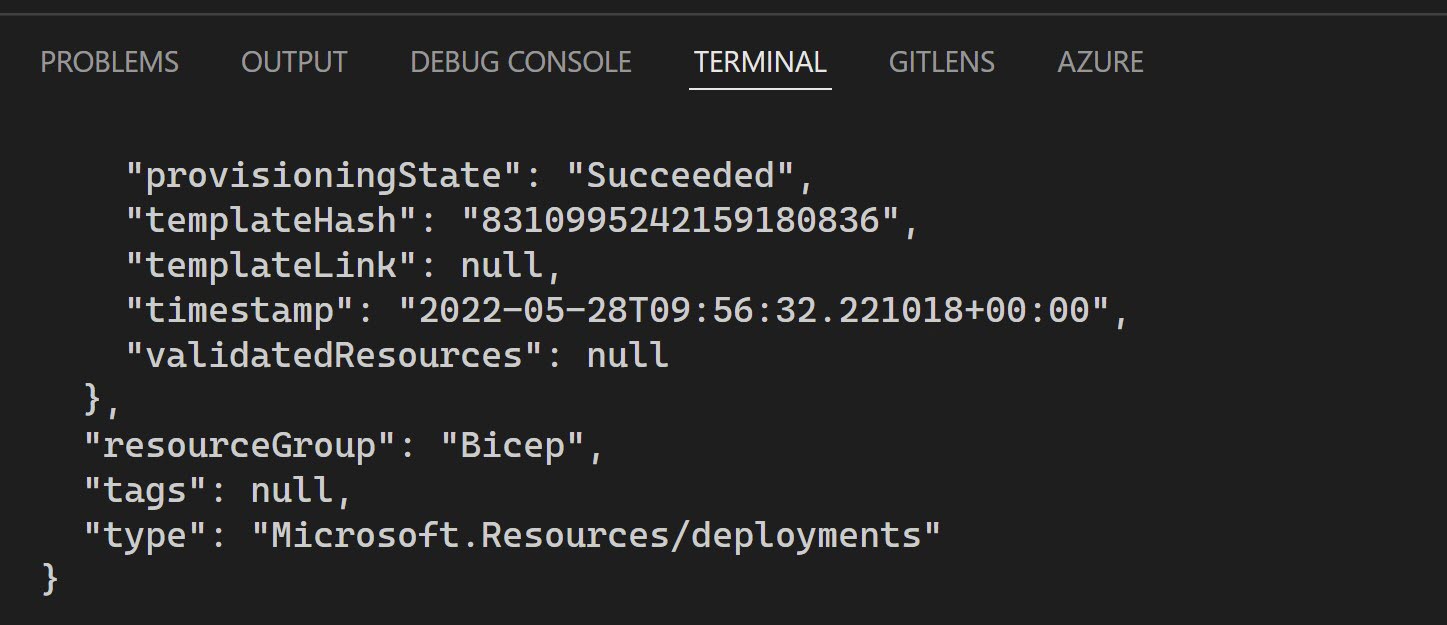
Deploying the Bicep file
Now is the time to deploy the Bicep file you've created. In the same terminal, run the following commands:
az group create --name Bicep --location eastus
az deployment group create --resource-group Bicep --template-file main.bicep --parameters storageName=uniqueName
Note
Replace the uniqueName with a unique name, but you can also ignore providing the parameter since it has a default value.
Understanding the commands
- az group create: Creates a new resource group named
Bicepin theeastusregion. - az deployment group create: Deploys the Bicep template to the specified resource group.
When the deployment finishes, you'll get a message indicating the deployment succeeded.
Next steps
Now that you've learned how to create a basic template and deploy it, head over to the next unit to learn more about the constructs in a Bicep file.