Exercise - Create a CD release pipeline for IoT Edge with a smoke test
Create a new release pipeline
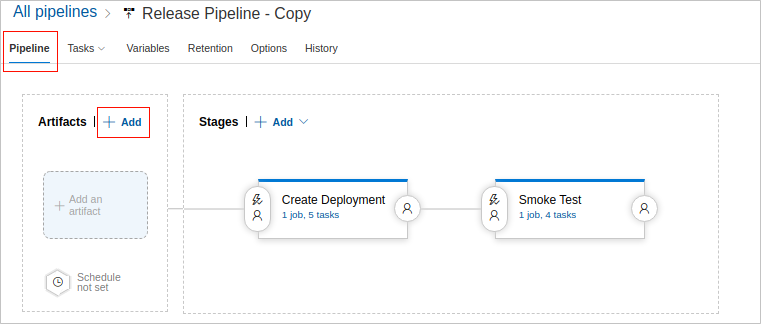
Deployments to devices need to be done under tight control in production environments. To achieve this, you'll create a release pipeline that deploys to QA devices and smoke tests the edge runtime in a containerized device. This is accomplished by running an instance of azure-iot-edge-device-container, which is configured as a QA device. Then, you'll probe the IoT hub to ensure that the QA device receives the desired deployment configuration, and is able to successfully run all configured modules. This test is contained in edgeSmokeTest.sh.
To begin creating a release pipeline, in the left menu pane, select Pipelines, and then select Releases. Select New pipeline. The Select a template pane appears. To create a new pipeline with an empty job, select Empty job, and then select Save. In the Save dialog, select a Folder from the dropdown, and enter any Comment. Select OK.
From the left menu pane, select Releases. In the middle menu pane, select the New dropdown, and then select Import release pipeline. Download the release-pipeline.json file located in the root of this repository and import it. The import should finish successfully as follows.
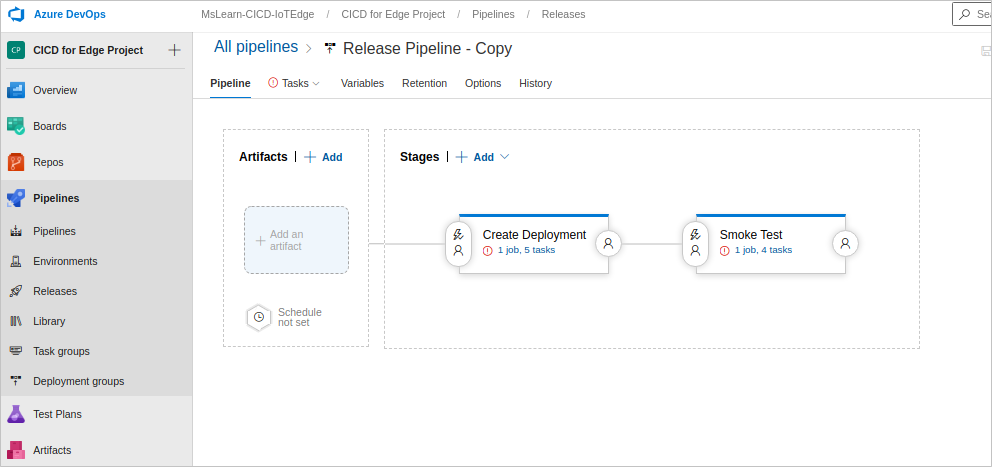
You'll need to fix a few things before you can successfully run the release pipeline, specifically Azure subscription endpoints, agent pools, variable settings, and artifact source.
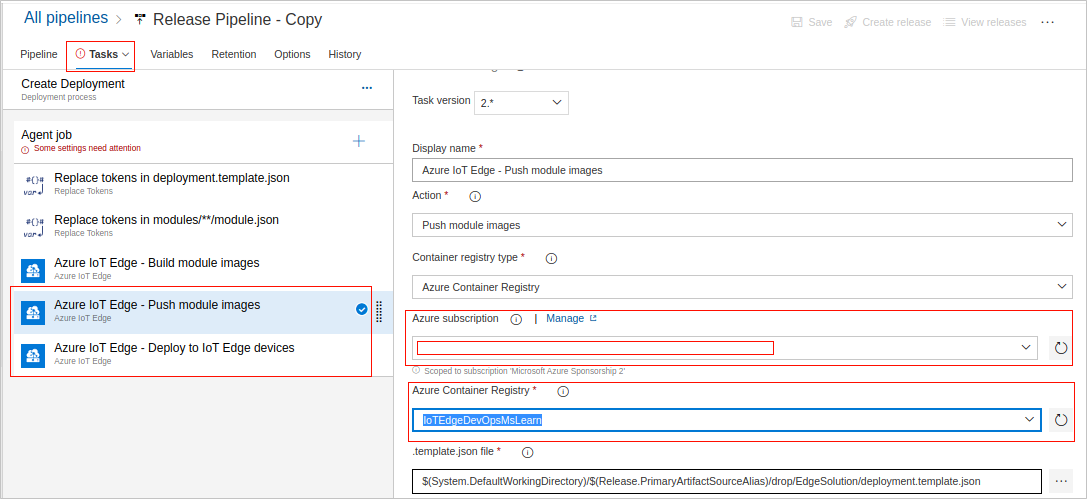
From the Tasks dropdown, select Create Deployment. Provide the appropriate Azure subscription and Azure Container Registry name for the Azure IoT Edge - Push module images task.
Provide the appropriate Azure subscription and Azure Container Registry name for the Azure IoT Edge - Deploy to IoT Edge devices task.
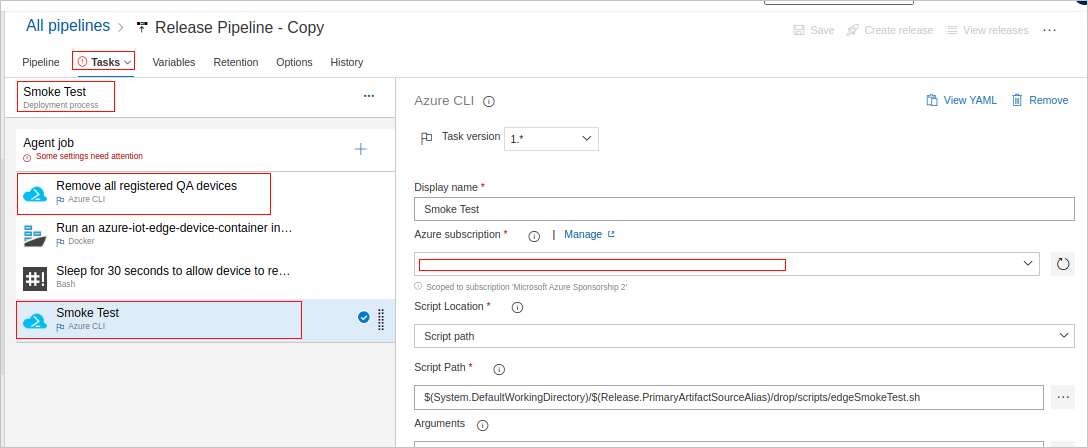
From the Tasks dropdown, select Smoke Test. Provide the appropriate Azure subscription and Azure Container Registry name for the Remove all registered QA devices and Smoke Test tasks.
To fix the agent pools, from the Tasks dropdown, select Create Deployment, and then select Agent Job to change the agent pool.
Repeat the same step. From the Tasks dropdown, select Smoke Test, and then select Agent Job to change the agent pool to ubuntu latest.
Now, you should be able to save the release pipeline. We highly recommended saving it at this point if Azure DevOps allows.
On the Variables tab, you'll need to modify all variables in brackets (<>).
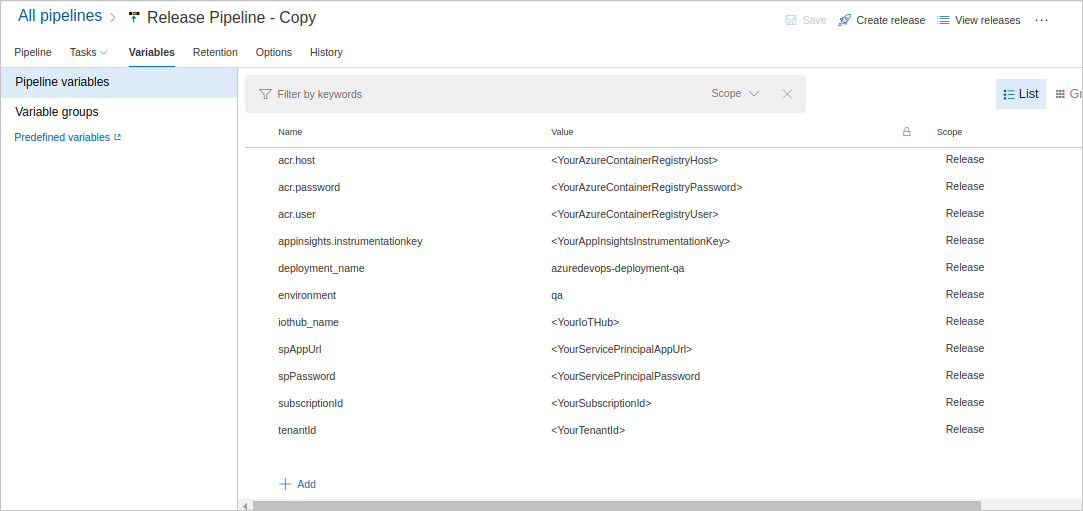
Use the same values for
acr.host,acr.user,acr.password, andappinsights.instrumentationkeythat you previously used in the CI build definition.iothub_nameis the name of the IoT hub you created. Navigate to the Azure portal home page, go to the resource group you created, and make a copy of the IoT hub name.For the additional variables, you need to create a service principal by performing the following steps:
Go to the Azure portal.
Open Azure Cloud Shell.
Run
az account listto see available subscriptions, and set the appropriate subscription.az account set --subscription <subscriptionid>Create a service principal for your subscription with the Azure CLI.
az ad sp create-for-rbac --name <name> --role Contributor --scopes /subscriptions/<subscriptionid>You should see output similar to the following.
{
"appId": "00001111-aaaa-2222-bbbb-3333cccc4444",
"displayName": "azure-iot-edge-device-container-sp",
"name": "http://azure-iot-edge-device-container-sp",
"password": "MyPassword",
"tenant": "abcdefgh-abcd-abcd-abcd-abcdefghijkl"
}
Make note of the
name,password, andtenantvalues, as these values will be used forspAppURl,spPassword, andtenantrespectively.Provide all parameters as required in Variables.
Now, go back to Pipeline, and add an artifact.
Select your CI build pipeline as the source type, and configure it to obtain the latest version.
After you have configured everything appropriately, select Save.
In the left menu pane, select Pipelines, and then select Releases.
Select the newly created release pipeline, and select Create a release.
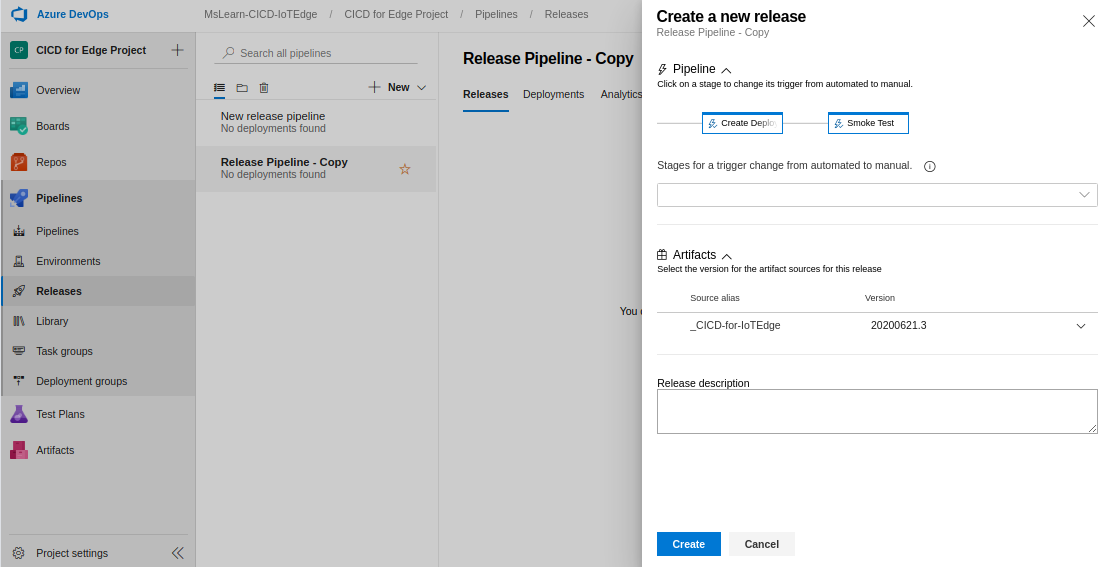
The new release pipeline should begin running.