Exercise - setting tenant-wide properties
Your goal is to change the tenant display name.
Browse to the Azure portal and sign in using an Administrator account for the directory.
Select the Show portal menu hamburger icon and then select Microsoft Entra ID.
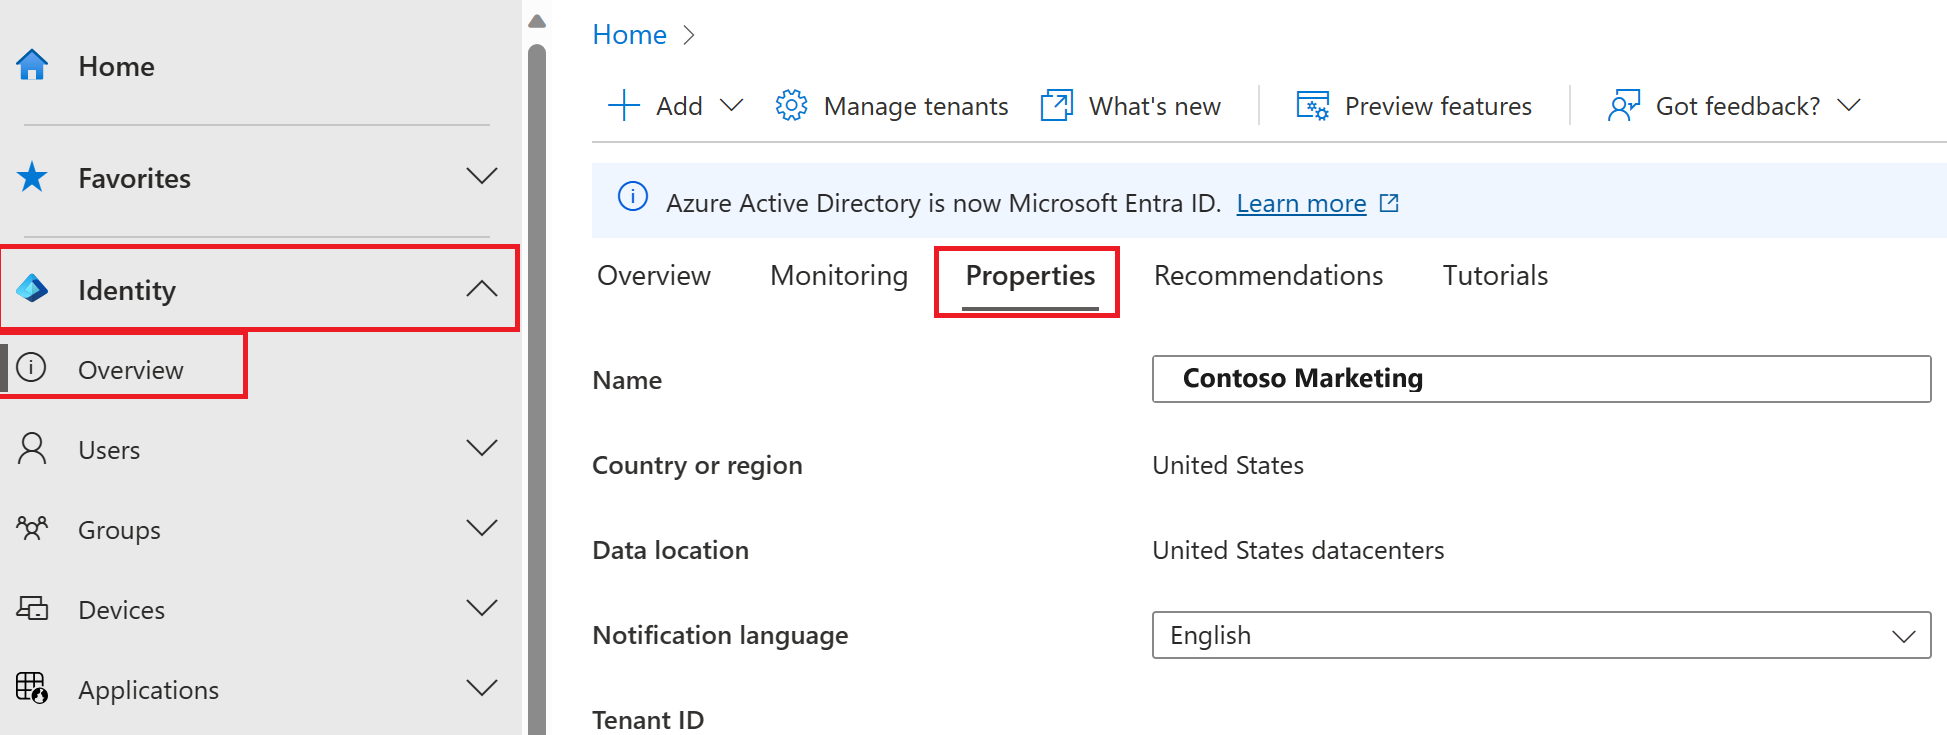
In the left navigation, in the Manage section, select Properties.
In the Name box, change the tenant name. For example, Contoso Marketing Company can be changed to Contoso Marketing Company 2.
Select Save to update the tenant properties.
Find the Country / region associated with your tenant
In the Microsoft Entra ID screen, in the Manage section, select Properties.
Under Tenant properties, locate Country / region and review the information.
Important
When the tenant is created, the Country / region is specified at that time. This setting can't be changed later.
Find the location associated with your tenant
Just as the Country / region is found in the Microsoft Entra ID Properties dialog, so is the location information.
In the Properties screen, under Tenant properties, locate Location and review the information.
Find the tenant ID
Azure subscriptions have a trust relationship with Microsoft Entra ID. Microsoft Entra ID is trusted to authenticate users, services, and devices for the subscription. Each subscription has a tenant ID associated with it, and there are a few ways you can find the tenant ID for your subscription.
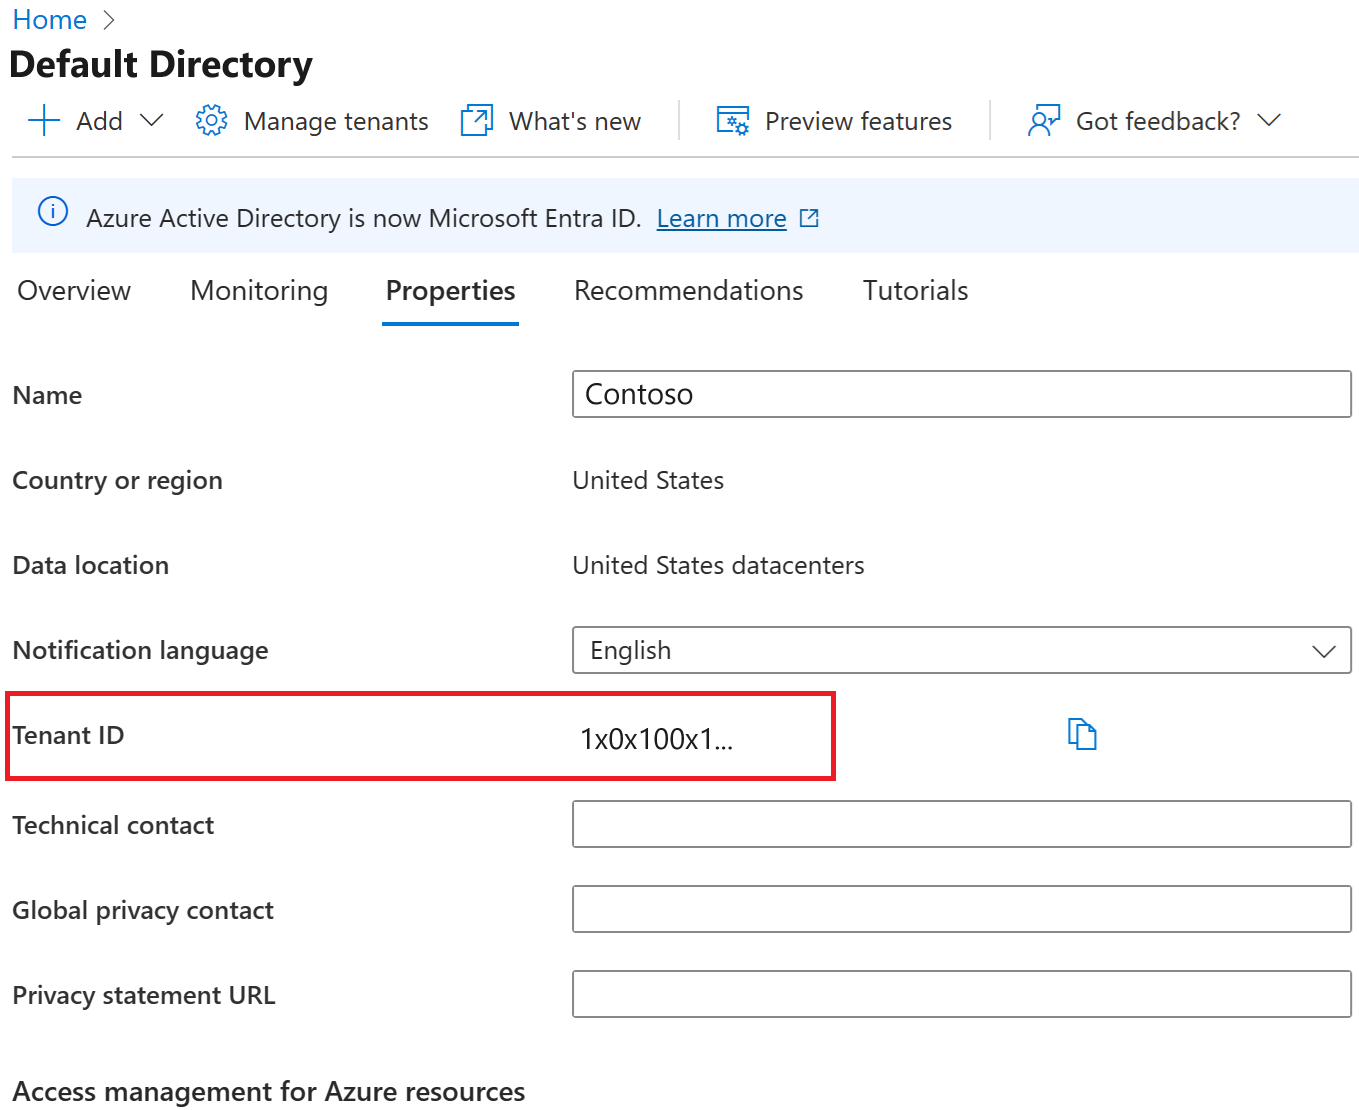
In the Microsoft Entra ID screen, in the Manage section, select Properties.
Under Tenant properties, locate Tenant ID. Tenant ID is your unique tenant identifier.
Change the Technical contact, add your privacy info, Global privacy contact, and Privacy statement URL
Microsoft strongly recommends you add both your global privacy contact and your organization's privacy statement, so your internal employees and external guests can review your policies. Because privacy statements are uniquely created and tailored for each business, we strongly recommend you contact a lawyer for assistance.
Note
For information about viewing or deleting personal data, see Azure Data Subject Requests. For more information, see the Service Trust portal.
You add your organization's privacy information in the Properties area of Microsoft Entra ID. To access the Properties area and add your privacy information:
- In the Microsoft Entra ID screen, in the Manage section, select Properties.
- Add your privacy info for your employees:
Technical contact. Type the email address for the person to contact for technical support within your organization.
Global privacy contact. Type the email address for the person to contact for inquiries about personal data privacy. This person is also who Microsoft contacts if there's a data breach. If there's no person listed here, Microsoft contacts the administrator who owns the tenant.
Privacy statement URL. Type the link to your organization's document that describes how your organization handles both internal and external guest's data privacy.
- Select Save.