Implement a multi-session deployment
As an organization begins to implement the multi-session capabilities that are available in Dynamics 365 Customer Service, you'll need to consider what a session might look like to a representative. You should consider factors such as the capabilities that should be available to the representative and the data that should be available to the technician when the session opens. For example, when a new chat session opens, in addition to the main customer information screen, you might determine whether the customer’s account record should also open in a new tab. Additionally, you might consider whether certain users should have different agent scripts available to them. These considerations represent a small subset of factors that you'll want to investigate as you begin implementing a multi-session experience.
Several tools are available for you to use to control how to tailor the user experience for representatives as they're working with customers. You can control everything from the functionality that's available to which users, to what the user experience looks like. To accomplish this task, go to the Customer Service admin center. Under the Agent Experiences group, select Workspaces, which includes several options that you can use to tailor the multi-session experience for representatives.
These options include:
Agent experience profiles - Allows you to create targeted app experiences for representatives and supervisors so that you don’t need to build and maintain custom applications.
Session templates - A combination of attributes and application tab information that can control what and how items are presented to representatives.
Application tab templates - Allows you to specify the type of applications that can be opened when representatives start a session in the Customer Service workspace or the Omnichannel for Customer Service app.
Notification templates - Allows you to define what information is displayed to representatives and supervisors for incoming conversations, escalations, transfers, or consults.
Agent experience profiles
As representatives access Dynamics 365 Customer Service, agent experience profiles will control the features that are available to representatives, how the data is presented, the channels that are available to them, and other items that affect their overall experience. You can define different agent experience profiles based on the different needs of your representatives. For example, you might have some representatives who, based on this role, don't require agent scripts or specific channel types. By creating an agent experience profile, you can specify what items you want to have available to representatives who are assigned to that profile.
Administrators can manage agent experience profiles as follows:
Create and assign users to your Microsoft Dynamics 365 Customer Service environment.
Ensure that users have the necessary security roles, such as Customer Service Representative or Omnichannel agent.
Create business processes, such as workstreams, queues, sessions, and productivity tools.
Create agent experience profiles.
Assign agent experience profiles to users.
When Dynamics 365 Customer Service is deployed, and based on whether you have set up Omnichannel for Customer Service or not, several profiles will be created by default. You can add users to these profiles as needed to quickly provide access to applications and features. The profiles that exist by default are:
Customer Service workspace + channels + Inbox + default profile - Customer Service workspace profile that includes access to channels, the Inbox, and default profile features.
Customer Service workspace + channels + default profile - Customer Service workspace profile that includes access to channels and default profile features.
Customer Service workspace + Inbox + default profile - Customer Service workspace profile that includes access to the Inbox and default profile features.
Customer Service workspace + default profile - Customer Service workspace profile that includes access to channels, the Inbox, and default profile features.
Omnichannel for Customer Service - default profile - Omnichannel for Customer Service profile.
Create agent experience profiles
While you can add users to any of the previously mentioned agent experience profiles, you can't delete or modify the functionality in the profiles. For example, you can't disable the Productivity pane if you want to. To have complete control over an agent experience profile, you'll need to create a new profile.
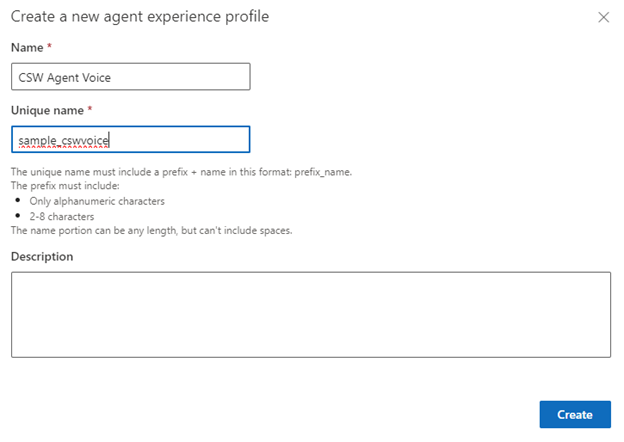
When creating a new agent experience profile, make sure that you supply the following details:
Name - Defines the name of the profile that will be displayed in the app profile.
Unique name - Defines a unique identifier that will be used for the app profile. When creating the profile unique name, you'll need to make sure that:
The prefix is alphanumeric with a length between three to eight characters.
You include an underscore between the prefix and name, for example sample_cswvoice.
Description - A description for the profile.
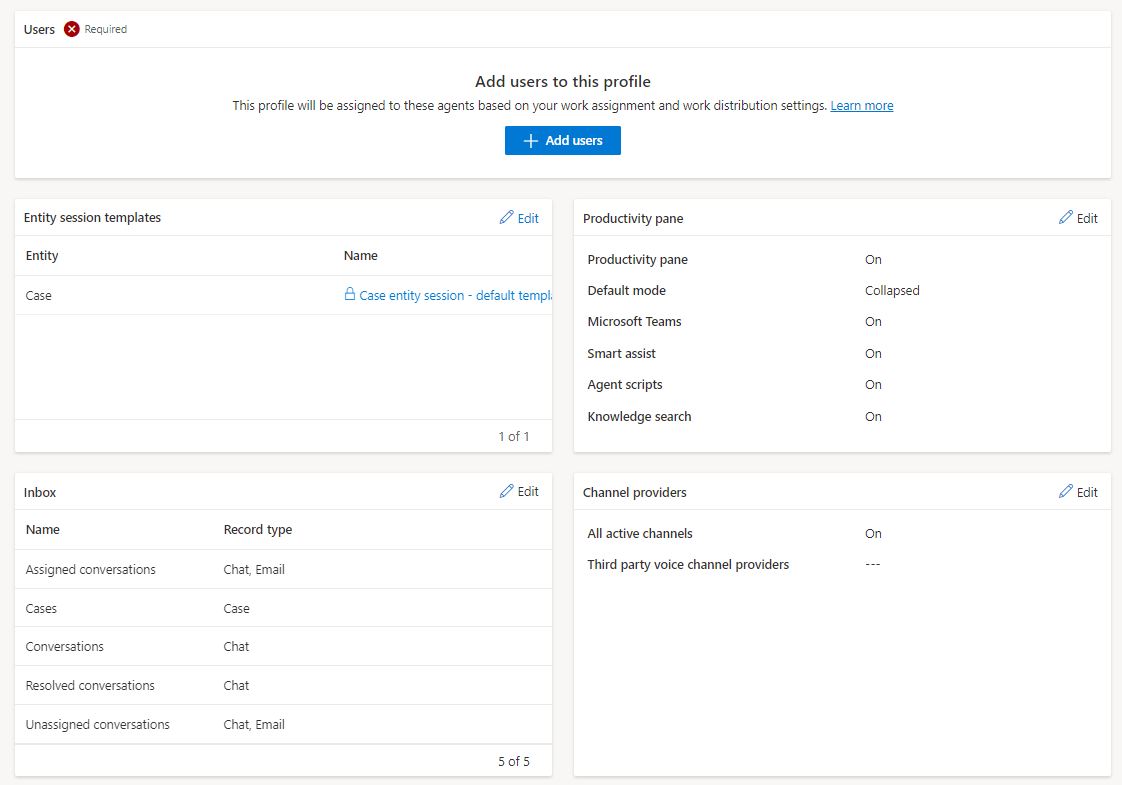
After you create a profile, you can open it and make changes as needed. Within a profile, you can define the following components:
Users - Defines the representatives whom the profile is associated with.
Entity session template - Specifies the entity session templates that you want to link to this profile for each entity that will be displayed in the UI. You can select an existing template or create a new entity session template.
Productivity pane - Defines which productivity tool options that you want to make available in the Productivity pane. The following productivity tool options are available:
Productivity pane - Specifies if you want to use the Productivity pane with this profile.
Default mode - Specifies if you want the Productivity pane to be expanded or collapsed by default.
Smart assist - Specifies if you want smart assist functionality to be displayed in the Productivity pane. More setup will be needed.
Agent scripts - Specifies if you want to have agent scripts displayed in the Productivity pane.
Microsoft Teams - Specifies if you want to be able to use Microsoft Teams integration with this profile. You'll need to set up Microsoft Teams integration in the environment as well.
Knowledge search - Specifies that you want to be able to use the Knowledge search control from within the Productivity pane.
Inbox - Allows representatives to view all their work items on one screen and helps them to prioritize tasks and efficiently work on multiple tasks. For example, you can have the inbox set to display assigned conversations or include email that's assigned to the user.
Channel providers - Lets you specify the different channels that will be available and select external voice channel providers. On the Channel providers pane, you can:
Turn on the All active channels toggle.
Select a channel provider or create channel providers in the Third party voice channel providers section.

For more information, see Roles and privileges associated with app profile manager.
Assign profiles to users
After you've specified what should be included in the profile, you'll need to assign the profile to any users whom it should be applied to. This step is important because if a user isn't assigned a profile, they'll automatically use the default profile for the application that they're working with.
You can assign users to a profile by selecting the Add users button on the profile screen. The Add users screen will open, where you can add existing users to the profile by selecting the Add button.
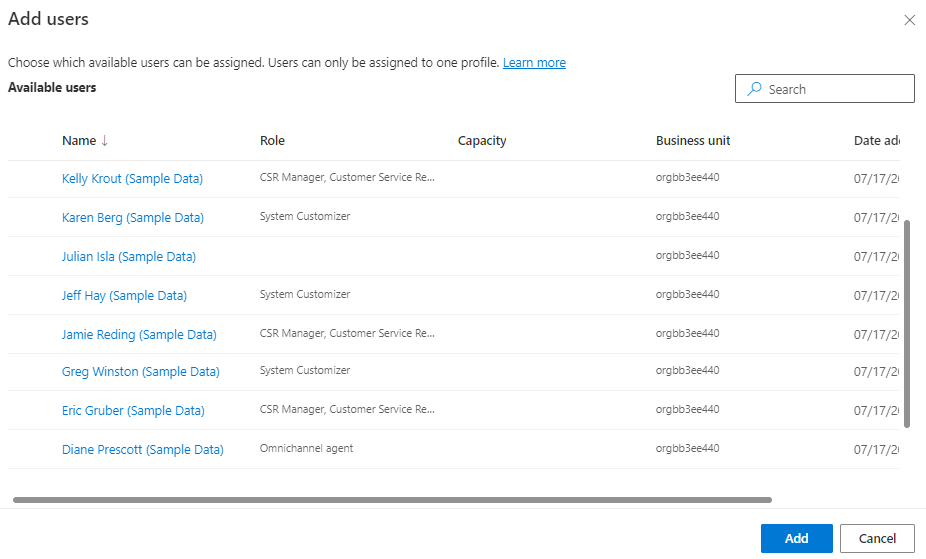
Users who have been defined for the profile will display under Users. After you've assigned all necessary users, you can close the profile users tab to return to the app profile page. An individual user can only belong to a single profile at a time. If you want to assign a user to a different profile, you'll first need to remove the user from their current profile and then add them to the new one.
Now that you've learned how to create agent experience profiles, you'll learn how to set up other elements in more detail.