Exercise - Manage a custom connector with a DLP policy
In this exercise, you'll manage a custom connector in a DLP policy. The first part of this exercise will be publishing a custom connector from GitHub. After deploying the custom connector, you'll add it to a DLP policy using the PowerShell cmdlets that are provided by Microsoft.
Publish a custom connector
The custom connector that you'll deploy is a sample Office365 Groups connector from Microsoft’s GitHub repository.
Follow these steps to install the custom connector:
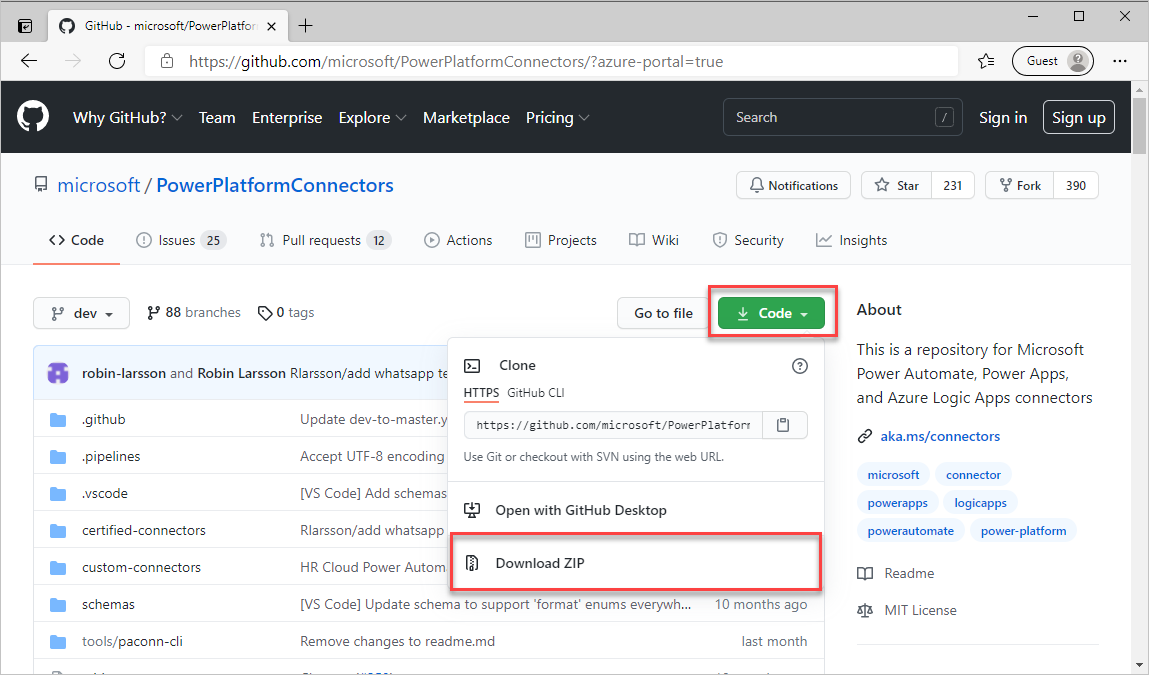
Go to the Microsoft Power Platform GitHub repository in a web browser.
Select the Code button and then select the Download ZIP link. Make a note where you save this zip file.
Locate the zip file that you downloaded. Right-click the file in Windows Explorer and select Extract All...
Go to the extracted folder and open the PowerPlatformConnectors-dev folder.
Open the custom-connectors folder.
Open the Office365Groups folder.
Make a note of the location of the apiDefinition.swagger.json file. You'll need this file when you create your custom connector in subsequent steps.
Go to the Power Automate maker portal in a web browser and sign in.
From the environment picker, select the environment that you created in the first module of this learning path. If you recall, an environment called Development was created. By selecting this environment, your custom connector will only be deployed in this environment and won't be available in your default environment.
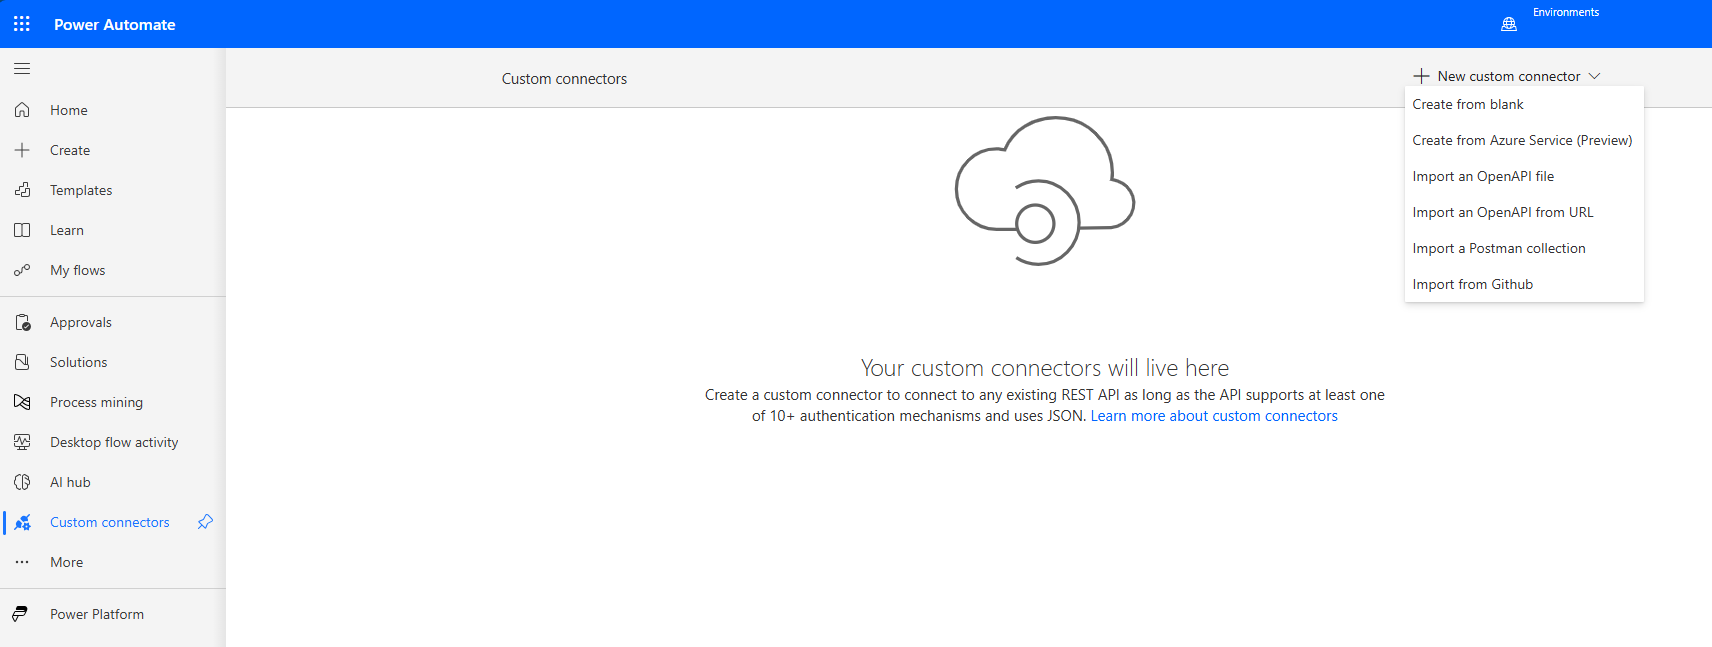
Within the left navigation pane, expand More and then select Discover all, then scroll down and select Custom connectors.
Select + New custom connector and then Import an OpenAPI file.
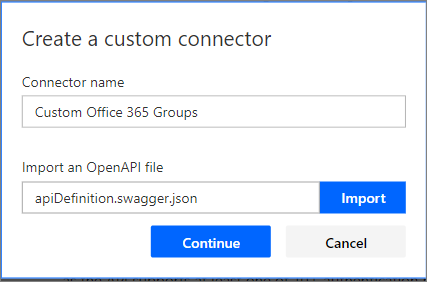
Enter Custom Office 365 Groups in the Connector name column. In the Import an OpenAPI file column, enter apiDefinition.swagger.json, select the Import button, and then select Continue. If you recall, this is the file that you located in step 7 of this exercise.
The custom connector publisher wizard will now be displayed. You don't need to complete actions on the General tab.
Select the Security tab and then select an Authentication type of No authentication.
No further actions are necessary on the Definition or Test tabs, so select the Create connector link to publish your connector.
In the upper-left corner, a message will briefly appear indicating that your custom connector has been published. Select the Close label to complete publishing the custom connector.
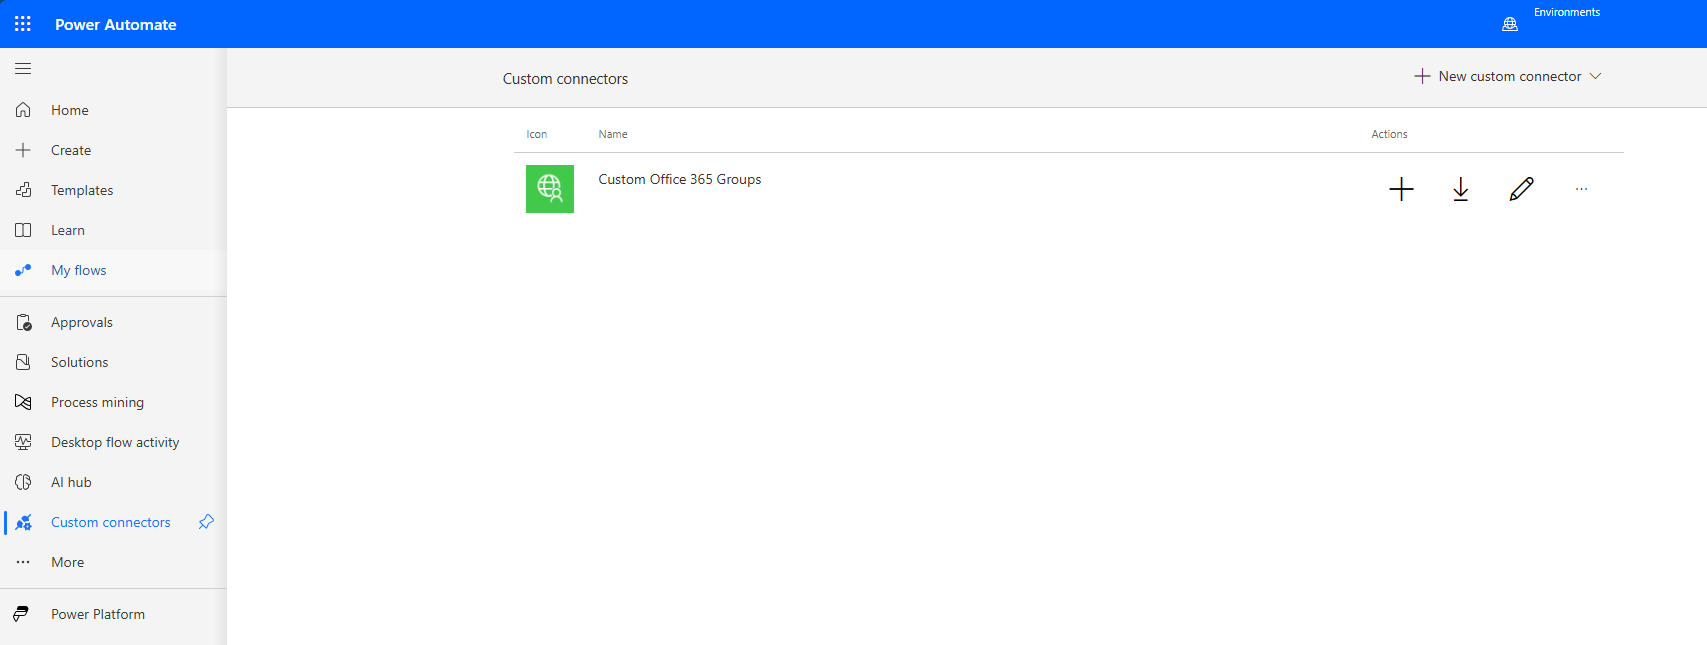
You should now see your custom connector available within the Custom connectors experience.
You have now published your custom connector. In the next topic, you'll manage this custom connector in a DLP policy.
Manage a custom connector in a DLP policy
Currently, a custom connector can't be managed through the Power Automate Admin center's DLP experience without some administrative actions. In this section, you'll use the Microsoft Power Apps and Power Automate PowerShell cmdlets for administrators.
To add a custom connector to a DLP policy, you'll need to retrieve some unique identifiers for your custom connector and DLP policy to provide them as inputs when adding your custom connector. These steps are also covered in the following section.
Note
Prior to attempting the following actions, ensure that you meet the prerequisites that were outlined earlier in this module.
Launch Windows PowerShell and select Run as Administrator.
Import the required modules by using the following commands:
Install-Module -Name Microsoft.PowerApps.Administration.PowerShell
Install-Module -Name Microsoft.PowerApps.PowerShell -AllowClobber
If you're prompted to accept the change to the InstallationPolicy value of the repository, accept [A] Yes to all modules by entering A and then selecting Enter for each module.
List all your DLP policies by running the following command in the Windows PowerShell command-line tool: Get-AdminDlpPolicy.

Note
You'll be prompted for credentials at this point. Ensure that the credentials you're using have Environment or Tenant Administrator permissions.
A list of DLP policies will be displayed. Look for the DLP policy that you created in the previous module. When you find the policy, copy the PolicyName, which is represented as a GUID, to a text editor like Notepad.

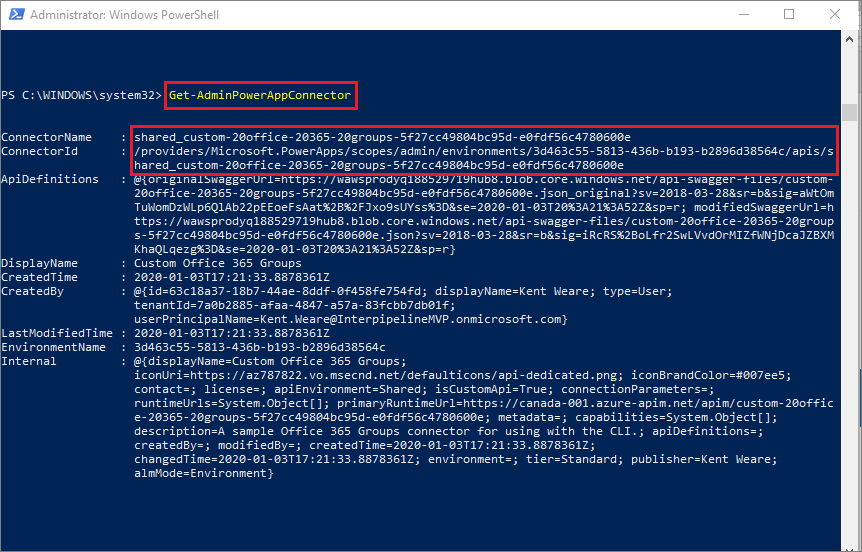
You now need to retrieve more details about your custom connector. To do so, enter Get-AdminPowerAppConnector in the Windows PowerShell command-line tool. When the results have returned, copy the ConnectorName and ConnectorId values to a text editor.
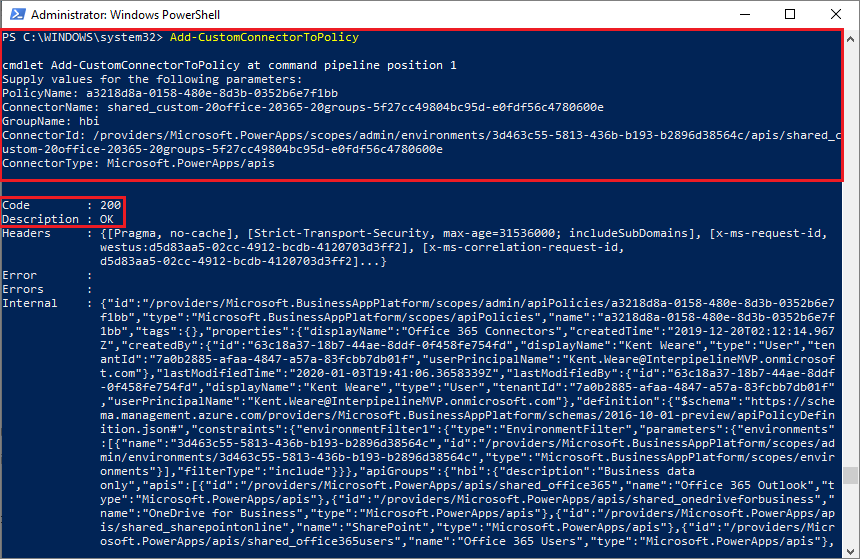
Enter Add-CustomConnectorToPolicy in the Windows PowerShell command-line tool.
When prompted, provide the PolicyName that you copied in step 5.
Provide the ConnectorName value that you copied in step 6.
Provide the GroupName of hbi to put it into the Business data only data group. Use lbi if you would rather put the custom connector in the No business data allowed data group.
Provide the ConnectorId that you copied in step 6.
You'll now be prompted to provide a ConnectorType. Provide a value of Microsoft.PowerApps/apis.
Your command should now run and you should be presented with a status Code of 200 and a Description of OK.
Validate that your custom connector can be managed through DLP policies by going to the Power Automate Admin center, and then explore your Office 365 Connectors DLP policy to ensure that your custom connector appears in your Business data only data group. You can now manage this custom connector, much like any other connector.
Note
Currently, you won't be able to rename the custom connector from this experience.