Send surveys from Dynamics 365 Customer Engagement
The task of creating projects and surveys within Dynamics 365 Customer Voice often lies with an organization's customer experience team or customer service team. The marketing team might also intercept to ensure that the branding and imagery are consistent with a company's corporate guidelines. If Microsoft Power Automate is required, and if complex flows must be created, it could be a member of a technical team who fulfills these requirements. Though many aspects of the feedback process for a business can be automated, an account manager can know the appropriate time to request quick feedback about a moment of truth.
In these situations, an automated process isn't needed. Instead, the ability to send and link a Customer Voice survey to a contact record within Microsoft Dynamics 365 Customer Engagement is required. Organizations can empower account managers and other customer-facing roles to accomplish this task by adding a Send Survey button to leads, contacts, accounts, opportunities, cases, and to any custom table that has the timeline enabled.
No cost or configuration is required to add this button. To install it, go to the Microsoft commercial marketplace and add the Send Customer Voice survey from Dynamics 365 app. The installation is typically handled by a system administrator for Dynamics 365. Select the Get it now button to initiate a request to agree to terms regarding account information and how Microsoft will interact with the user.
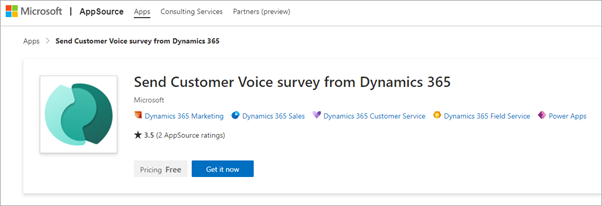
After you make sure that you're signed in, you'll be redirected to Microsoft Power Platform admin center and prompted to select an environment in which to add the Send Survey solution. Using the example of the contact, the Send Survey button will be visible after the installation of the solution is complete. Immediately after a client visit, the account manager might determine that it's a good time to request feedback from one or more of the contacts whom they've met with. A member of the team who is responsible for taking this action can create an account management visit survey in Dynamics 365 Customer Voice. Then, they can share this survey with all members of the account management team. After the survey has been shared, the account manager can go to a contact record and select the Send Survey button from the top ribbon.
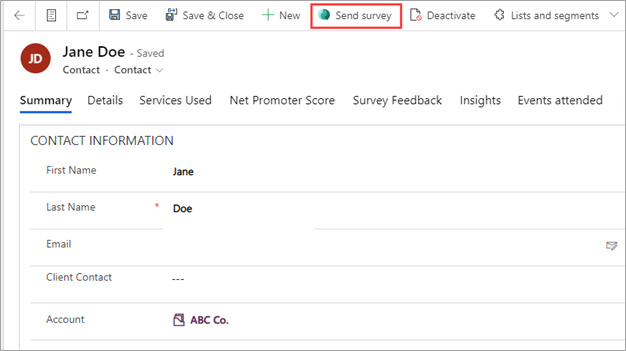
When you select the button, a dialog screen will open with a list of all surveys that you have access to. Now, you can select the correct survey and navigate to the next screen.
Make sure that you document surveys that are shared with users and will be sent in this fashion to ensure that people are clear about which variables have been added to the survey and the related email templates. When someone selects a survey and then gets to the next screen, they must fill out the data that will be used to send the survey and populate the variables.
The First Name and Last Name variables are always included within a survey and can't be deleted. These two values will be passed through automatically if you send the survey from a contact record. If you send from an account, the primary contact will be used as the recipient. For the opportunity and case, the app will use the contact or customer (depending on what is used by the organization) on the record as the survey recipient.
You will need to manually populate other variables that have been added to the survey before you send it. If these variables aren't added, the survey and email that are sent might appear odd and will show the name of the variable or default value that the creator of the survey might have added.

Typically, the recipient of the survey will be the contact (unless you send from a case or opportunity that is only linked to an account). Where you send the survey from dictates what record the survey invitation and subsequent survey response will be linked to in the corresponding field of those activities. For example, sending from an account to the primary contact will mean that the survey-related activities will be added to the contact's timeline and will also be found on the account's timeline. You can populate the locale value after you have selected the email template to make sure that the correct language has been set.
Using this free solution from the Microsoft commercial marketplace provides you with the ability to send the appropriate surveys for gathering feedback at the correct time in a customer's journey. The next unit will discuss how to capture and review customer-related satisfaction metrics within Dynamics 365.
Watch the following video for a quick demonstration about sending surveys.