Hearing and comprehension features
In real work, users can miss information when audio quality, background noise, hearing needs, or language barriers make content harder to follow. Windows accessibility features help make spoken information easier to understand during meetings, recordings, training, and collaboration.
Live Captions
With Live Captions, Windows can automatically transcribe spoken content from audio sources so users can follow along more reliably during video calls, recordings, and streamed content. Live Captions process audio and generate captions on the device, so audio and captions don't leave the PC. Captions can also work offline after setup and language file download. Users can position captions at the top or bottom of the display or in a floating window so they remain readable during work. The workplace outcome is better comprehension, reducing the risk of missed details or repeated follow-up.
On supported Copilot+ PCs running Windows 11, version 24H2 and later, Live Captions translation is available where supported. This can help users stay engaged when language, not just audio quality, is the barrier. Feature availability varies by device, configuration, region, and language.
Note
All audio and caption processing occurs on-device—audio, voice data, and captions aren't sent to the cloud. Live Captions translation is available on Copilot+ PCs running Windows 11, version 24H2 and later. Feature availability varies by device and configuration.
Now that you understand what Live Captions can do, let's explore the ways to turn on Live Captions on your Surface:
- Open quick settings, select the battery, network, or volume icon on the taskbar, then select Live Captions.
- Turn on the Live Captions toggle in the quick settings Accessibility flyout.
- Press Windows logo key + Ctrl + L.
- Select Start > All apps > Accessibility > Live Captions.
- Go to Settings > Accessibility > Captions and turn on the Live Captions toggle.
When turned on for the first time, live captions will ask for your consent to process voice data on your device and prompt you to download language files to be used by on-device speech recognition. If your language isn't available, you can use another language during setup.
You can also personalize how captions are displayed on your Surface. To choose where captions are displayed on your desktop do the following:
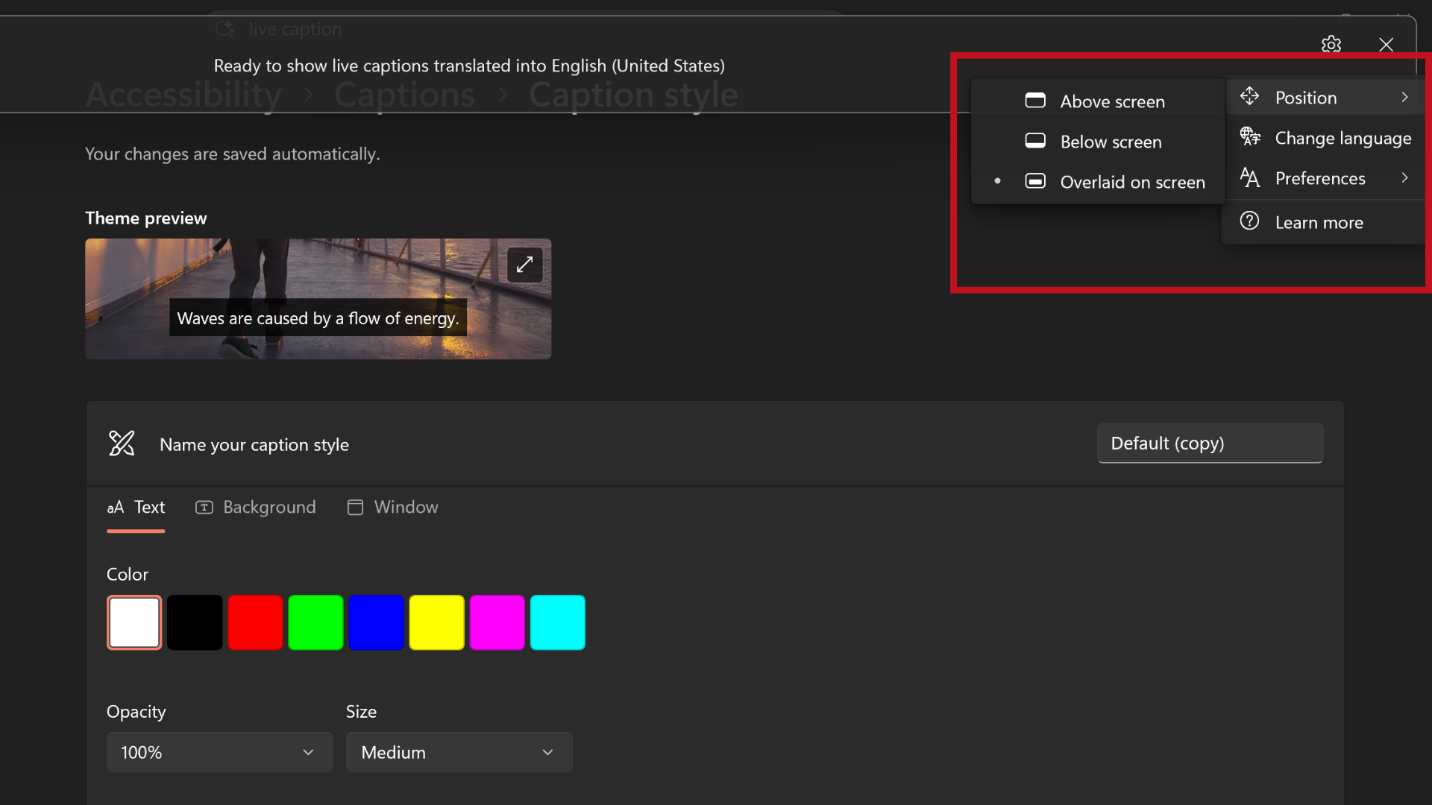
- Select the Settings button in the live captions window.
- Select Position.
- Choose either Above screen, Below screen, or Overlaid on screen.
Note
When you choose Above screen or Below screen, the captions window appears as docked to the top or bottom screen edges in reserved space on your desktop, and other apps won't be blocked by the captions window. When docked to the top, you might find that Live Captions works well while sharing video in a virtual meeting or conversation, whereas in other cases, such as viewing videos, docking to bottom might work best. When you choose Floating on screen, Live Captions will appear in an overlay window, which you can reposition as needed to avoid obscuring other apps in use.
Lastly, you can customize Live Captions to make them easier to read. To do so, do the following:
- Select the Settings button in the live captions window.
- Select Preferences.
- Select Caption style. The Accessibility settings for Captions opens.
- Under Caption style, select a built-in style from the dropdown menu. Use the Default built-in style to have captions displayed with colors appropriate to your device's dark or light mode setting in Settings > Personalization > Colors > Choose your mode.
- Select the Edit button to create a custom style that works best for you.
Why this matters: Live Captions help reduce communication gaps when audio quality, background noise, hearing needs, or language barriers make spoken information harder to follow.
Use case scenario: A sales representative joins a virtual customer briefing from a busy airport and turns on Live Captions to follow key product requirements without asking the customer to repeat information.
Voice Focus
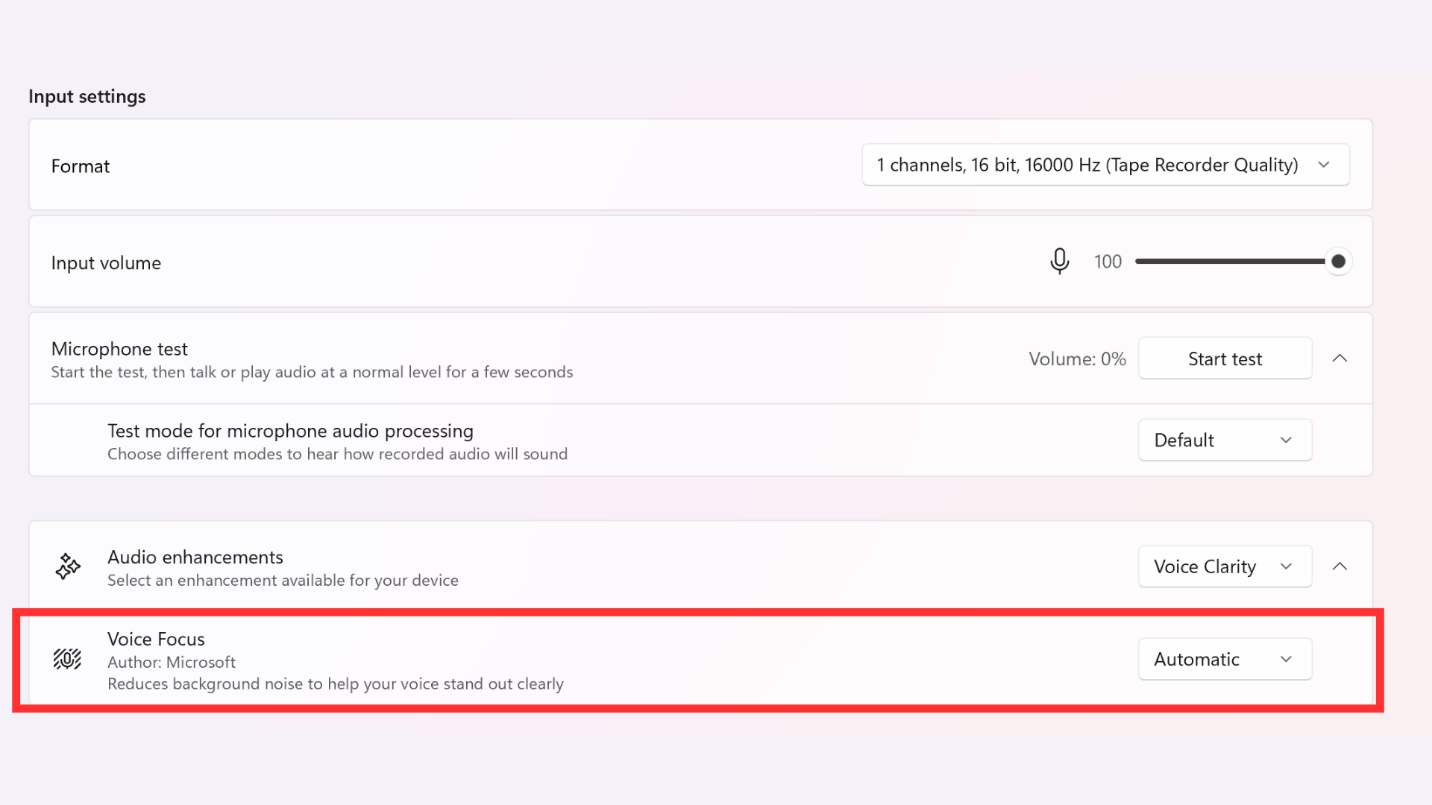
Background noise can become a barrier when users are trying to hear or be heard clearly during calls. Voice Focus helps address this barrier by using AI-based noise suppression to reduce background noise while keeping speech clearer. On supported Surface Copilot+ PCs, Voice Focus is part of Windows Studio Effects. Availability can vary by device, microphone, app, and configuration. The workplace outcome is clear communication, less repetition, and better focus during hybrid collaboration.
- Open Windows Settings by pressing Windows key + I on your keyboard.
- Select System, then select Sound.
- In the Sound settings, scroll down to find the Input section.
- Select Microphone array.
- Scroll down to Audio Enhancements.
- Select the Voice Focus toggle to enable the feature.
Why this matters: Voice Focus supports clearer hybrid collaboration by helping speech stand out when users take calls from shared spaces, open offices, or other noisy environments.
Use case scenario: A consultant joins a Teams call from a hotel lobby and enables Voice Focus so background conversations are reduced and stakeholders can hear the update more clearly.