Exercise - Publish an OpenAPI enabled web API to Azure App Service
In this exercise, you deploy your web API application to Azure App Service through Visual Studio.
Note
In the previous exercise, you already have the ASP.NET Core Web API app with the OpenAPI feature enabled. You will use the app for this exercise.
You need an Azure subscription to complete this module. If you do not have one, you can sign up for a free one here.
Deploy Web API Application to Azure App Service through Visual Studio
After the previous exercise, the web API application is ready to publish. In order to deploy the web API application, run the following steps.
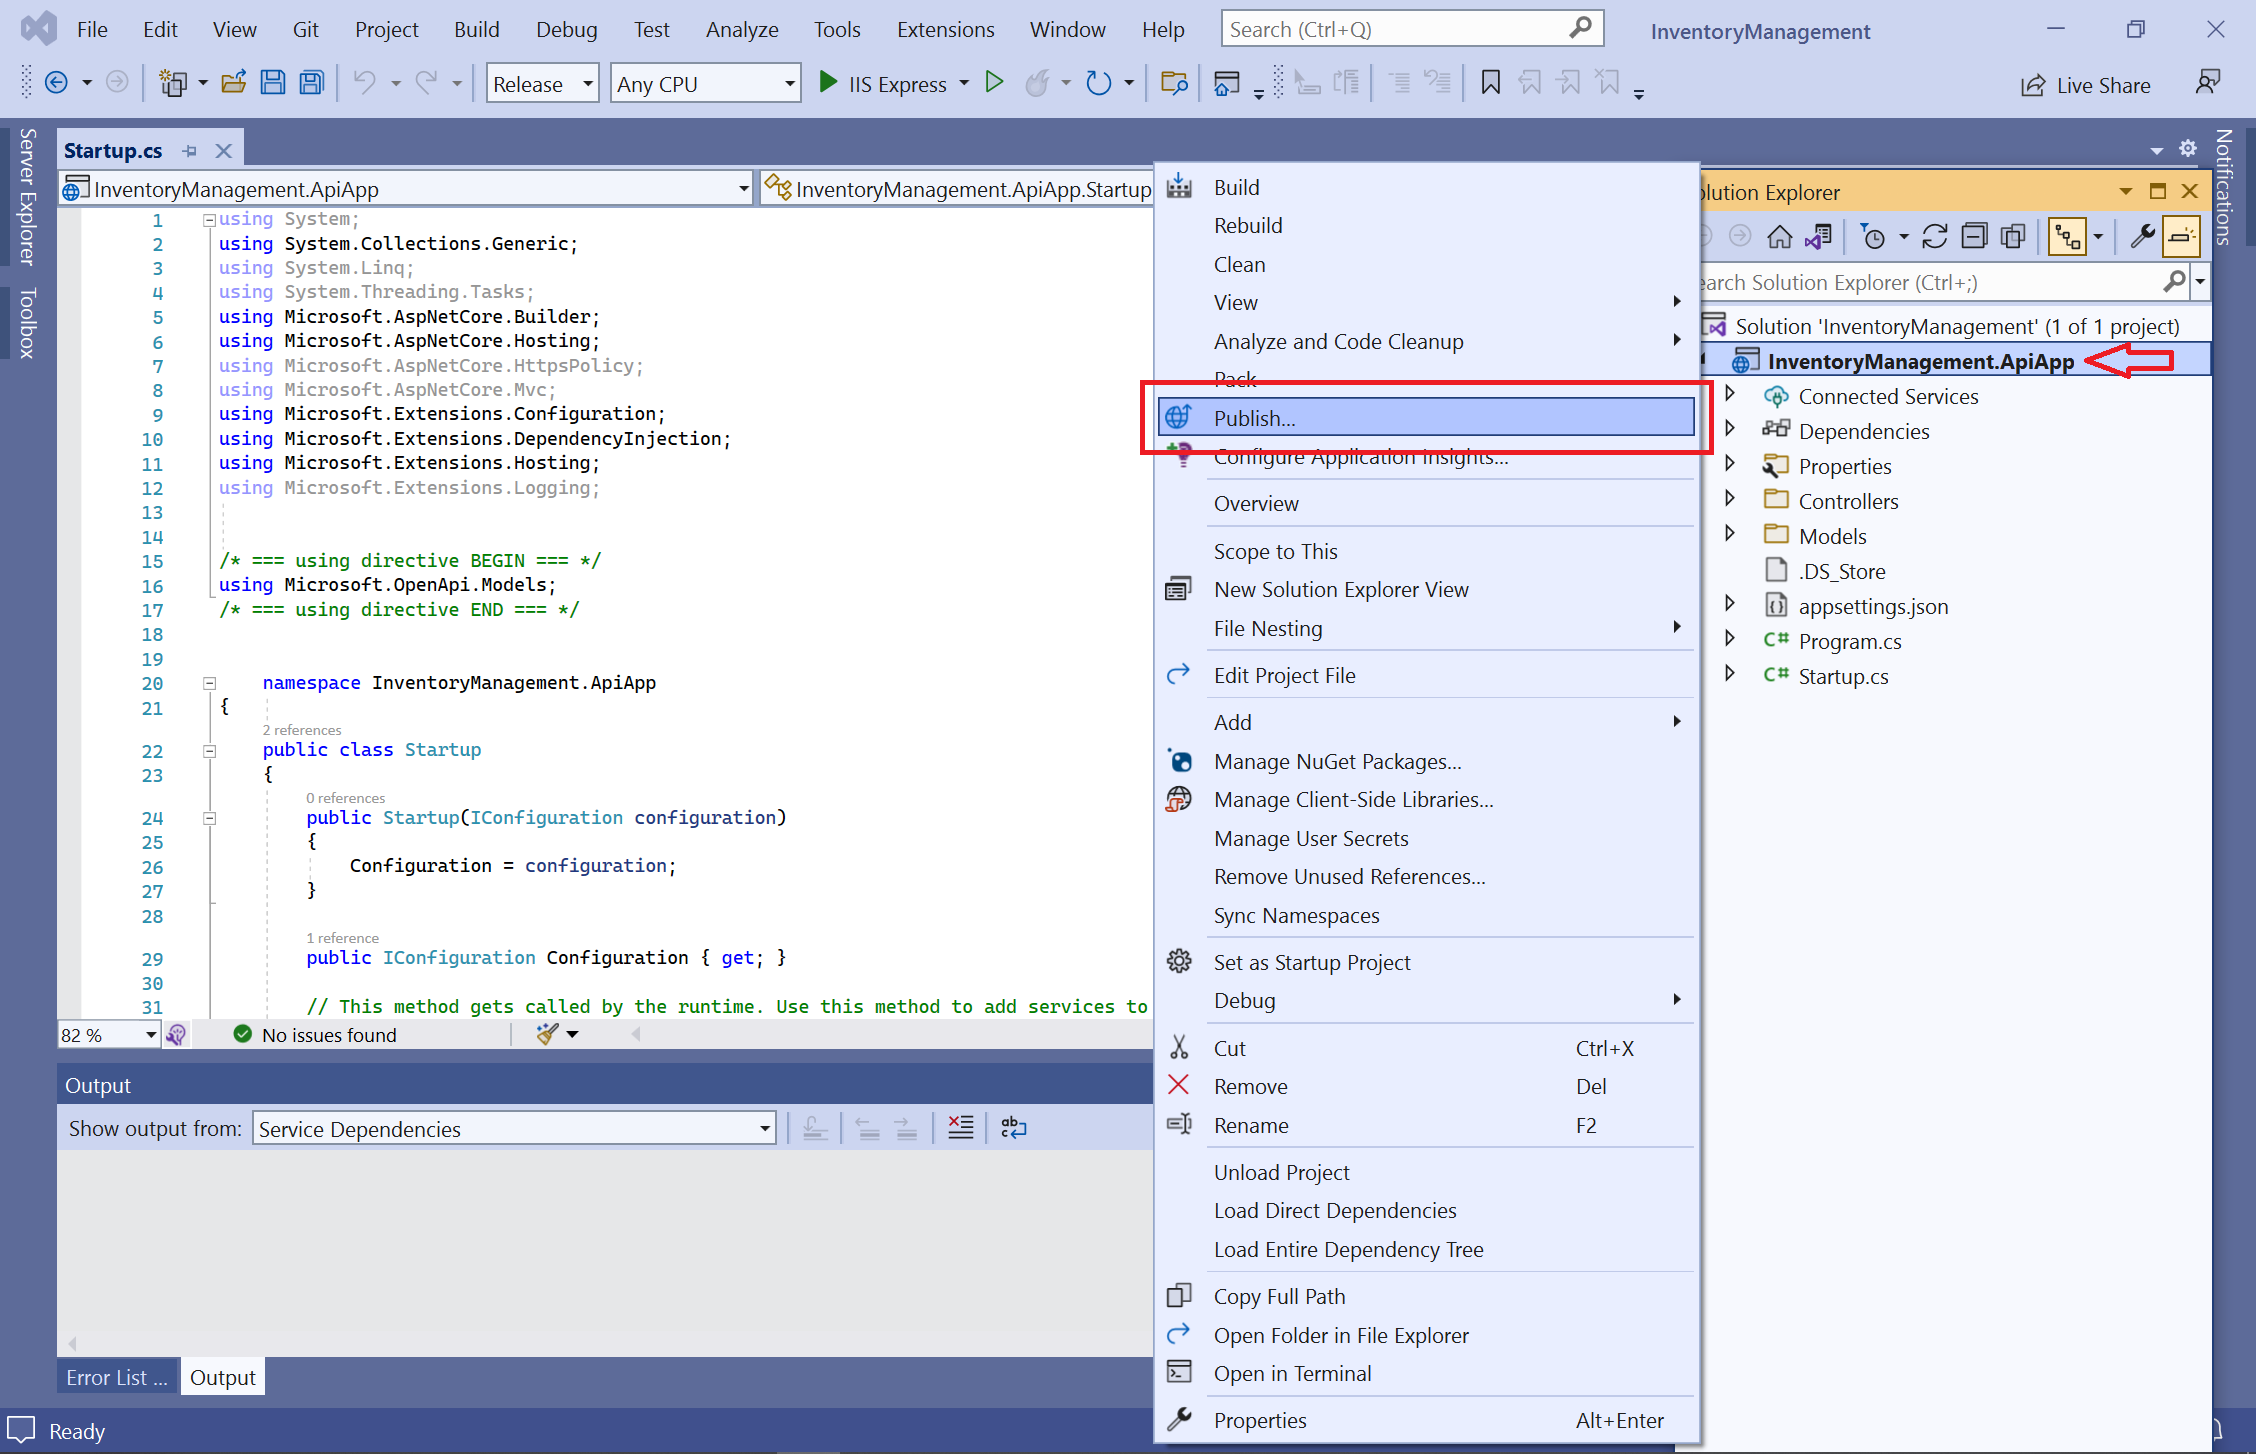
In Solution Explorer, right-click the project and select the Publish menu.

In the Publish dialogue modal, select Azure and select the Next button. (You may need to sign in to your Azure subscription first.)

Select Azure App Service (Windows) and select the Next button.

Let's create a new Azure App Service instance through Visual Studio, for this exercise. In the future, you could use an existing one. Select the
➕button at the dialogue modal to create a new Azure App Service instance.
When a new App Service (Windows) dialogue modal pops up, all field values are automatically populated. You can use the prepopulated ones or change them. Fill in all the field values and select the Create button.

Your new Azure App Service instance has been created. Select the Next button.

For now, publish the web API app only to the Azure App Service instance. You can skip the deploying to API Management step for now. Check the Skip this step tick box and select the Finish button.

Your web API app is ready to deploy. In Settings, in the main pane, confirm that the Target Framework references your version of Visual Studio. Select the Publish button in Visual Studio.

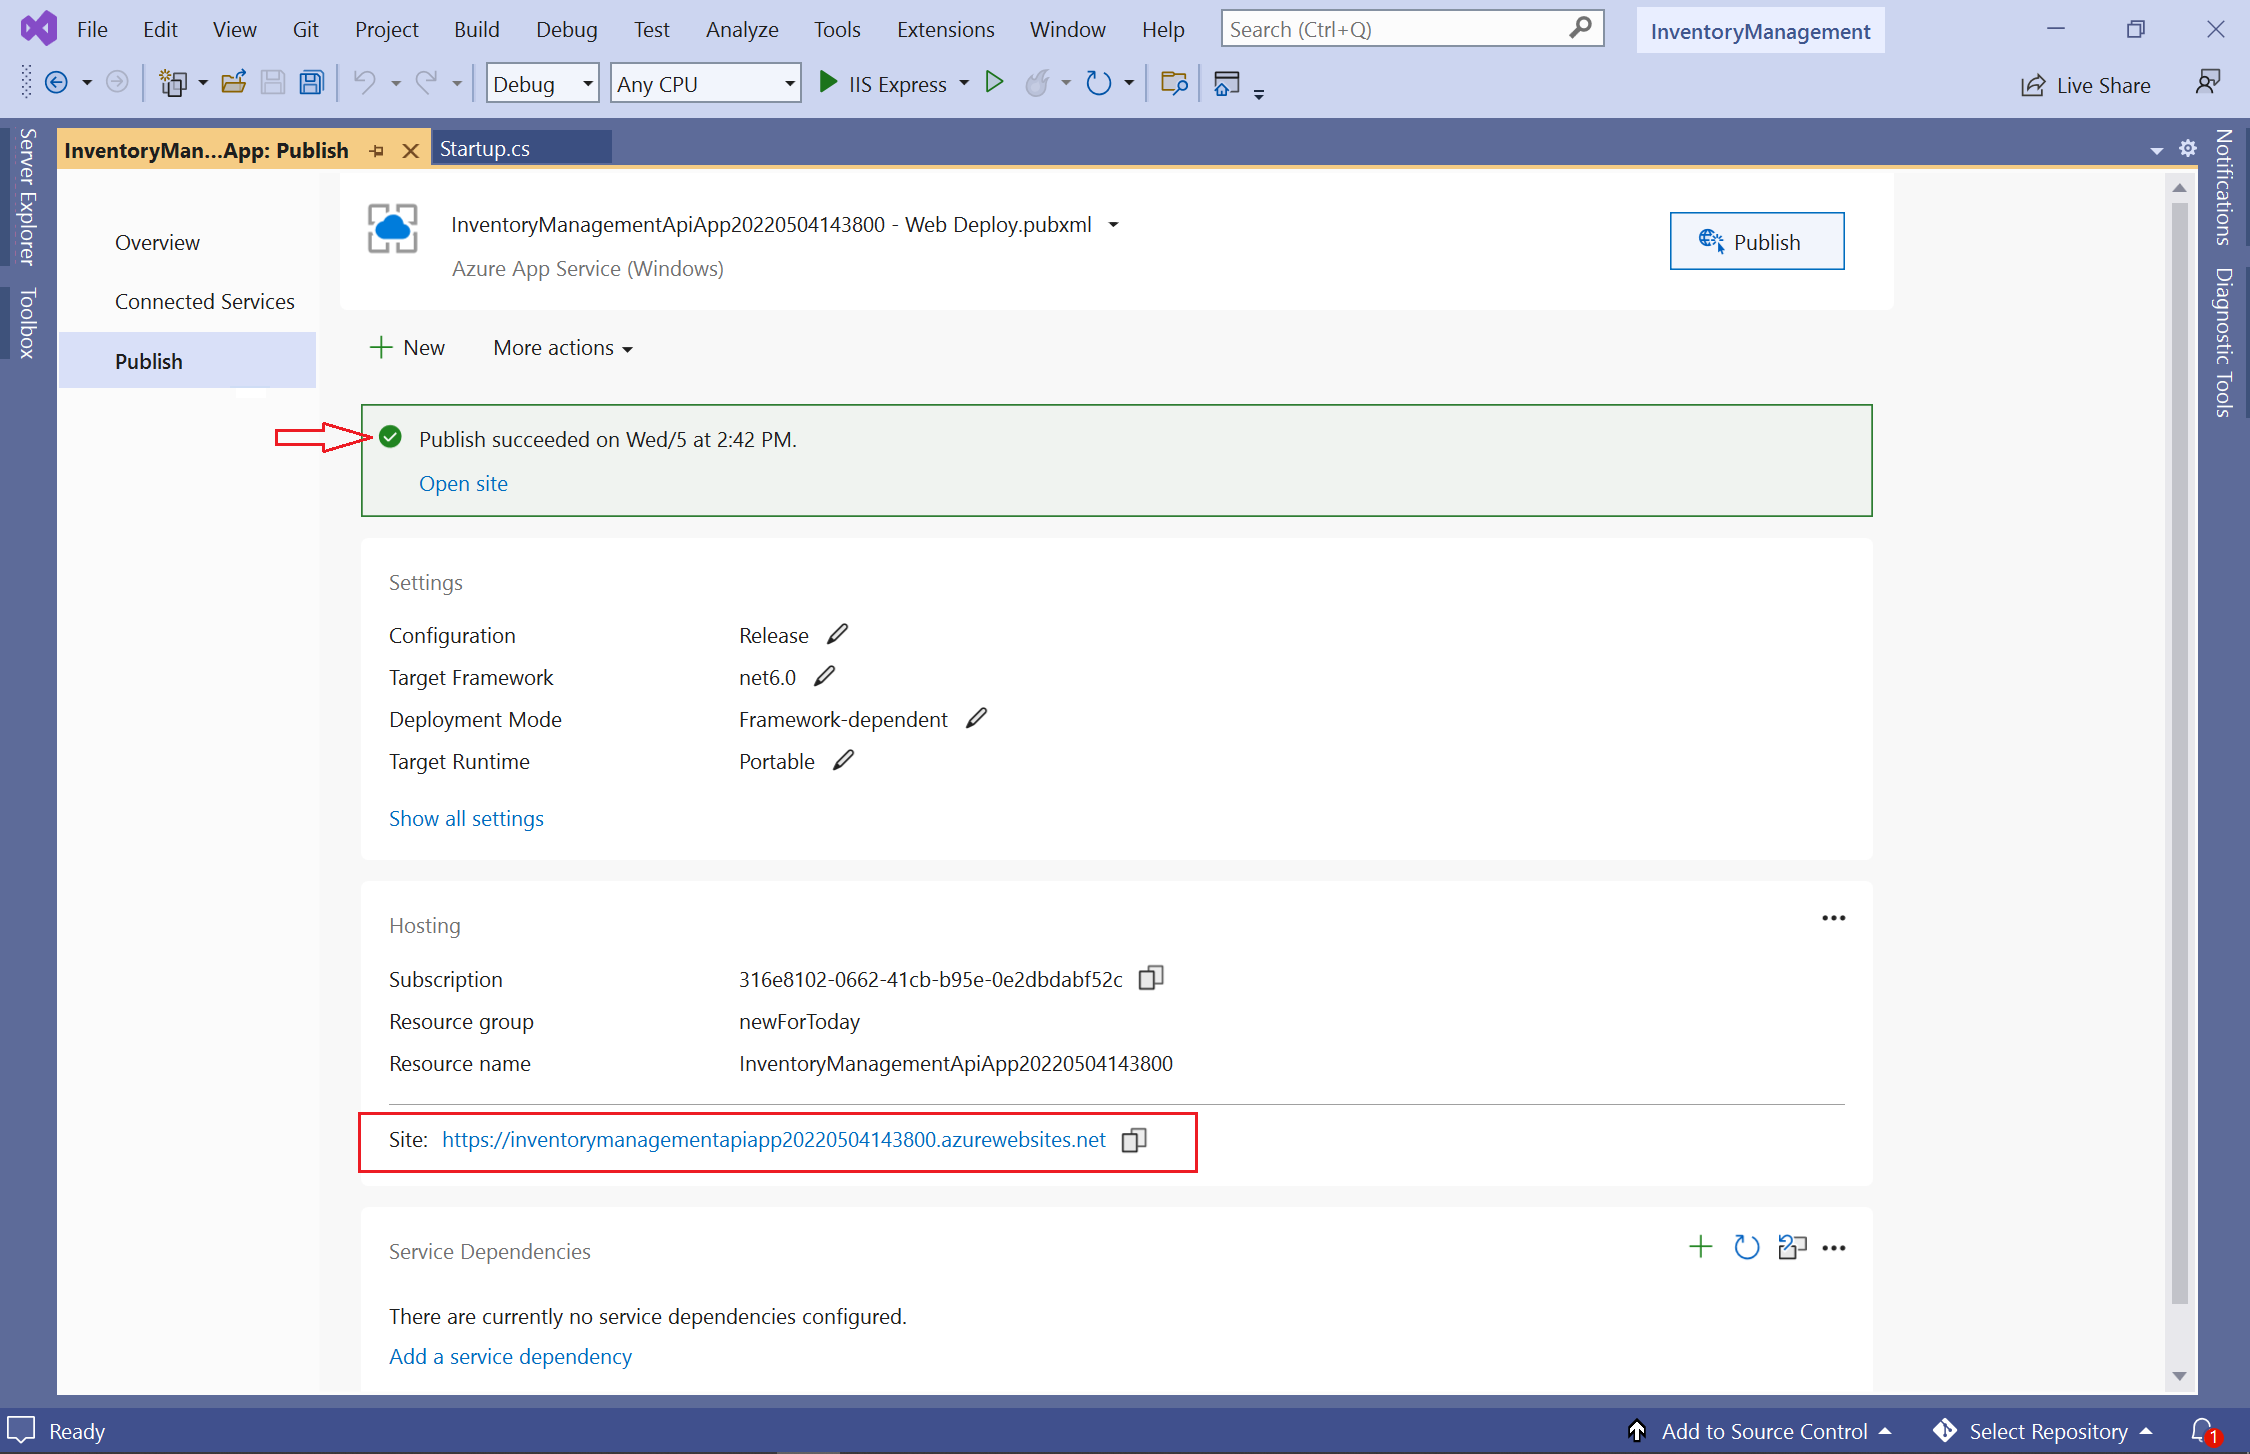
Once the web API app is published, Visual Studio notifies you through a banner. Copy the website URL for later use.

Verify the web API application is running
Let's ensure your web API app is properly deployed. Open your web browser and enter the website URL you copied from the previous step. A Page Not Found error, like the one in the following image, is expected.

Edit the URL with
/swaggerby selecting the<copied-website-url>according to the following example.<copied-website-url>/swaggerThe Swagger UI page now renders correctly. Select the /api/WarehouseLocations banner to expand it.

Select the Try it out button.

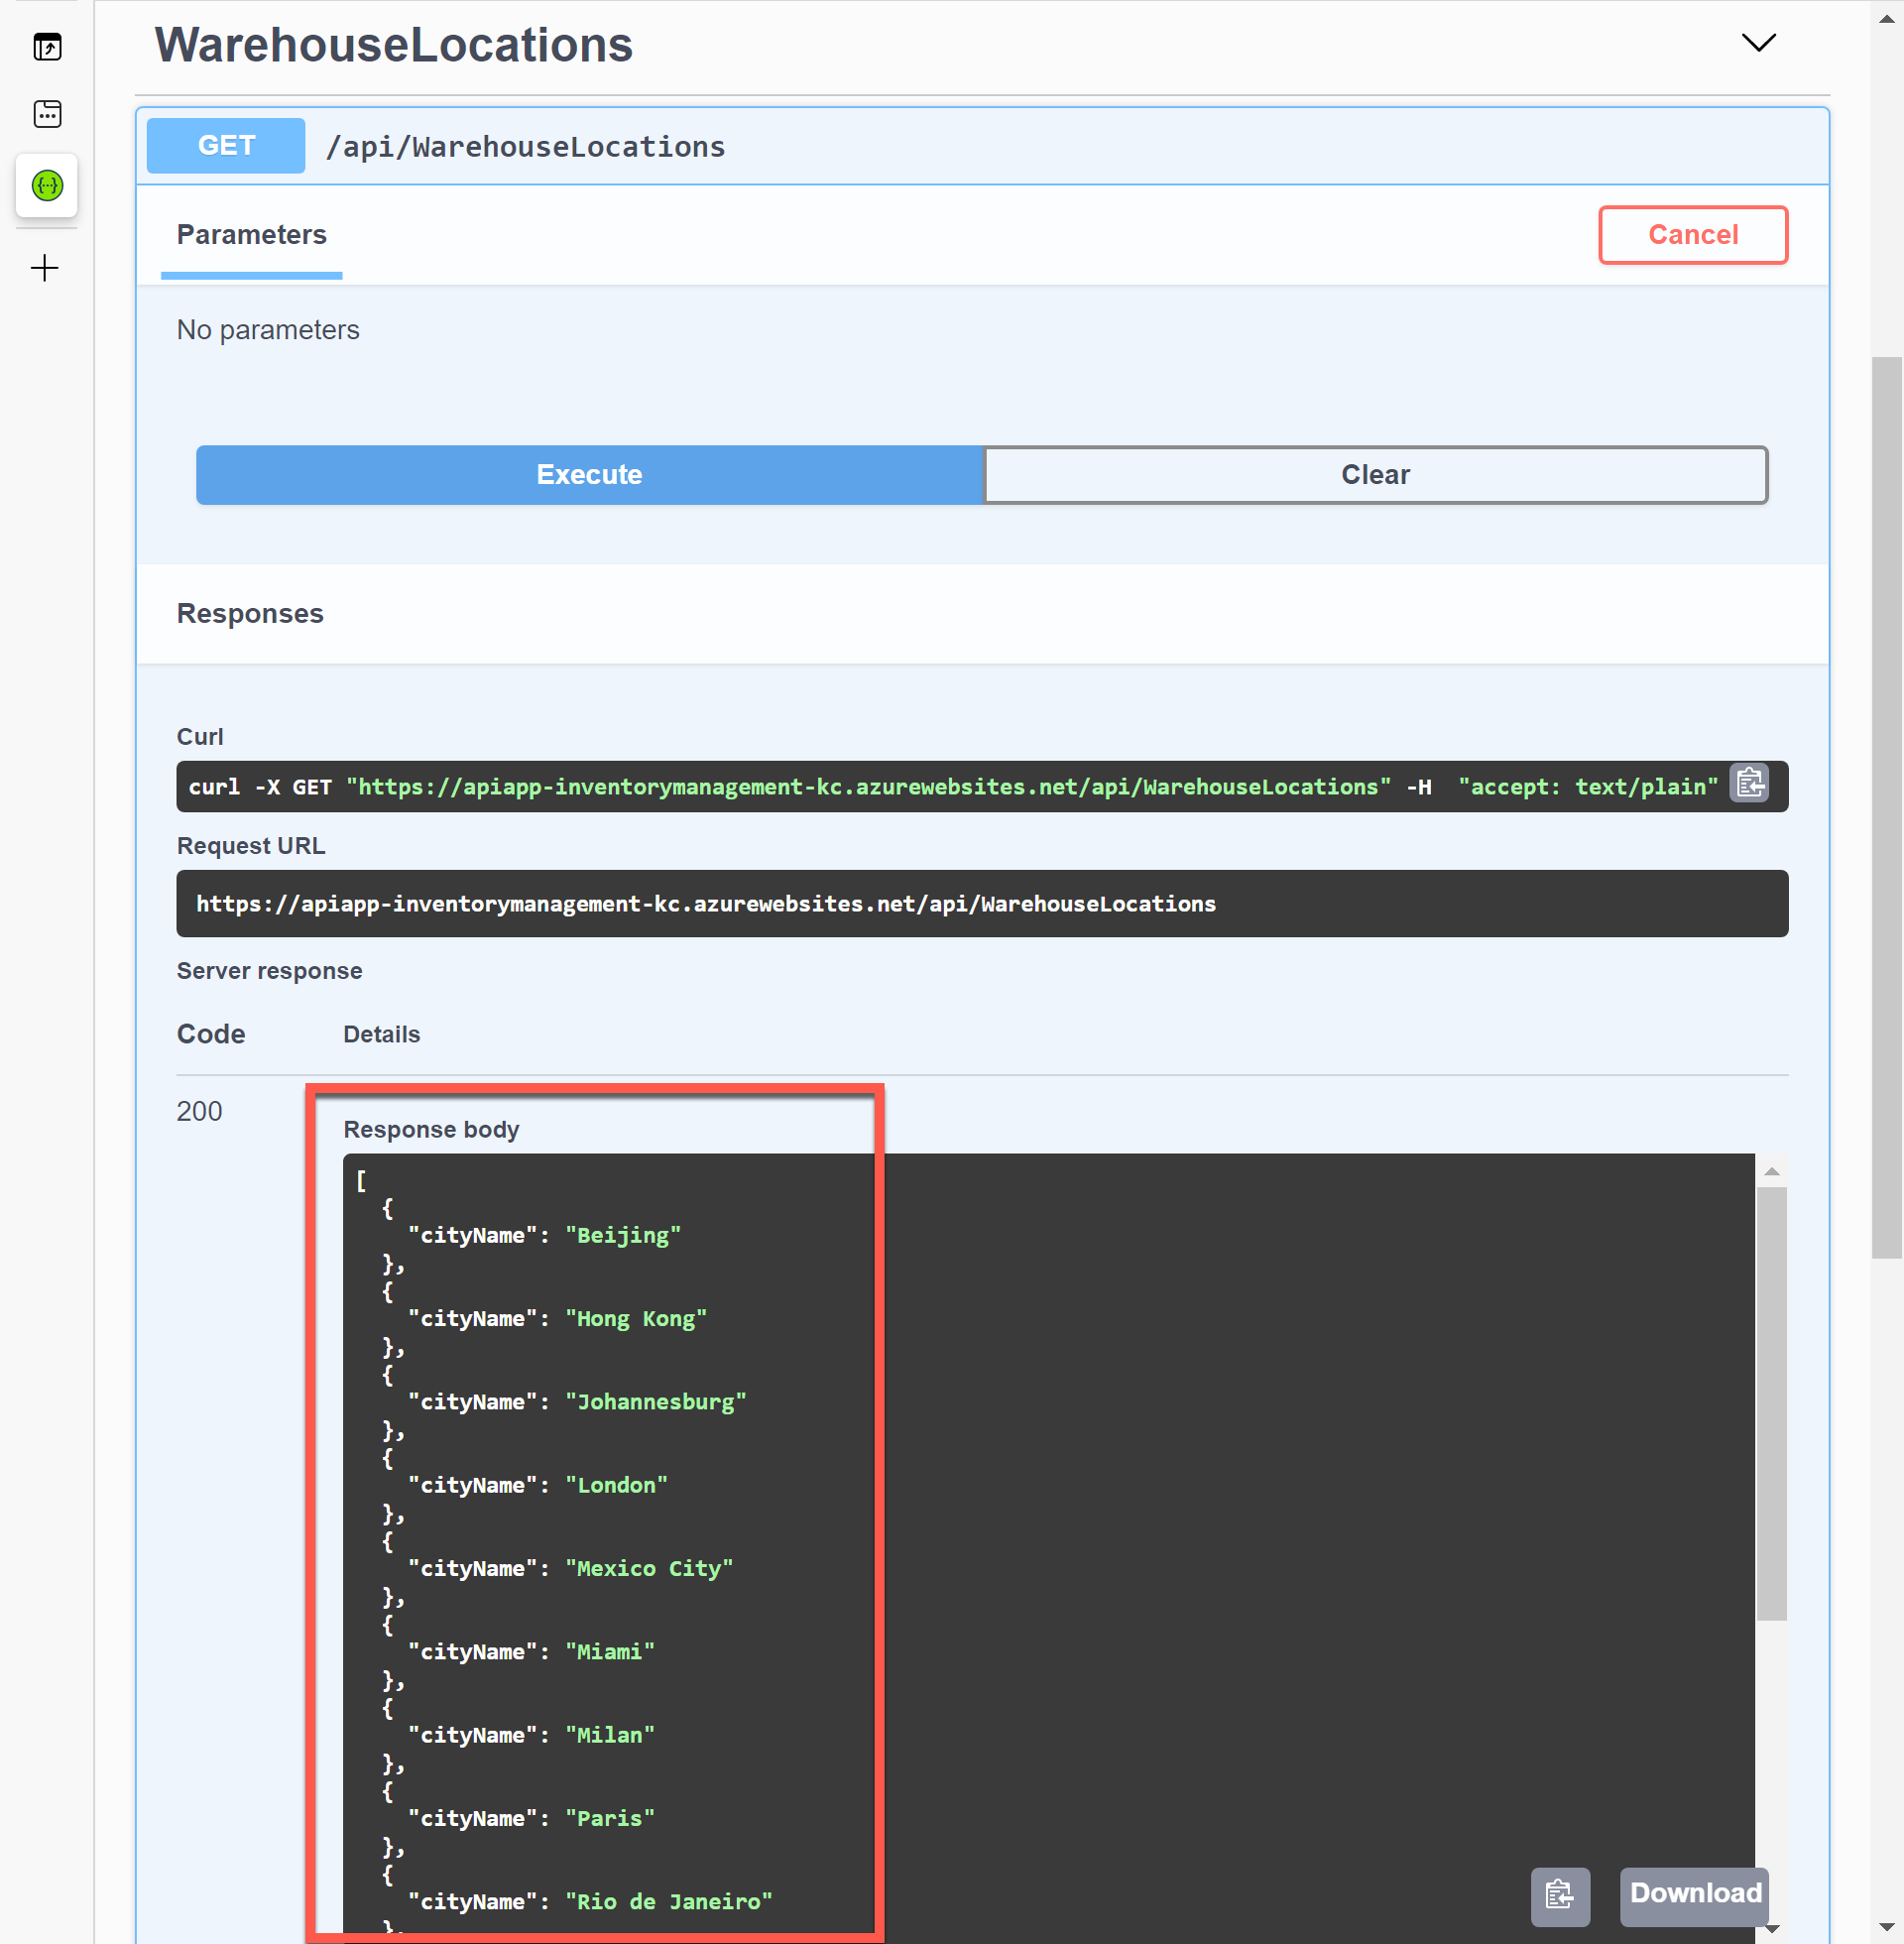
Select the Execute button.

View the result.

Congratulations! You've now published your ASP.NET Core Web API app to Azure App Service through Visual Studio!