Optional exercise - Add a Teams notification
In this optional exercise, you modify the existing flow to include a Microsoft Teams notification for your approval flow.
Note
To complete the exercises, you'll need to use a few files. Download the App in a Day files for use in this module. The file folders that are in this download include:
- Completed modules with instructions - Package files to import the completed exercise steps.
- Machine-Order-Data.xlsx - File used in the exercises.
Section 1: Modify the flow
Before you begin, ensure that you're currently viewing the New machine approval request cloud flow, within the Contoso Coffee solution, in Edit mode.
To modify the flow, follow these steps:
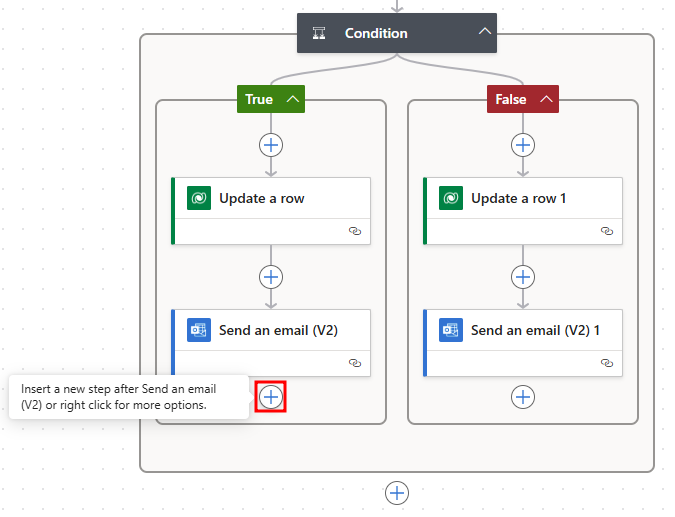
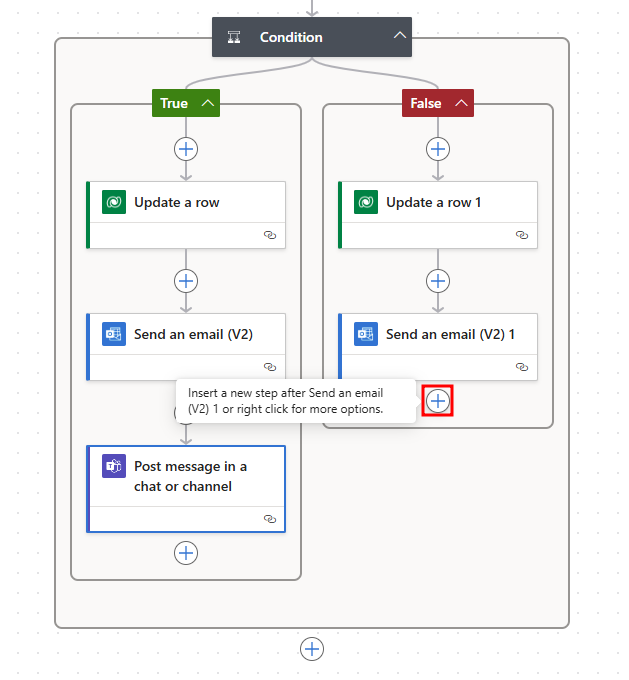
In the True branch of the condition, select the + icon after the Send an email action to open the Add an action pane.
Search for
post a messageand select Post a message in a chat or channel. You might be prompted to sign in.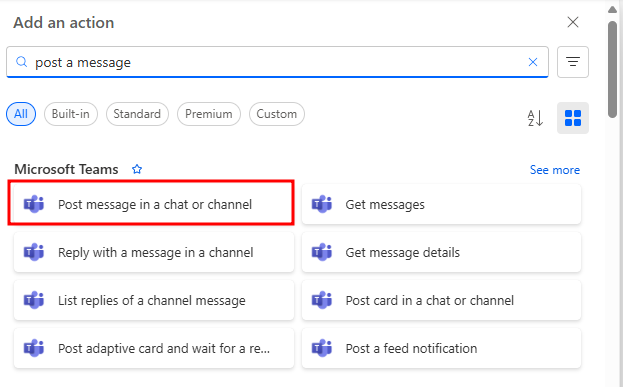
Note
You may need to sign in to create a connection to Microsoft Teams. Select the Sign in button to form this connection.
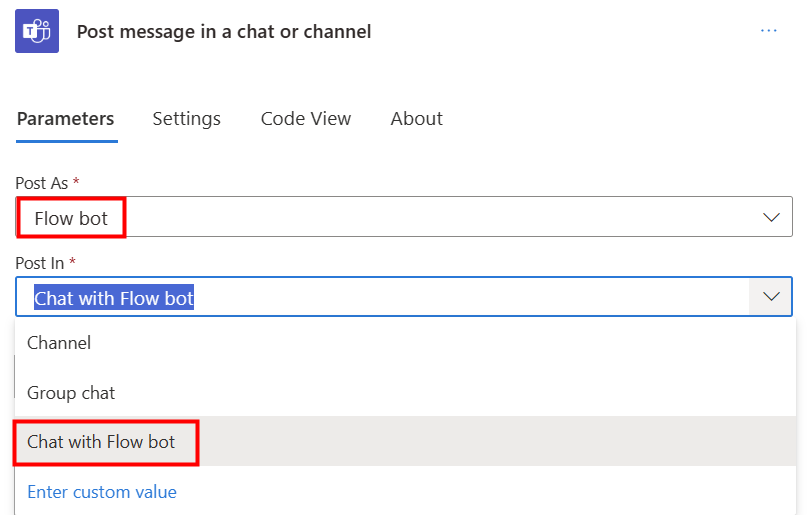
Select Flow bot from the Post as dropdown menu, and then select Chat with Flow bot from the Post in dropdown menu.
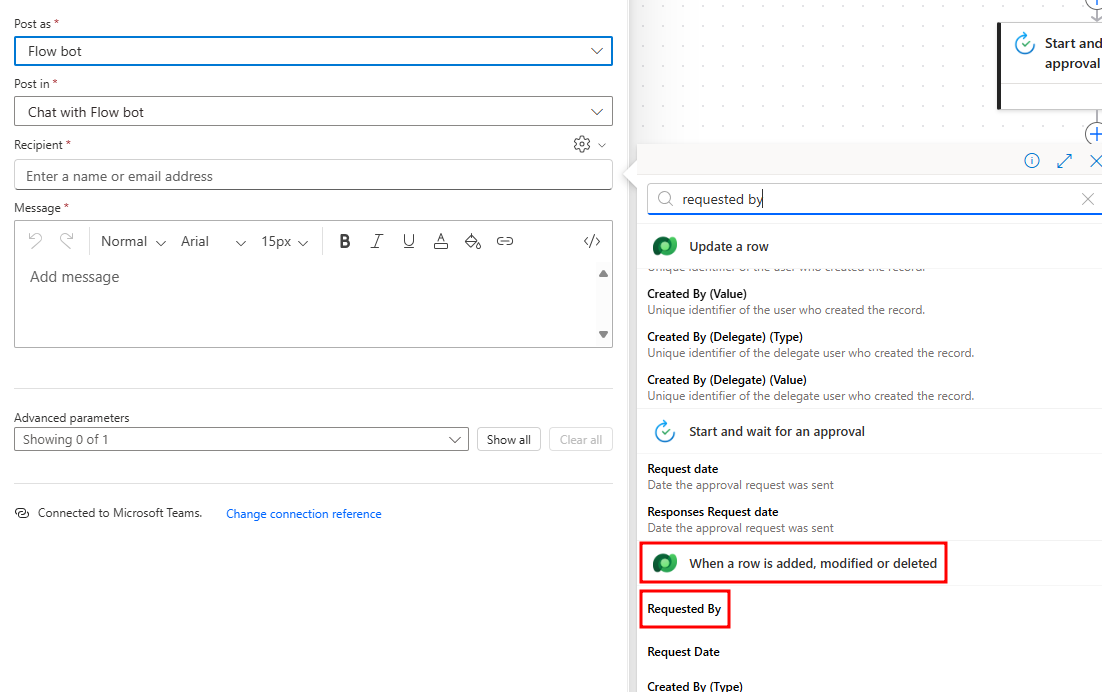
Switch to Advanced Mode, select the Recipient field, and open the dynamic content pane by selecting the lightning bolt icon.
Select Requested By under When a row is added... in the Recipient field.
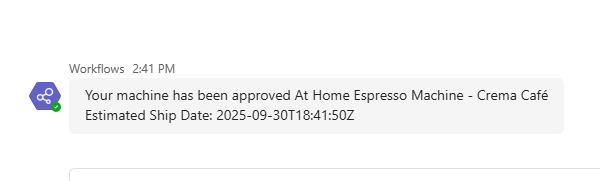
In the Message box, type
Your machine has been approvedand then select Machine Name from under the dynamic content When a row is added... header.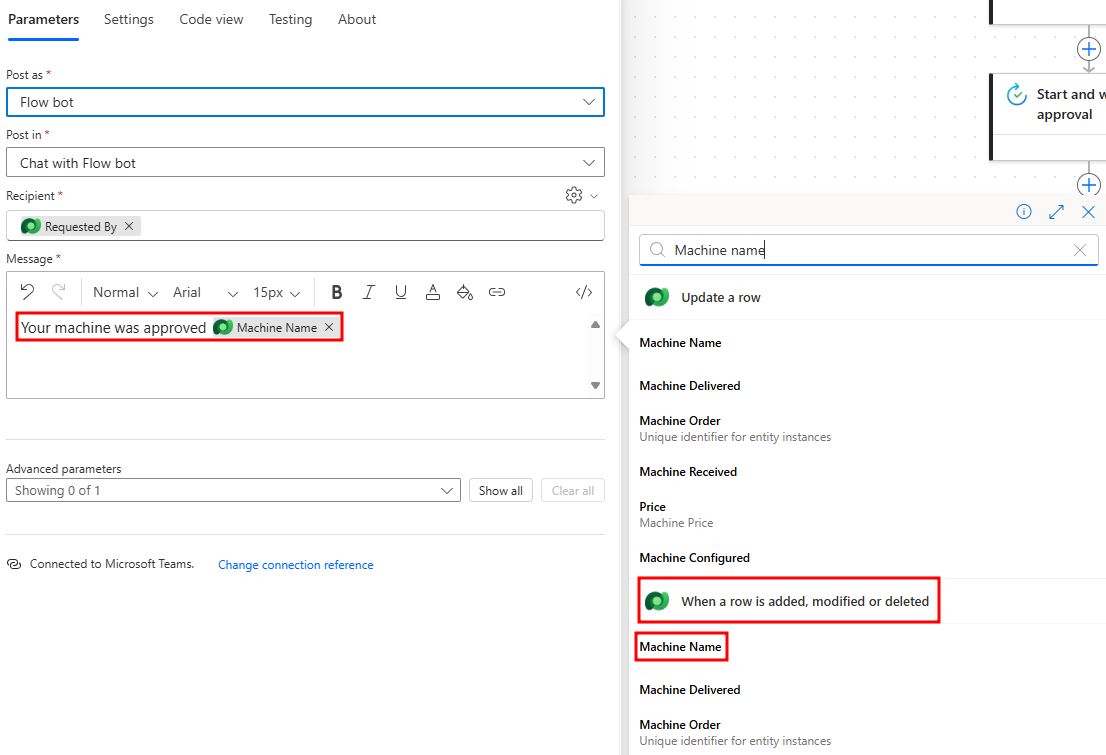
Move to the next line of the message, then type
Estimated Ship Date:and then select Estimated Ship Date from under the dynamic content Update a row header. Important to make sure you select the Estimated Ship Date from the Update a row action.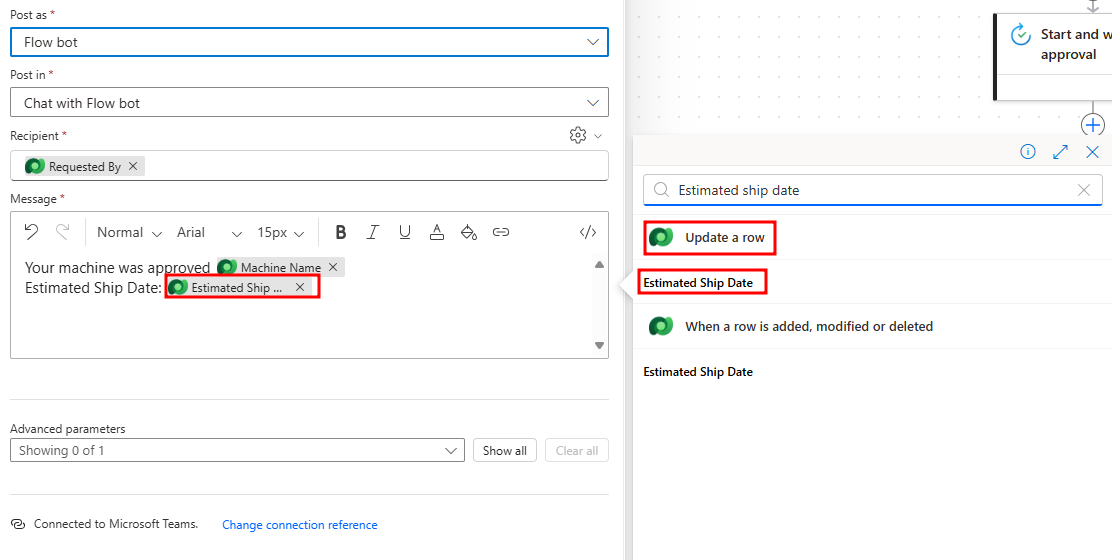
In the False branch of the condition, select the + icon after the Send an email action to open the Add an action pane.
Search for
post a messageand select Post a message in a chat or channel.Select Flow bot from the Post as dropdown menu, and then select Chat with Flow bot from the Post in dropdown menu.
Switch to Advanced Mode, select the Recipient field, and open the dynamic content pane by selecting the lightning bolt icon.
Select Requested By under When a row is added... in the Recipient field.
In the Message box, type
Your machine request forand then select Machine Name from under the dynamic content When a row is added... header, then typewas not approved.
Select Save to save your changes.


Section 2: Test your modified flow
Now that the flow is modified, you're ready to test it.
In another tab, go to Microsoft Teams.
Open a third tab and run the Machine Ordering app. Select a machine and submit an approval request.
You should receive an email with options to approve or reject the request. Select Approve.
After you select Submit, a message and a notification should display in the Chat tab on your app bar from the flow bot. Select to open the chat. Wait a moment if it doesn't appear immediately.
The approval of the request should be visible.