Implement custom services and the Batch OData API
You can use custom services to expose business logic to an external service. Data contracts help you pass complex business logic.
The Batch OData application programming interface (API) provides an interface that you can use to reschedule batch jobs by using OData.
Implement custom services
Data entities expose data simply and externally. When you use custom services, you can expose more complex business logic to an external service. Essentially, you can conduct advanced calculations for a request and then return it as a response.
All custom services in finance and operations apps always deploy with SOAP and JSON endpoints. A custom service consists of three classes:
A data contract class for requests - The suffix for this class should be Request.
A service class for business logic - The suffix for this class should be Service.
A data contract class for responses - The suffix for this class should be Response.
After creating the classes, you need to add the service class to a service. Then, the system can include it in a service group.
To make a simple custom service in which you send two numbers and get a summary in return, follow these steps:
- Create a data contract request class with two attributes for each number.
- Create a data contract response class with one attribute for the result.
- Create the service class.
- Add your business logic method from the service class to a service, and then add the service to a service group.
- Test the new custom service by using tools that you prefer.
Create a data contract request class with two attributes for each number
To create a data contract request class with two attributes for each number, follow these steps:
Create a new project in Visual Studio for your code.
Right-click your project to open the context menu, and then select Add > Class.
Enter a request name for your data contract class. In the following example, the class is named MB500_CustomServiceRequest.
In the code editor, add the
DataContractAttributeattribute before the class name to indicate that it's a data contract class, as shown in the following example:[DataContractAttribute] internal final class MB500_CustomServiceRequest { }Add the
DataMemberAttributeattribute for each number that the system should serialize in the request, as shown in the following example:[DataContractAttribute] internal final class MB500_CustomServiceRequest { real numberA; real numberB; [DataMemberAttribute('numberA')] public real parmNumberA(real _numberA = numberA) { if (!prmisDefault(_numberA)) { numberA = _numberA; } return numberA; } [DataMemberAttribute('numberB')] public real parmNumberB(real _numberB = numberB) { if (!prmisDefault(_numberB)) { numberB = _numberB; } return numberB; } }Select Save all. Right-click the project to open the context menu and then select Build.
Create a data contract response class with one attribute for the result
To create a data contract response class with one attribute for the result, follow these steps:
Use the same project in Visual Studio for your code.
Right-click your project to open the context menu, and then select Add > Class.
Enter a response name for your data contract class. In the following example, the class is named MB500_CustomServiceResponse.
Indicate the class as a data contract class with an attribute.
Add
DataMemberAttributedata member for the result that you want to have in your response. The following code is an example of a data contract for a response:[DataContractAttribute] internal final class MB500_CustomServiceResponse { real result; [DataMemberAttribute('result')] public real parmResult(real _result = result) { if (!prmisDefault(_result)) { result = _result; } return result; } }Select Save all. Right-click the project to open the context menu and then select Build.
Create the service class
To create the service class, follow these steps:
Use the same project in Visual Studio for your code.
Right-click your project to open the context menu, and then select Add > Class.
Enter a name for your service class (business logic). In the following example, the class is named MB500_CustomServiceService.
Use a new method that has your data contract request class as a parameter and that returns your data contract response class, as follows:
 internal final class MB500_CustomServiceService
 {
     public MB500_CustomServiceResponse summarize(MB500_CustomServiceRequest  _request)
     {
         MB500_CustomServiceResponse response = new MB500_CustomServiceResponse();

         real numberA = _request.parmNumberA();
         real numberB = _request.parmNumberB();

         response.parmResult(numberA + numberB);

         return response;
     }

 }
Select Save all. Right-click the project to open the context menu and then select Build.
Add a business logic method from the service class to a service and add the service to a service group
To add your business logic method from the service class to a service and then add the service to a service group, follow these steps:
Use the same project in Visual Studio for your code.
Right-click your project to open the context menu, and then select Add > New Item. Find the Services group, and then select Service.
Enter a name for your service. In the following example, the service is named MB500_CustomServiceSum.
Add the service class to the properties for the service.
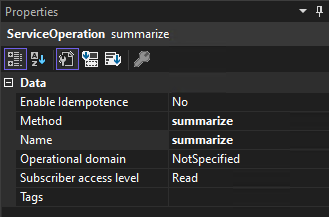
Right-click the Service Operations node to open the context menu, and then select New Service Operation.
Select your method in the service class in the properties for service operation, and then set the name to the same value.
Select Save all.
Right-click your project to open the context menu, and then select Add > New Item. Find the Services group, and then select Service Group.
Enter a name for your service. In the following example, the service is named MB500_CustomServices.
Enter MB500 as a description in the properties for the service group.
Drag your service named MB500_CustomServiceSum to the service group’s MB500_CustomServices node.
Select Save all. Right-click the project to open the context menu and then select Build.

Test the new custom service using your preferred tools
If you review the services at your URL, your new service should appear.
Implement the Batch OData API
Many tasks are run as batch jobs, and critical batch jobs require monitoring. Often, a reschedule is necessary to restart a job if something goes wrong.
Batch OData API raises a business event so that Microsoft Power Automate can capture the state and automate rescheduling. However, some errors require manual intervention.
To create a Microsoft Power Automate flow for Batch OData API, follow these steps:
- Sign in to Microsoft Power Automate and create an automated flow.
- Provide a name for the flow, and then search for Fin & Ops to find When a Business Event occurs in the list. Select Create.
- Select the When a Business Event occurs trigger and then specify parameters.
- Select your instance.
- Select Batch as the Category.
- Notice that you now have the following Business Event options in the Category list:
- Batch job canceled
- Batch job failed
- Batch job finished
- Batch job started
- Restart your batch job when it fails by selecting Batch job failed.
- Select USMF as the legal entity.
- Add a new action for Parse JSON.
- Access the schema for a Batch job failed business event by following these steps:
- Go to finance and operations apps and find the Business Event Catalog in System Administration.
- Filter the category for Batch, and then select Batch job failed.
- Download the schema from the Download schema menu.
- Open the schema and copy all text by selecting the Ctrl+C keyboard shortcut.
- Set Content to Body in the Parse JSON action, select Use sample payload to generate schema, and then paste the JSON from the business event.
- Select Done and the system creates the schema from the business event.
- Add a new action for Condition.
- Use the Job ID for the condition. Every batch job has a Job ID that you can use to filter for a specific batch job.
- Add a new action for Execute OData API in the Condition if it returns a value of True:
- Search for Fin & Ops, and then select See more.
- Find and select Execute action.
- Select the instance that you want to use.
- Find and select the BatchJobs-SetBatchJobToWaiting action.
- Save the flow.
The following image shows that the business event for Batch job failed triggers a flow. Afterward, the system sets the batch job ID to Waiting, which means that it runs the flow again.
