Access data from a Blazor component
- 7 minutes
Engaging websites need to display dynamic content that might change all the time. Learning how to obtain data from a dynamic source, such as a database or web service, is a fundamental technique in web development.
Suppose you're working for a pizza delivery firm on its updated customer-facing website. You have a range of webpages laid out and designed as Blazor components. Now, you want to populate those pages with information about pizzas, toppings, and orders that you want to obtain from a database.
In this unit, you learn how to access data and render it within HTML markup for display to the user.
Creating a registered data service
If you want to create a dynamic website that shows changing information to users, you must write code to get that data from somewhere. For example, suppose you have a database that stores all the pizzas your company sells. Because the pizzas are always changing, it's a bad idea to hardcode them into the website HTML. Instead, use C# code and Blazor to query the database, and then format the details as HTML so that the user can pick their favorite.
In a Blazor Server app, you can create a registered service to represent a data source and obtain data from it.
Note
The sources of data you can use in a Blazor app include relational databases, NoSQL databases, web services, various Azure services, and many other systems. You can use .NET technologies such as Entity Framework, HTTP clients, and ODBC (Open Database Connectivity) to query those sources. These techniques are beyond the scope of this module. Here, you learn how to format and use data that you obtained from one of these sources and technologies.
The creation of a registered service starts by writing a class that defines its properties. Here's an example that you might write to represent a pizza:
namespace BlazingPizza.Data;

public class Pizza
{
    public int PizzaId { get; set; }

    public string Name { get; set; }

    public string Description { get; set; }

    public decimal Price { get; set; }

    public bool Vegetarian { get; set; }

    public bool Vegan { get; set; }
}
The class defines the pizza's properties and data types. You must make sure these properties match the pizza schema in the data source. It makes sense to create this class in the Data folder of your project, and use a member namespace called Data. If you prefer, you can choose other folders and namespaces.
Next, you would define the service:
namespace BlazingPizza.Data;

public class PizzaService
{
    public Task<Pizza[]> GetPizzasAsync()
    {
    // Call your data access technology here
    }
}
Notice that the service uses an asynchronous call to access data and return a collection of Pizza objects. The data source might be remote from the server where the Blazor code is running. In that case, use an asynchronous call. Then if the data source responds slowly, other code can continue to run as you await the response.
You would register the service by adding a line to the Add Services to the container section in the Program.cs file:
...
// Add services to the container.
builder.Services.AddRazorPages();
builder.Services.AddServerSideBlazor();
// Register the pizzas service
builder.Services.AddSingleton<PizzaService>();
...
Using a service to obtain data
Now you use the service you defined by calling it in a Blazor component and obtaining data. Let's suppose you have the following component code, and you want to display pizzas in it:
@page "/pizzas"
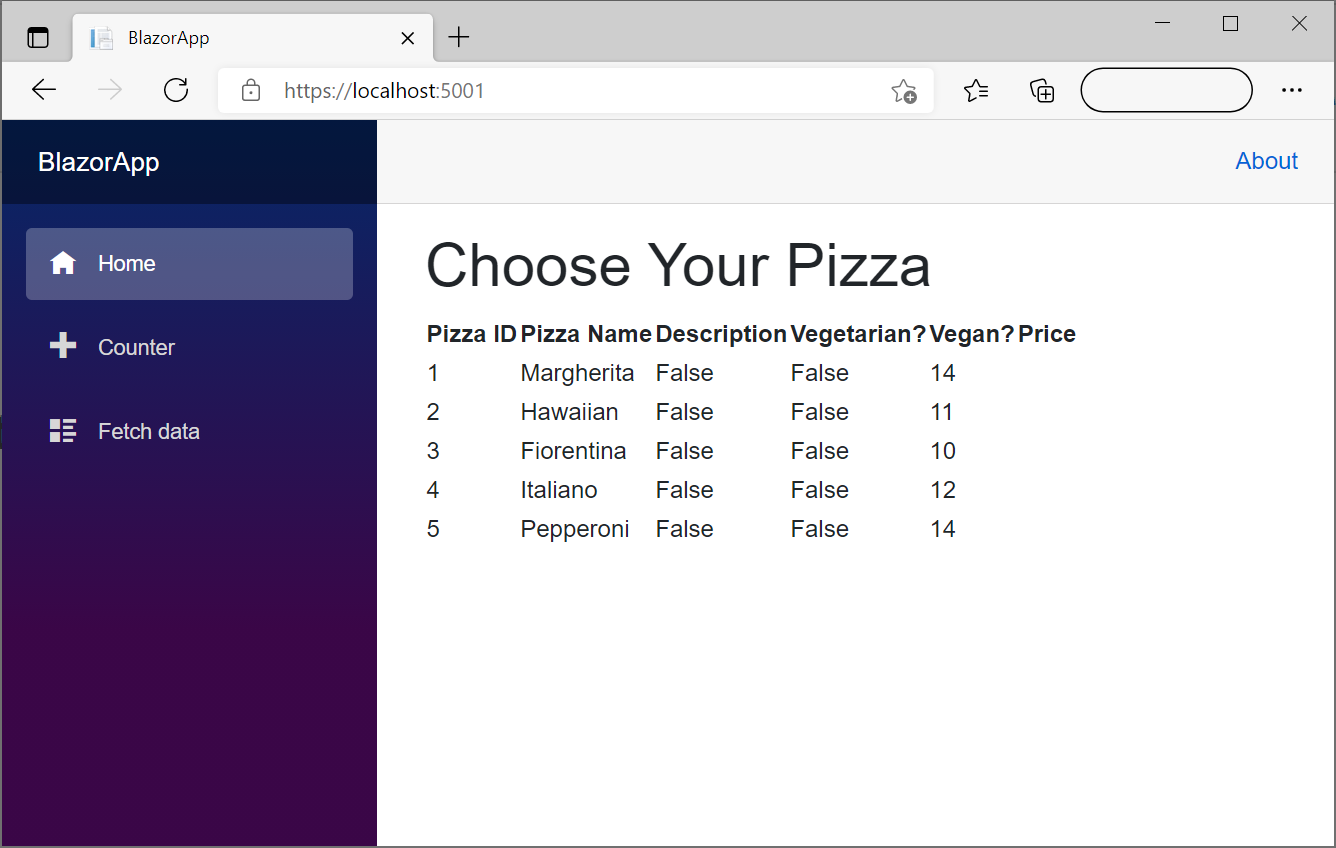
<h1>Choose your pizza</h1>
<p>We have all these delicious recipes:</p>
Injecting the service
Before you can call the service from the component, you must use dependency injection to add the service. Inject the service by adding the following code after the @page directive:
@using BlazingPizza.Data
@inject PizzaService PizzaSvc
Usually, the component and the service are in different namespace members, so you must include the @using directive. This directive works in the same way as a using statement at the top of a C# code file. The @inject directive adds the service to the current component and initiates an instance of it. In the directive, specify the name of the service class. Follow it by the name you want to use for the instance of the service in this component.
Override the OnInitializedAsync method
A good place to call the service and obtain data is in the OnInitializedAsync method. This event fires when the component's initialization is complete and it receives its initial parameters, but before the page is rendered and displayed to the user. The event is defined on the Blazor component's base class. You can override it in a code block as in this example:
protected override async Task OnInitializedAsync()
{
    \\ Call the service here
}
Call the service to obtain data
When you call the service, use the await keyword because the call is asynchronous:
private Pizza[] todaysPizzas;

protected override async Task OnInitializedAsync()
{
    todaysPizzas = await PizzaSvc.GetPizzasAsync();
}
Displaying data to the user
After getting some data from the service, you'll want to display it to the user. In the pizzas example, we expect the service to return a list of pizzas that the users can choose from. Blazor includes a rich set of directives that you can use to insert this data into the page that the user sees.
Checking for data
First, we determine what the page displays before the pizzas are loaded by checking whether the todaysPizzas collection is null. To run conditional rendering code in a Blazor component, use the @if directive:
@if (todaysPizzas == null)
{
    <p>We're finding out what pizzas are available today...</p>
}
else
{
    <!-- This markup will be rendered once the pizzas are loaded -->
}
The @if directive renders the markup in its first code block only if the C# expression returns true. You can also use an else if code block to run other tests and render markup if they're true. Finally, you can specify an else code block to render code if none of the previous conditions returned true. By checking for null in the @if code block, you ensure that Blazor doesn't try to display pizza details before data is obtained from the service.
Note
Blazor also includes the @switch directive for rendering markup based on a test that might return multiple values. The @switch directive works in a similar way to the C# switch statement.
Rendering a collection of objects
If Blazor executes the else statement in the preceding code, you know that some pizzas were obtained from the service. The next task is to display these pizzas to the user. Let's look at how to display the data in a simple HTML table.
We don't know how many pizzas are available when we code this page. We can use the @foreach directive to loop through all the objects in the todaysPizzas collection and render a row for each one:
<table>
 <thead>
  <tr>
   <th>Pizza Name</th>
   <th>Description</th>
   <th>Vegetarian?</th>
   <th>Vegan?</th>
   <th>Price</th>
  </tr>
 </thead>
 <tbody>
  @foreach (var pizza in todaysPizzas)
  {
   <tr>
    <td>@pizza.Name</td>
    <td>@pizza.Description</td>
    <td>@pizza.Vegetarian</td>
    <td>@pizza.Vegan</td>
    <td>@pizza.Price</td>
   </tr>
  }
 </tbody>
</table>
You probably want a richer display of pizzas than the plain table shown in this example. You might want to format the price and other values. Work with your graphic designers to develop a more engaging UI. For example, include pictures of each pizza.
Note
Blazor includes other looping directives, such as @for, @while, and @do while. These directives return repeated blocks of markup. They work in a similar way to the equivalent C# for, while, and do...while loops.
In the next unit, you'll register your own data service!