Extend Dataverse
Every app that you create or customization that you make is part of a solution. Every solution has a publisher, and you specify the publisher when you create a solution.
Create a publisher
The solution publisher indicates who developed the app. For this reason, you should create a solution publisher that's meaningful. You can view the solution publisher for a solution by selecting Settings from the Solutions area in Power Apps. For more information, see Solution publisher.
In the Power Apps portal, select Solutions.
On the command bar, select New Solution, on the right pane, select the Publisher dropdown list, and then select + Publisher.
Create a new publisher
To create a new publisher, follow these steps:
In the New Publisher form, enter the following required and optional information:
Display name - Enter the display name for the publisher.
Name - Enter the unique name for the publisher.
Prefix - Enter the publisher prefix that you want.
Option Value Prefix - This column generates a number based on the publisher prefix. You can use this number when you're adding options to choices. This number provides an indicator of which solution was used to add the option.
Contact Details - Optionally, you can add contact and address information.
Select Save and Close.
Create a custom table
To create a custom table, follow these steps:
On the navigation pane, expand Dataverse and then select Tables.
On the command bar, select New table.
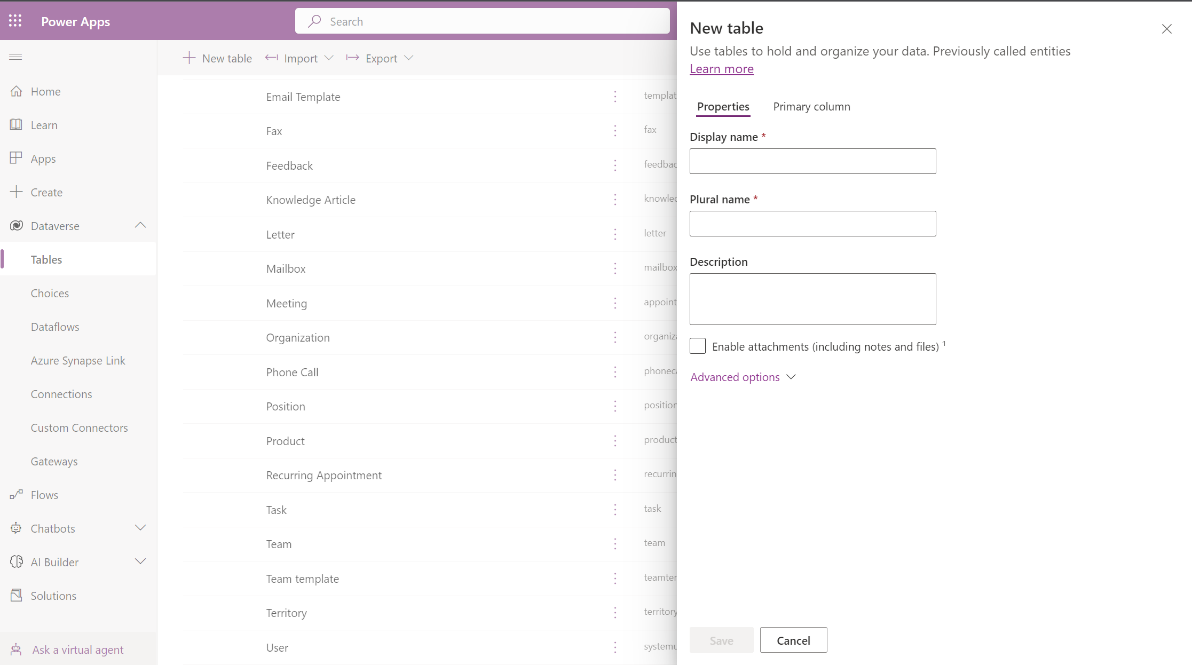
In the New table panel, fill in the properties columns.
Switch to the Primary column tab and then populate the necessary fields.
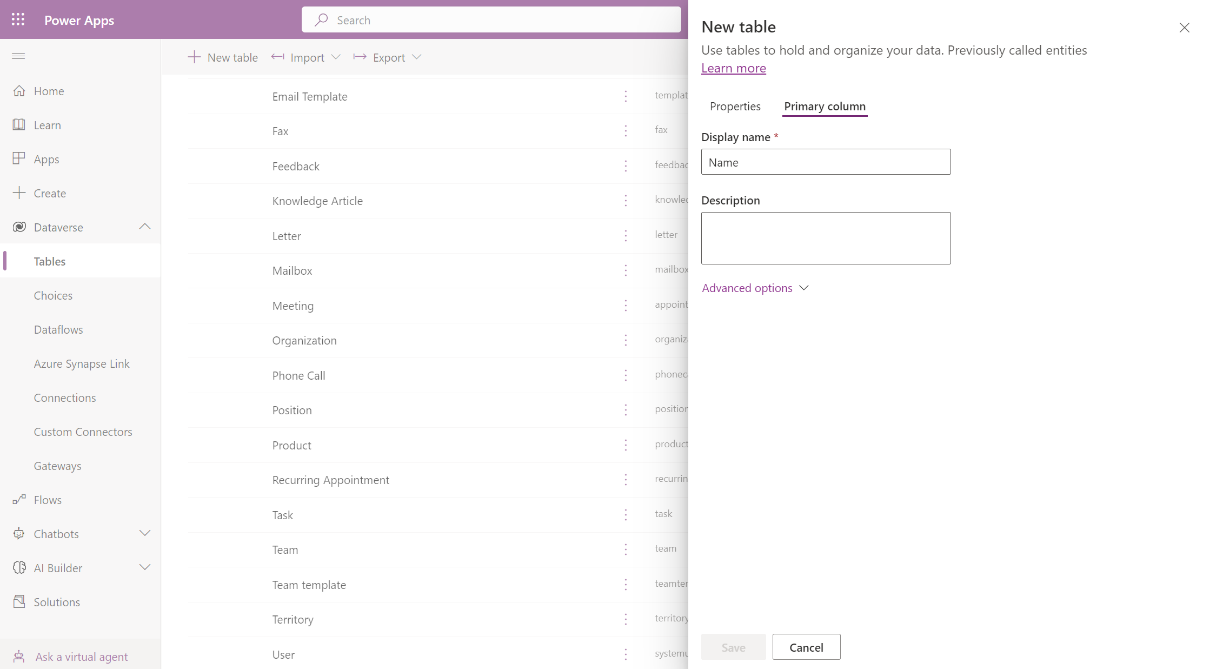
Select Save to create a new table in Dataverse.


Create custom fields
To create custom fields, follow these steps:
Expand the Dataverse section and then select Tables in the left navigation pane.
Select an existing table.
Add a new column to your table by selecting New column.
In the New column panel, enter the Display name for your column. The display name is visible to users when they're accessing the column.
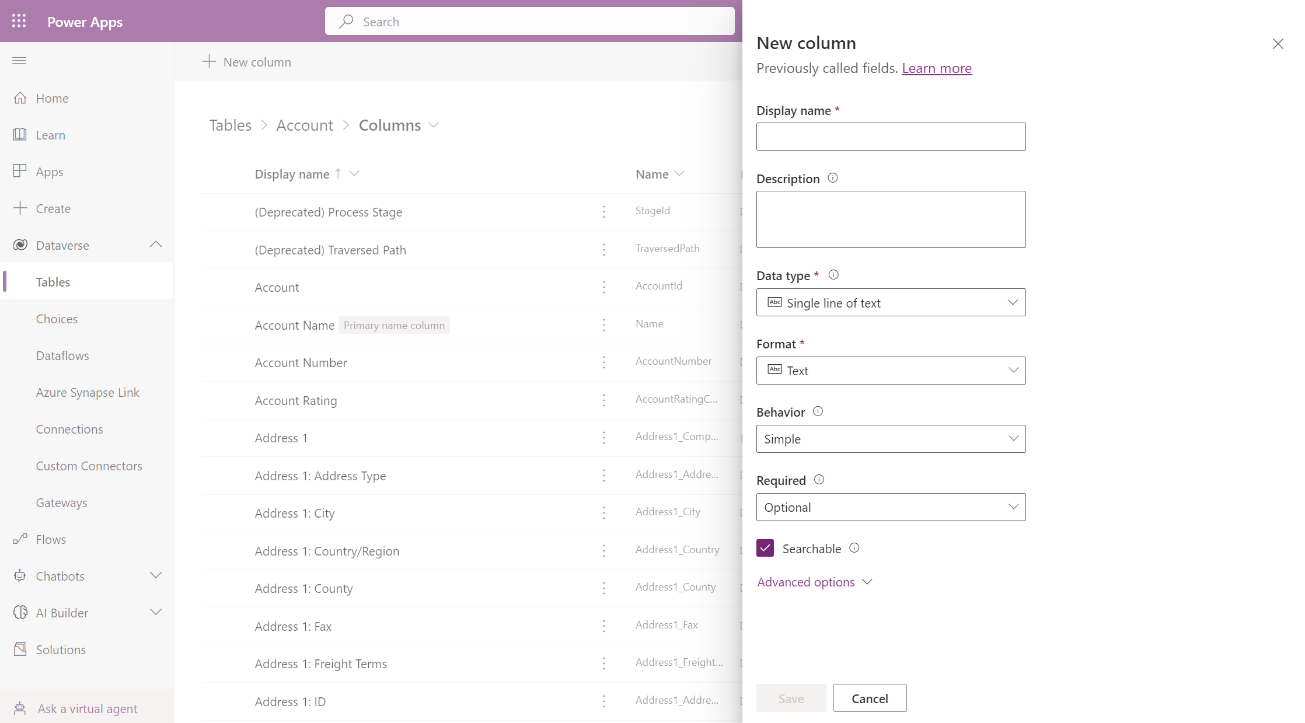
Select the Data type of your column. It controls the way that information is stored and how it's presented in apps. For example, the text is stored differently to a decimal number or a URL.
Select the Format for your Data type column that you chose in the previous step. You can choose different formats that match your needs to display on the form later and that capture the correct data.
Under Required, select the checkbox if you want to recommend this column as required in your apps. However, this setting doesn't provide hard enforcement through all connections to Microsoft Dataverse. If you need to ensure that the column is populated, create a business rule.
Under Searchable, select the checkbox if you need this column to be available in views, charts, dashboards, and Advanced Find. In most cases, this checkbox should be selected.
Select Save Table to finalize your changes and save them to Dataverse.
