Describe the components of a cloud flow
As you begin to create Power Automate flows, it’s important to note that every cloud flow has two main parts.
Trigger: Determine what starts the flow
Actions: Determine what the flow does
Triggers
Triggers are the starting action for a flow. A trigger could be something such as a new email arriving in your inbox or a new item being added to a SharePoint list. A flow only has one trigger.
While a flow only has one trigger, there are a few different types of triggers that can be used:
When something changes: This type of trigger runs when data is changed. It could be a new item created in SharePoint, when a lead is updated in Dynamics, or when an event has been deleted from Outlook for example. When something changes triggers are the most used triggers.
On a schedule: You can set up a flow to be triggered at a certain time of day and with a recurrence. This scheduling allows for processes such as checking every day at 8 AM to see if there are account renewals pending and if so, sending an email to the necessary people.
On a button press: This trigger takes shape in many ways. It can be when a flow virtual button is run via the mobile app and a physical button is clicked with third party options. Alternatively, it can be when a button is pressed inside of Power Apps. This capability gives you and/or the users control to "run" a flow on demand.
Actions
Actions are what you want to happen when a trigger is invoked. For example, the new email trigger starts the action of creating a new file on OneDrive. A typical Power Automate flow has multiple actions.
Now that we introduced you to triggers and actions, let’s examine how they're used together when you create a flow. In this example, we examine purchase order approval. Approvals are often processes that are done manually but could easily be done with a Power Automate flow.
An organization can easily create a purchase request app using Microsoft Power Apps. Users who need to purchase something would initiate the purchase order process by going into the Purchase Order Power App creating a purchase order (PO) request. In those instances, the trigger would be the user selecting a submit button on the power app. Once the request is submitted, the information is sent to a Power Automate flow.
It is at this step that the actions come in. The flow's first action is to identify the manager of the user who initiated the PO request. In this case, the flow is using a Microsoft 365 connector to retrieve the user’s manager automatically from Microsoft Entra. Next it creates an approval request in Microsoft Teams. The approval request is assigned to the manager who was identified in the Get manager action.
The image shows an example of the starting point of the flow:
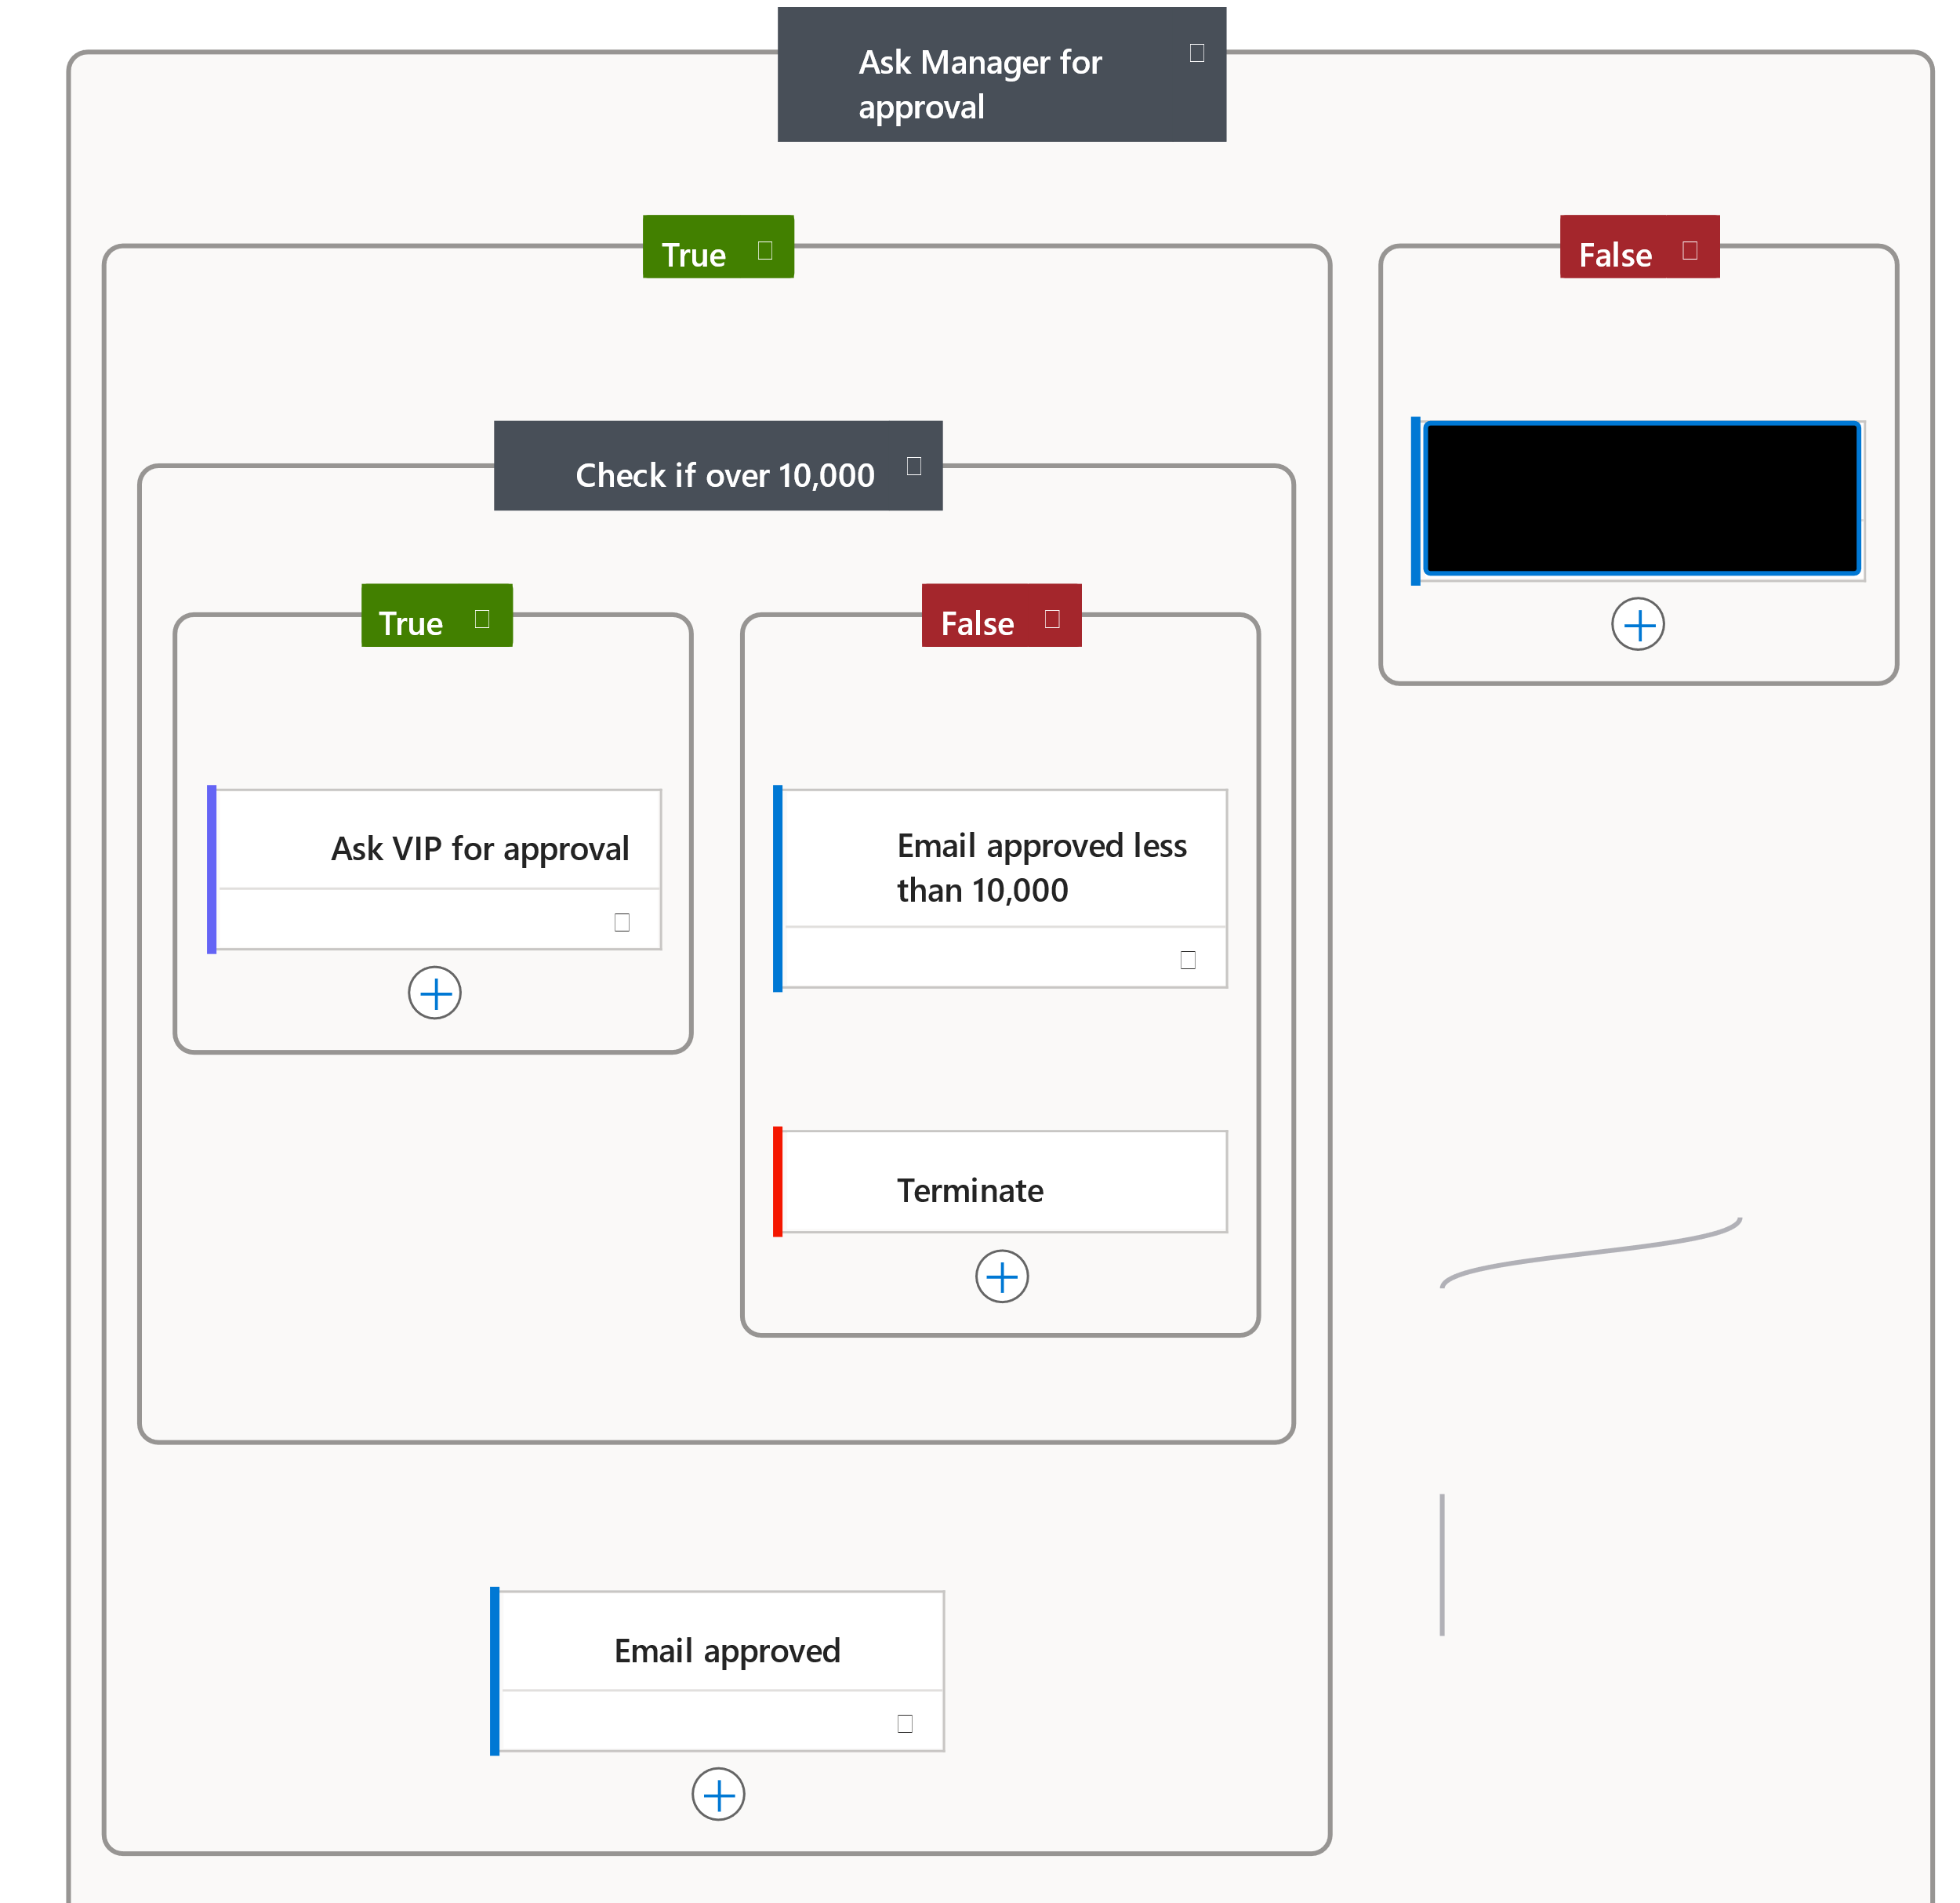
Often, organizations have different procedures to support different types of scenarios. For example, a company might have a policy where purchase requests for more than $10,000.00 need to be sent to a Vice President before they can be completed. This logic can be easily built into a flow using conditions. In this case, after the manager receives the approval request and approves it, the flow includes a condition to see if the value of the request is for more than $10,000.00. If it is, there's another action to send an approval to the VP in Microsoft Teams. If the item is less than $10,000.00, then the item is officially approved, and the request is submitted.
The image provides a high-level example of what that flow may look like.
Even though this flow has many decision points, each of the decisions is handled without needing to write any code. Once the flow is activated, it handles purchase order requests automatically. The approval process becomes part of your users’ daily activities.
Work with your data where it lives
When you build or create any type of automation, access to your data is important. Without correct access to the data, the automation may not be able to execute appropriately. Power Automate makes connecting to your data easy with over 1000 connectors that you can use to easily connect to data and services across the web and on-premises.
Some common data sources include:
Microsoft Dataverse
Salesforce
Dynamics 365
Google Drive
Office 365
Oracle
As you see from the previous example, you don't have to choose just one data source. Microsoft Power Platform easily supports multiple data connections allowing you to bring data together from many platforms into a single automation.
Now that we see how a Power Automate flow works, let’s examine some different scenarios where organizations might use Power Automate flows with other services.
