Exercise: Provision an Azure OpenAI resource
In this exercise, you create an Azure OpenAI Service resource that enables you to interact with different large language models (LLMs).
Note
To complete this exercise, you need the following:
- An Azure subscription. Create one for free.
- Access to Azure OpenAI in the desired Azure subscription. Currently, access to this service is granted only through applications. Apply for access to Azure OpenAI by completing this form: https://aka.ms/oai/access.
Provision a resource in the Azure portal
Complete the following steps to provision a resource in the Azure portal:
Go to the Azure portal in your browser and sign in.
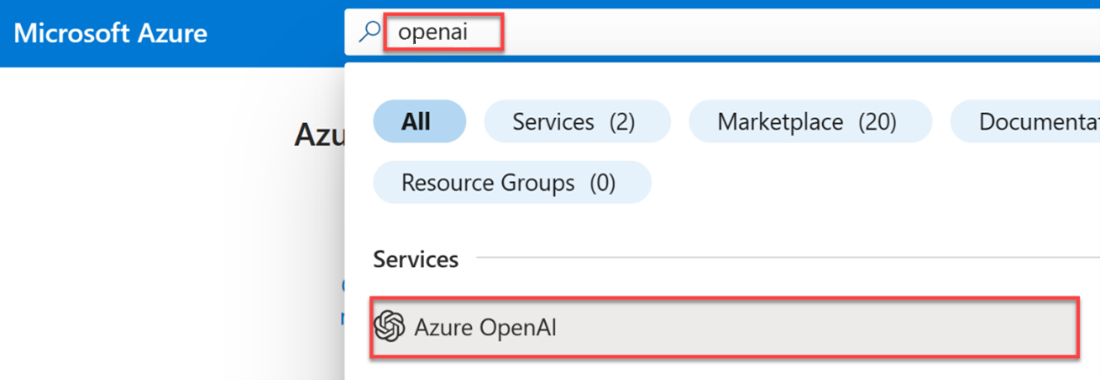
Type OpenAI in the search bar at the top of the portal page and select Azure OpenAI.
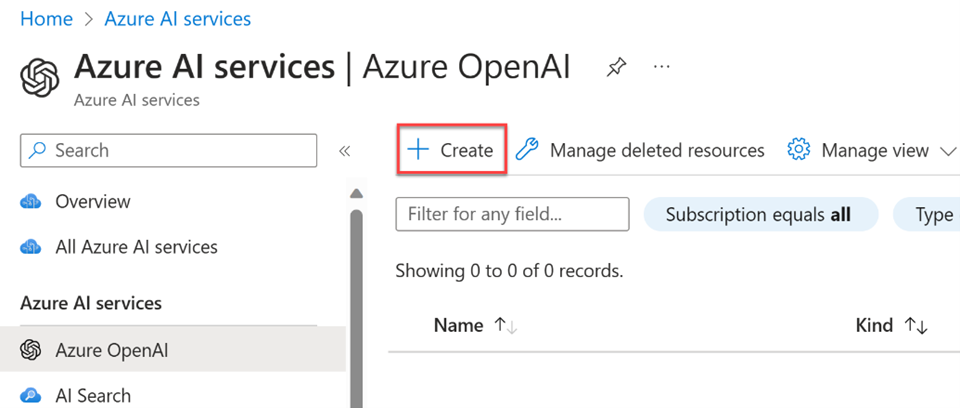
Select Create.
To create a resource, add the following information:
What Comment Subscription Use the same subscription you used to apply for Azure OpenAI access. Resource group Use an existing resource group or create a new one. Region Select a region close to you for best response times. Name The name must be globally unique. Pricing tier Currently Standard S0 is the only available tier. 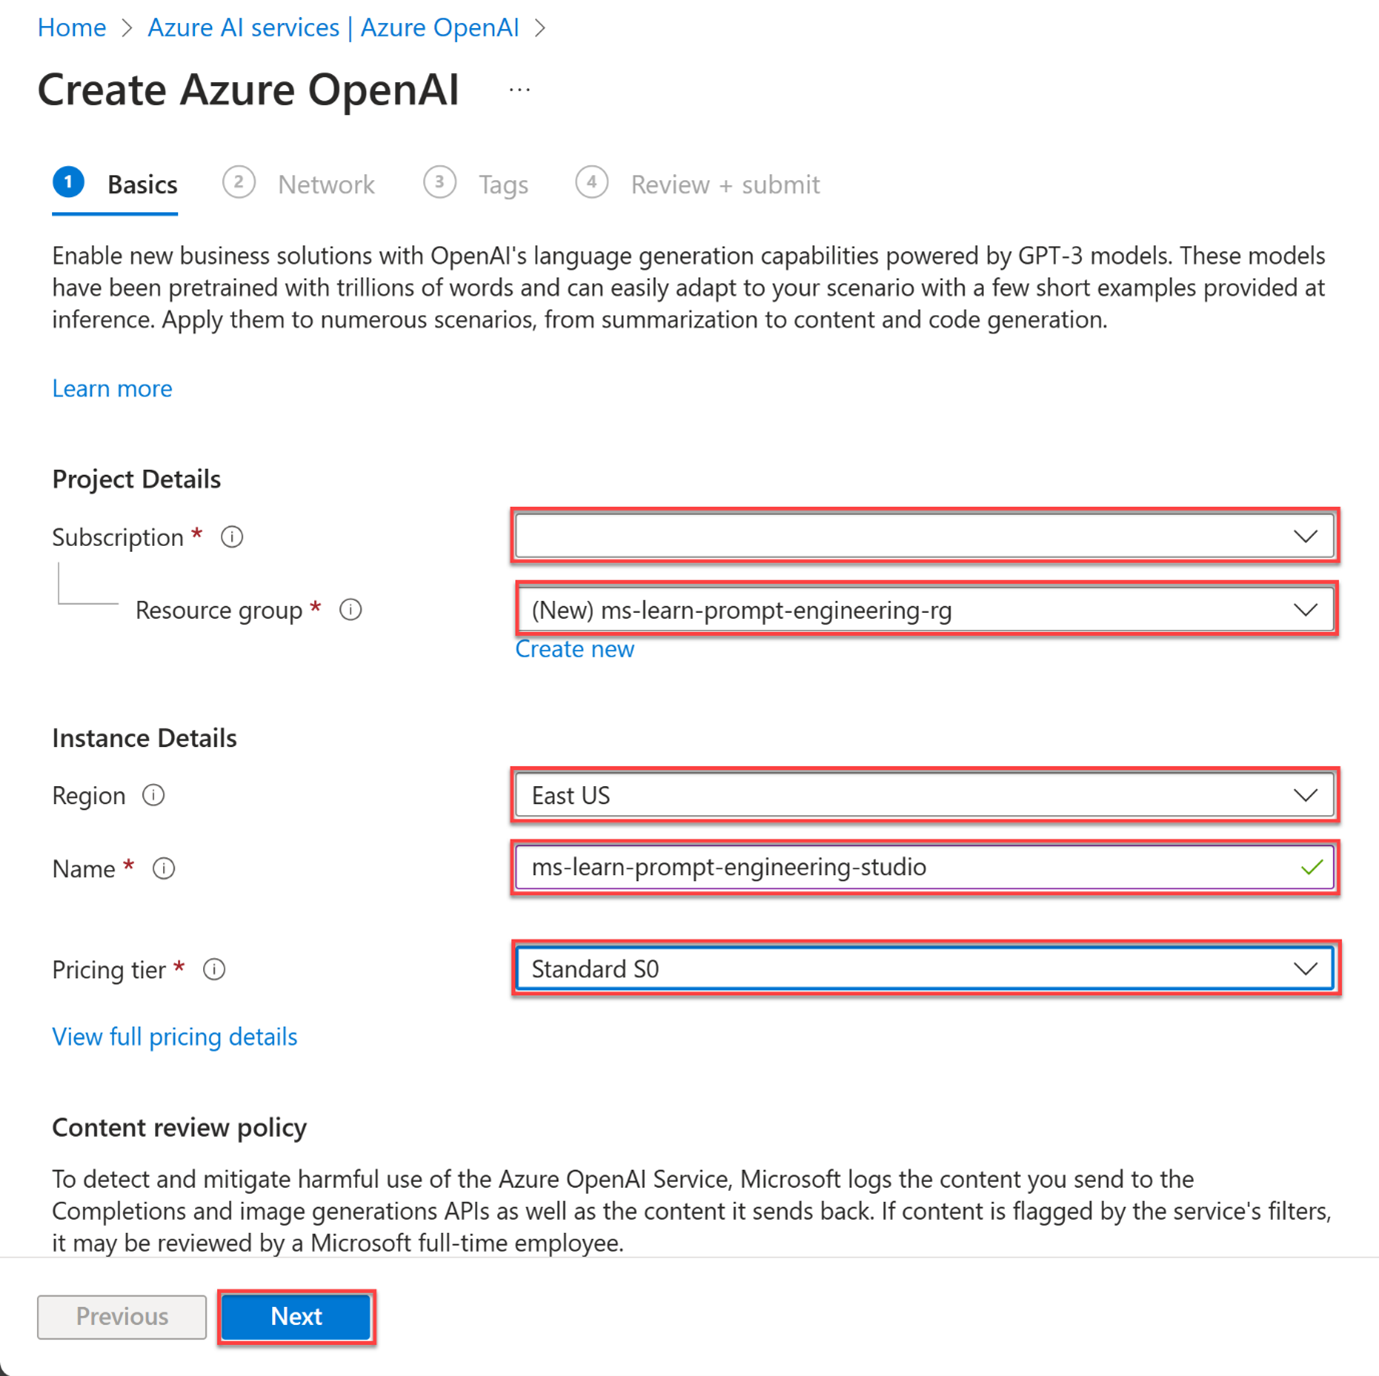
After adding the basic information, select Next to confirm your details and proceed to the next page.
Select Next to confirm your network details.
Select Next to confirm your tag details.
Confirm your configuration settings and select Create to start provisioning the resource. Wait for the deployment to finish.
After deployment, select Go to resource to inspect your created resource. Here, you can manage your resource and find important information like the endpoint URL and API keys.
Congratulations! You successfully provisioned a resource. In the next exercise, you deploy a model to interact with your LLM.