Exercise: Create an Azure OpenAI deployment
In this exercise, you create an Azure OpenAI deployment. Creating a deployment on your previously provisioned resource allows you to interact with your large language model (LLM).
Note
To complete this exercise, you need the following:
- An Azure subscription. Create one for free.
- Access to Azure OpenAI in the desired Azure subscription. Currently, access to this service is granted only through applications. Apply for access to Azure OpenAI by completing this form: https://aka.ms/oai/access.
- An Azure OpenAI resource. If you haven't created this yet, refer to the previous exercise before moving on.
Create a deployment
Let's walk through creating a deployment by using Azure OpenAI Studio. You can have more than one Azure OpenAI cloud resource. To ensure you're managing the right one, navigate to Azure OpenAI Studio from the instance tab.
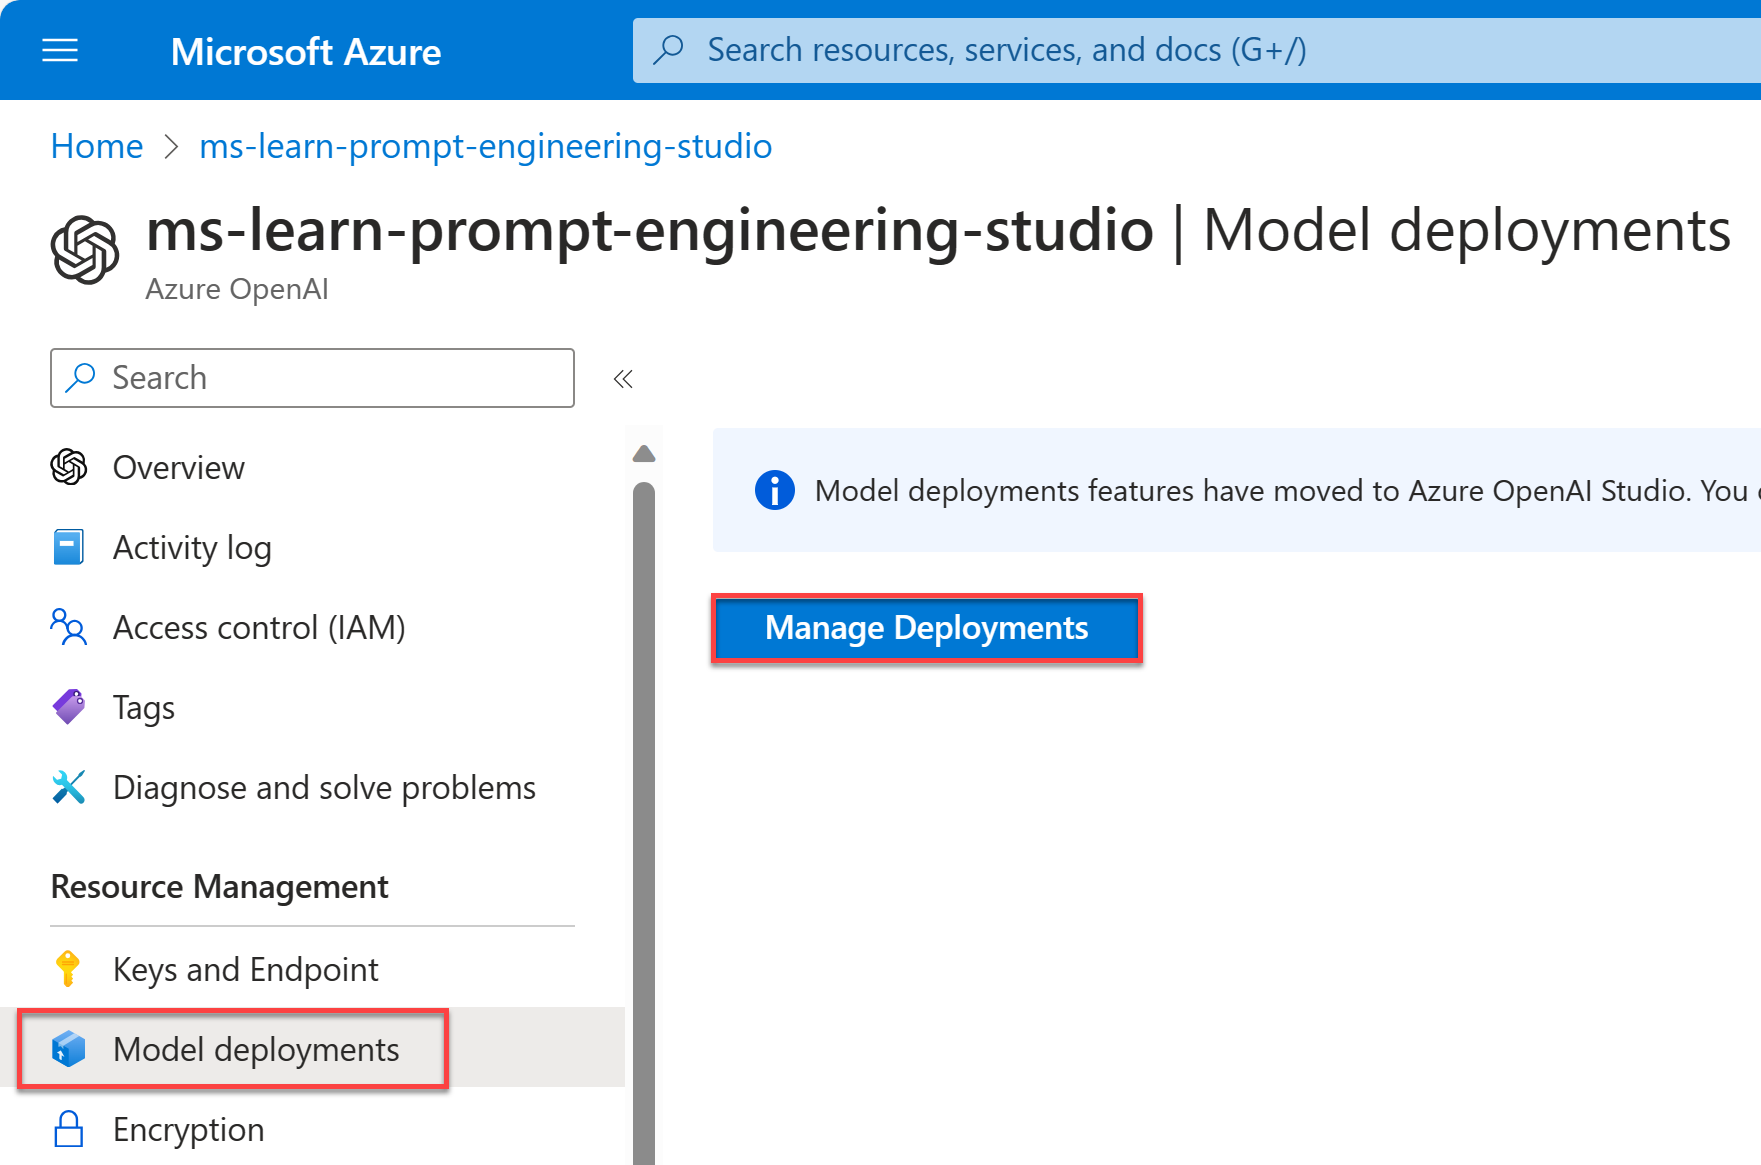
Go to the Azure portal and locate your newly provisioned Azure OpenAI instance by typing OpenAI in the top search bar. From there, select your specific cloud instance.
On the left, select Model deployments and then select Manage Deployments.
When you select Manage Deployments, you're directed to Azure OpenAI Studio. Double-check that Deployments is selected.
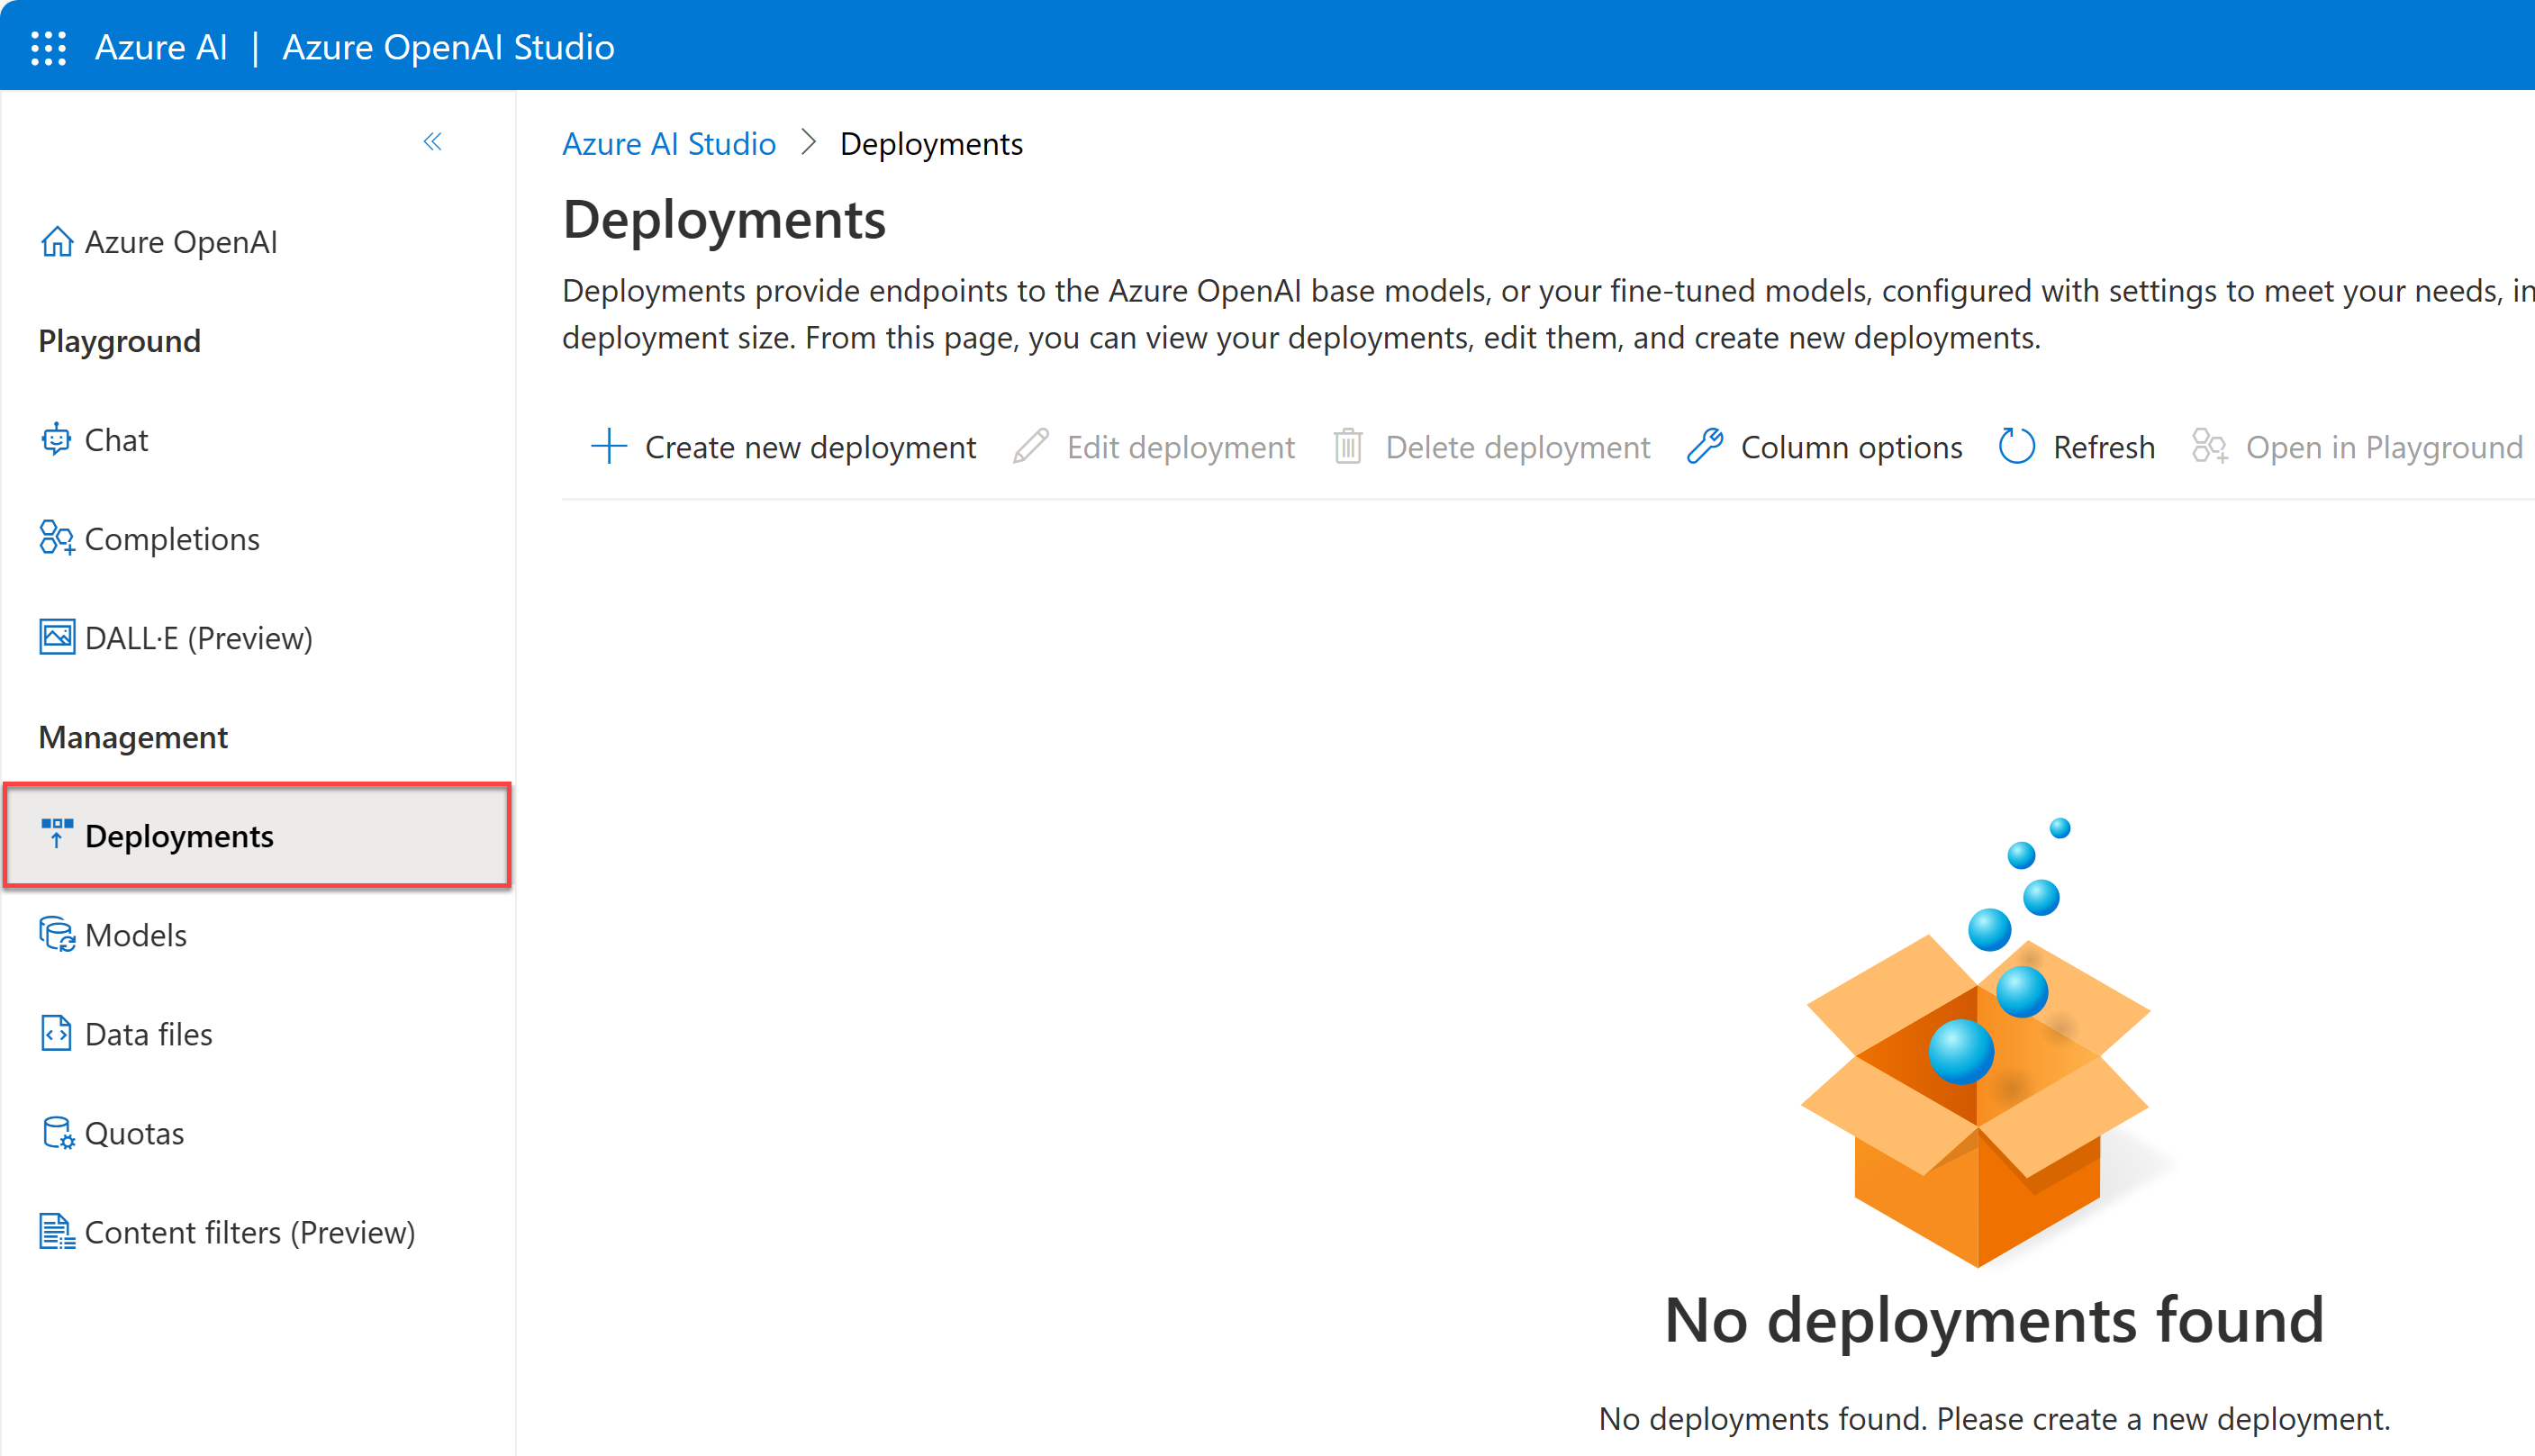
Select Create new deployment from the toolbar to open the Deploy model window.
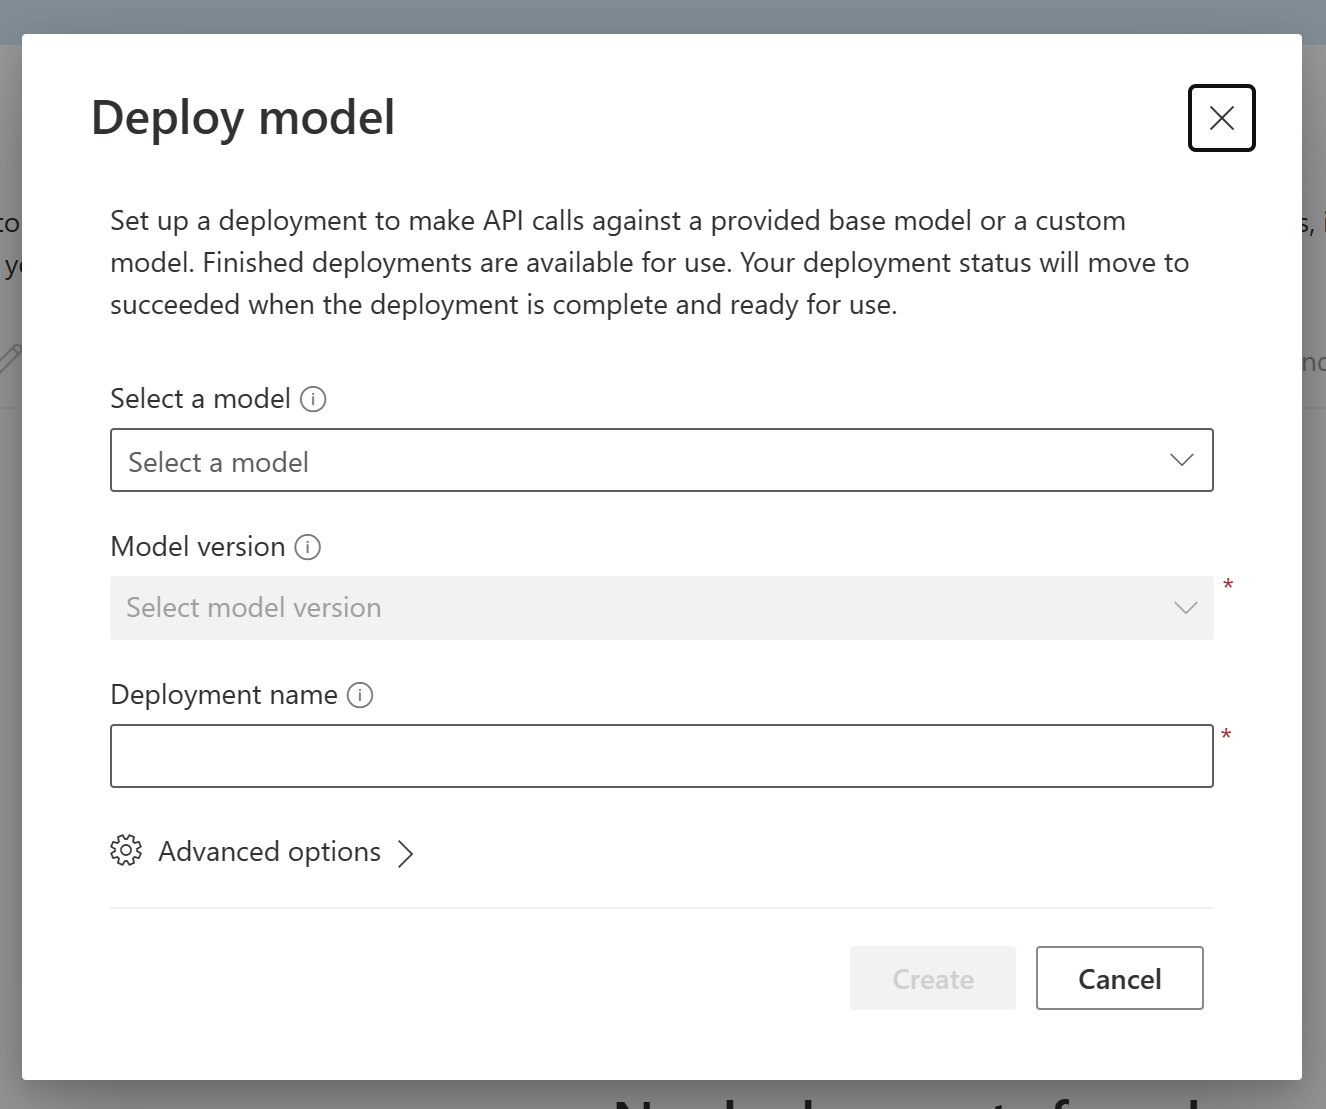
In the window, fill in the required fields:
What Value Select a model Select gpt-35-turbo. Model version Select 0301. Deployment name Add a name that's unique for this cloud instance. The name should make sense to you, for example conversation-model, because this model type and GPT-4 are optimized for conversation. Select Create.
Congratulations! You successfully created a model deployment that enables you to interact with the GPT-3.5-Turbo LLM.