Exercise: Deploy Azure Application Gateway
Lab scenario
In this lab, you use the Azure portal to create an application gateway. Then you test it to make sure it works correctly.
Architecture diagram
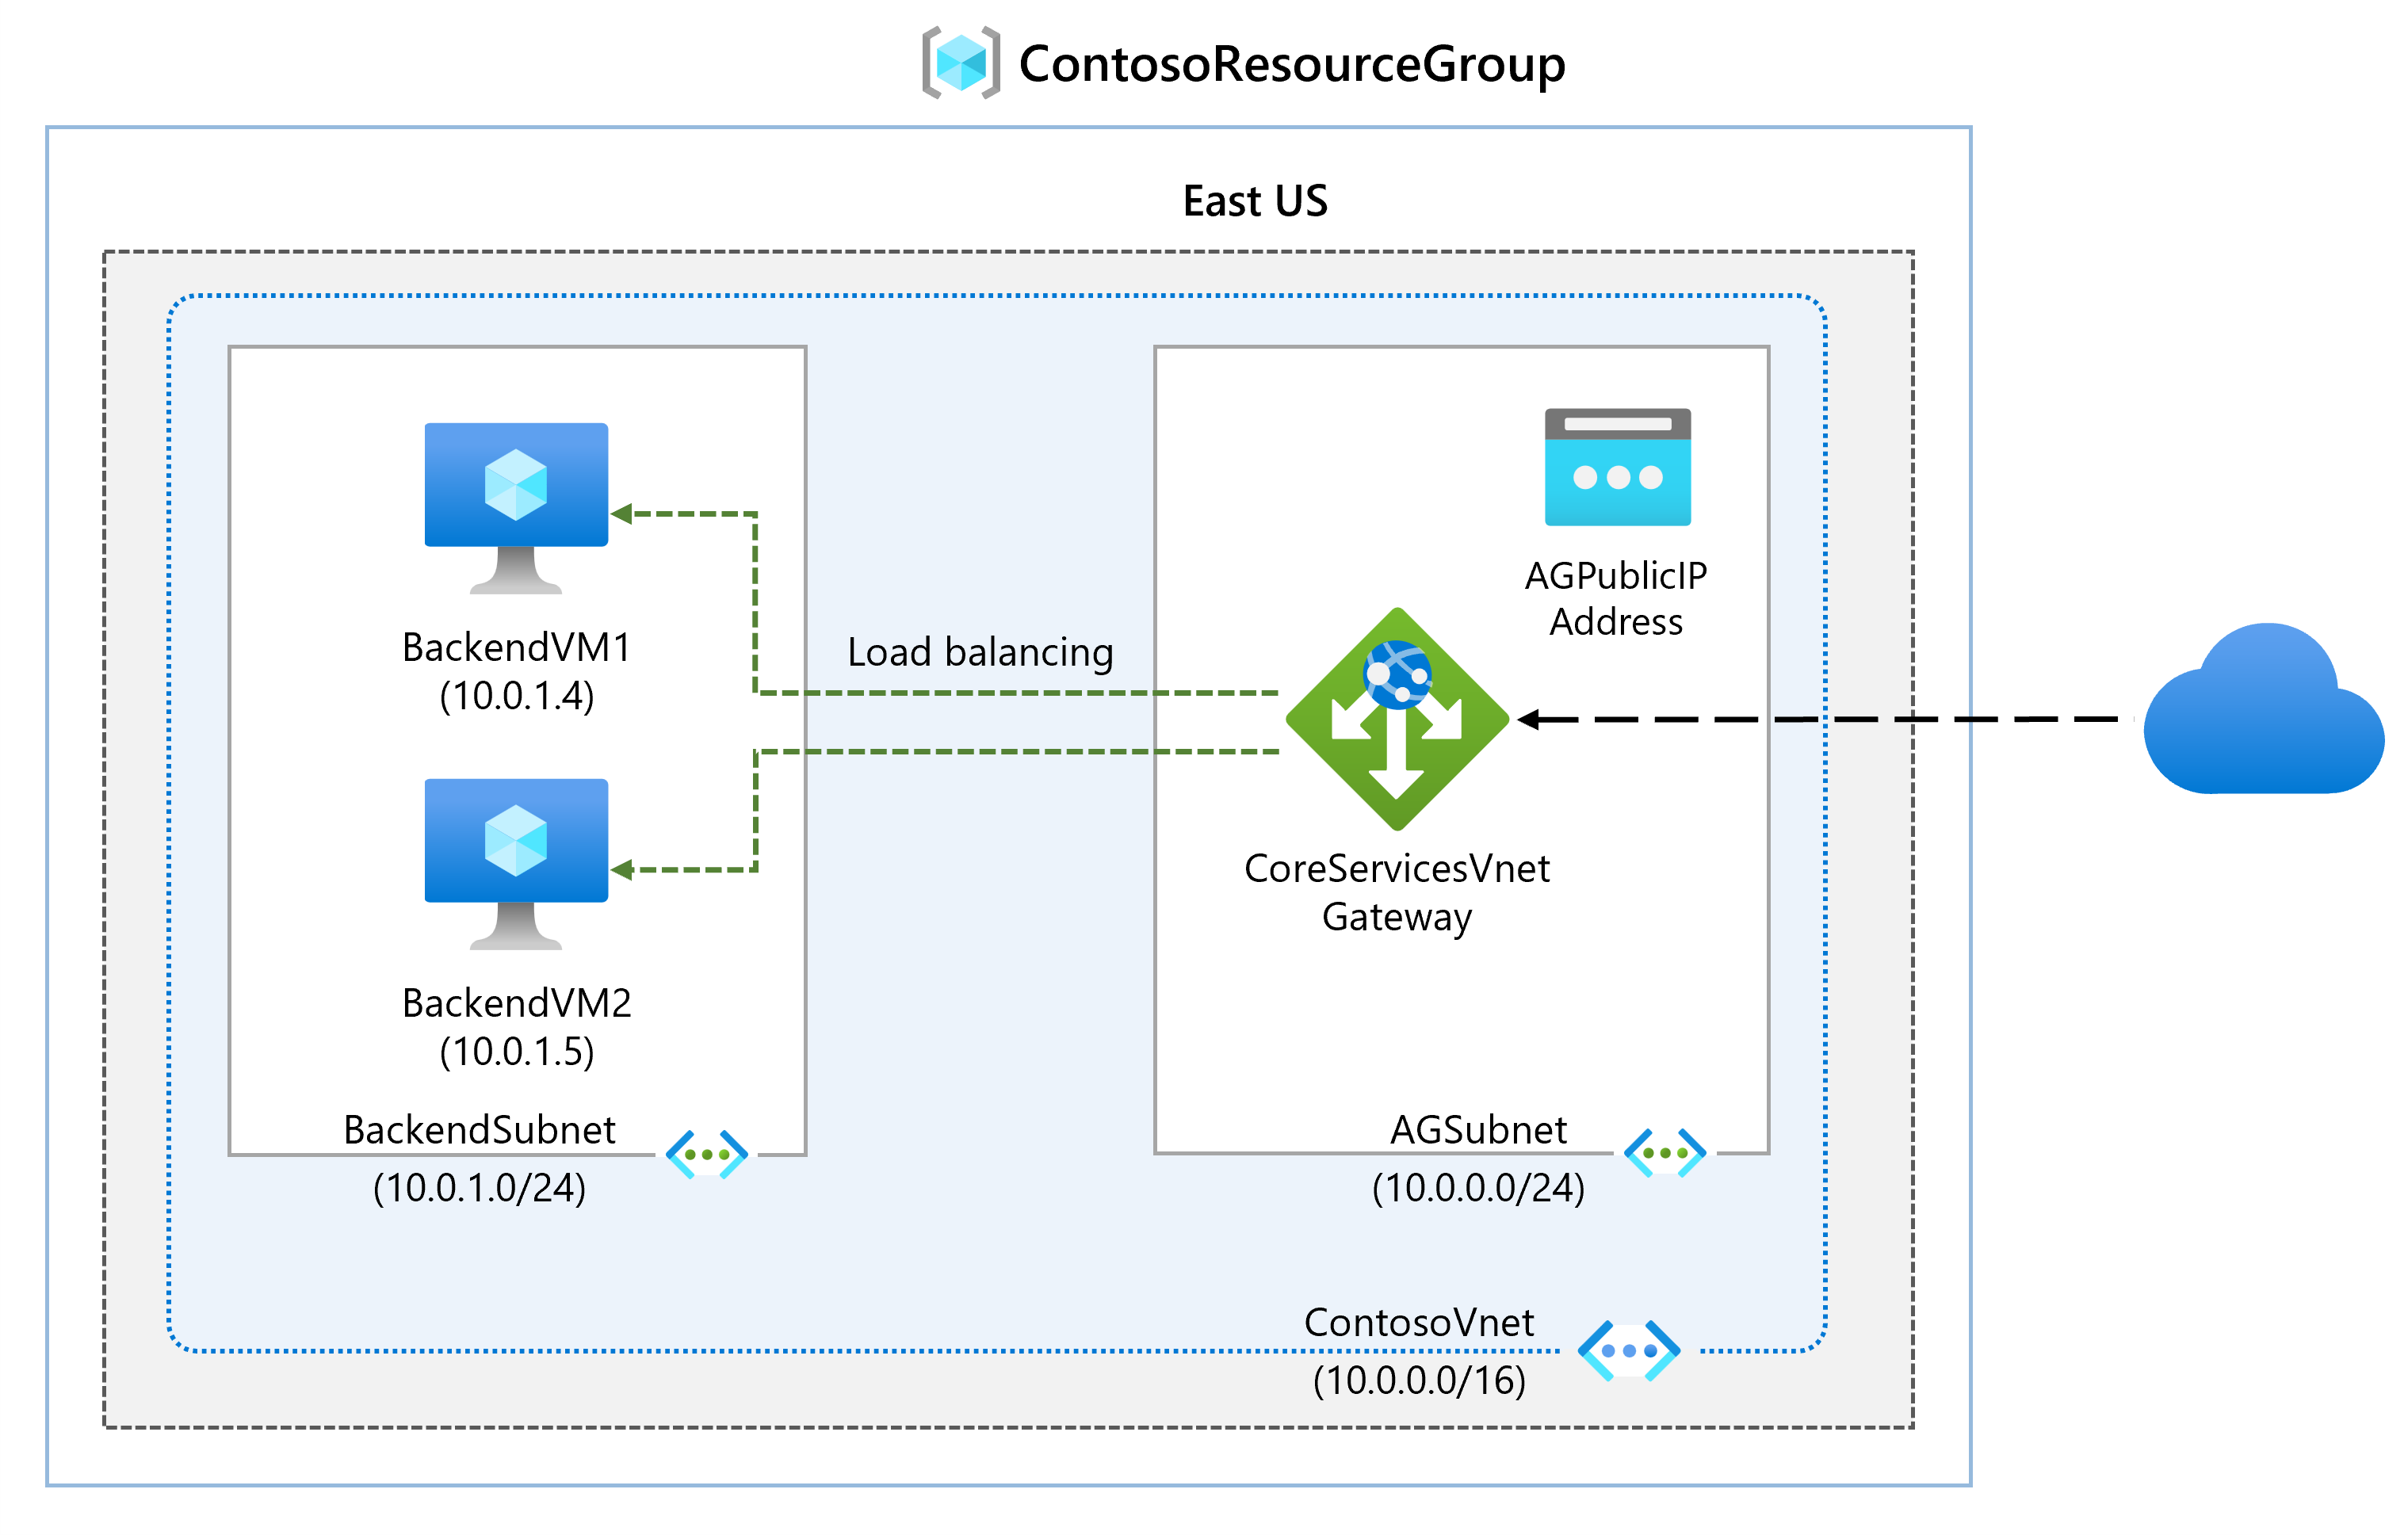
Job skills
- Create an application gateway.
- Add backend targets.
- Use a template to create the virtual machines.
- Add backend servers to backend pool.
- Test the application gateway.
Important
Estimated time: 25 minutes. To complete this exercise, you need an Azure subscription.
Launch the exercise, and follow the instructions. When finished, be sure to return to this page so you can continue learning.