Add, update, or delete data in a table by using Excel
Microsoft Dataverse can help you add, update, or delete data in a table by using the Microsoft Power Apps Office Add-in feature for Excel. This is simply another tool you can use to edit your Dataverse tables. Let's walk through how to use this technique.
Sign in to the Power Apps portal.
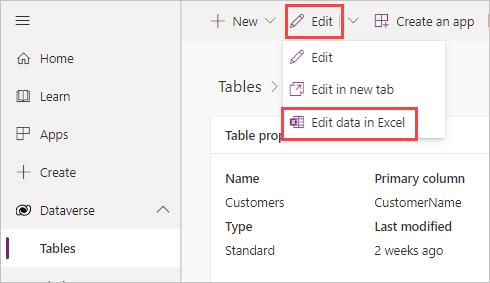
On the left navigation pane, select Tables.
Select the table that you want to edit.
Select the Edit button in the command bar then Edit data in Excel from the dropdown.
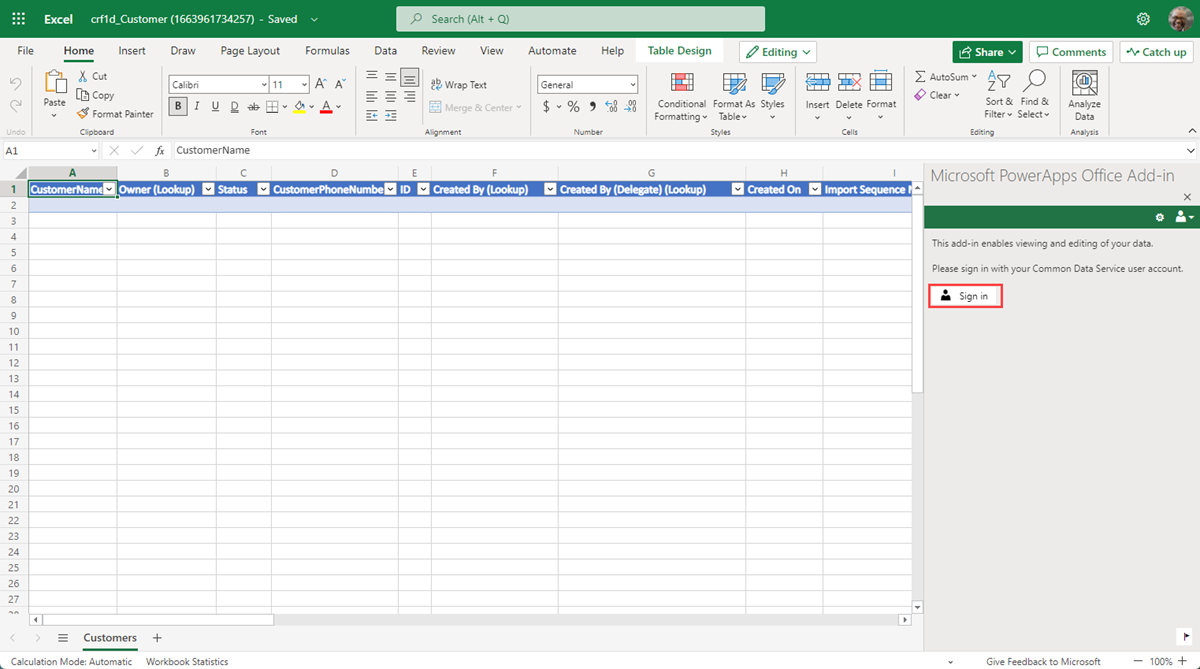
Power Apps will download the file into your browser's Downloads where you can then open the file either in Excel online or in your Excel app. When you open the file, you'll be prompted to Sign in to enable the Microsoft Power Apps Office Add-in. None of your data is displayed. Select Sign in.
If you received an error, ensure that you're signed in using the same account that is signed in to the environment where you downloaded the Dataverse table. If you aren't, sign out and sign back in as the correct user. The error message goes away.
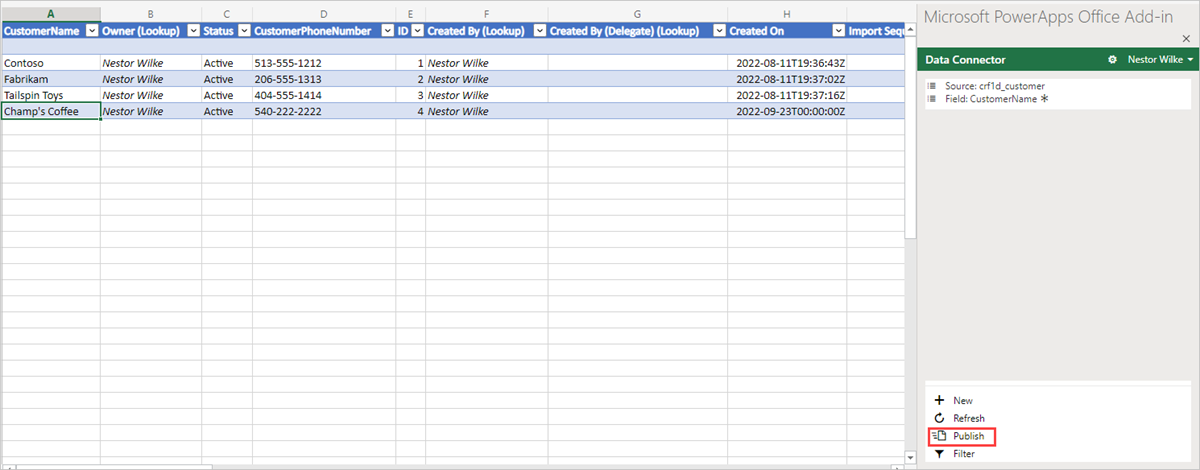
After a few moments, your data will appear in the spreadsheet, and you can now use Excel to add, update, or delete data by using the buttons in the add-in pane. The Publish button (in the add-on panel) saves your changes.


If you return back to your Table in Power Apps (you might need to refresh your view), you can view the changes that you published from Excel.
Tip
To delete data, delete one or more rows in the spreadsheet and then select Publish. To edit data, edit any value in the spreadsheet and then select Publish.