Import data using Power Query
Dataflows allow users to extract, transform, and load data from a wide range of data sources into your Dataverse tables. A dataflow is a collection of tables that are created and managed in environments in the Power Apps service. You can add and edit tables in your dataflow and manage data refresh schedules directly from the environment in which your dataflow was created.
Once you create a dataflow in the Power Apps portal, you can get data from it using the Dataverse connector.
There are three primary steps to using a dataflow:
Author the dataflow in the Power Apps portal. You select the destination where you'll load the output data, the source to get the data from, and the Power Query steps to transform the data using Microsoft tools that are designed to make doing so straightforward.
Schedule dataflow runs. This is the frequency with which the Power Platform Dataflow will refresh the data that your dataflow loads and transforms.
Use the data you loaded to the destination storage. You can build apps, flows, Power BI reports, and dashboards. Or connect directly to the dataflow’s Common Data Model folder in your organization’s lake using Azure data services like Azure Data Factory. Or you can use Azure Databricks or any other service that supports the Common Data Model folder standard.
Create a dataflow
Dataflows are created in one environment, so you'll only be able to see and manage them from that environment. If any user wants to get data from these dataflows, they must have access to the environment in which the dataflows were created.
Sign in to the Power Apps portal.
Select an environment.
On the left-side navigation panel, look under Tables for Dataflows. You might need to select More to find it (then you can pin it to your panel).

Select Dataflows to bring up a list of Dataflows. Notice that your command bar has a button to create a New dataflow. Go ahead and select it.
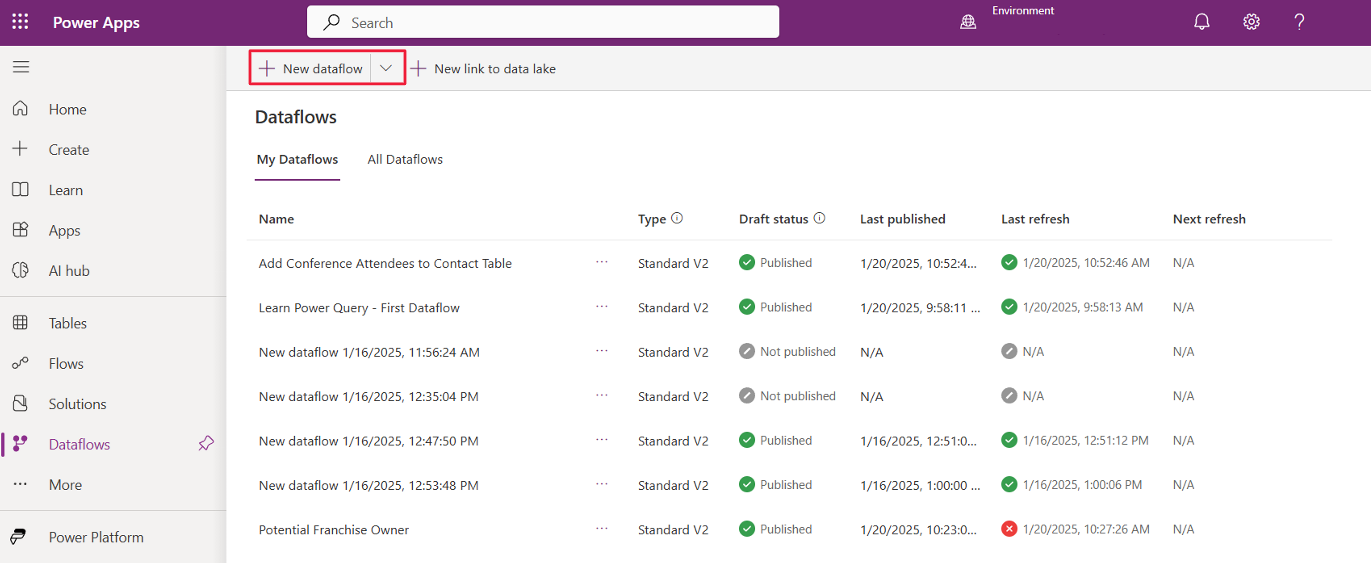
A New dataflow popup prompts you to name the dataflow, and then you can select the Create button.
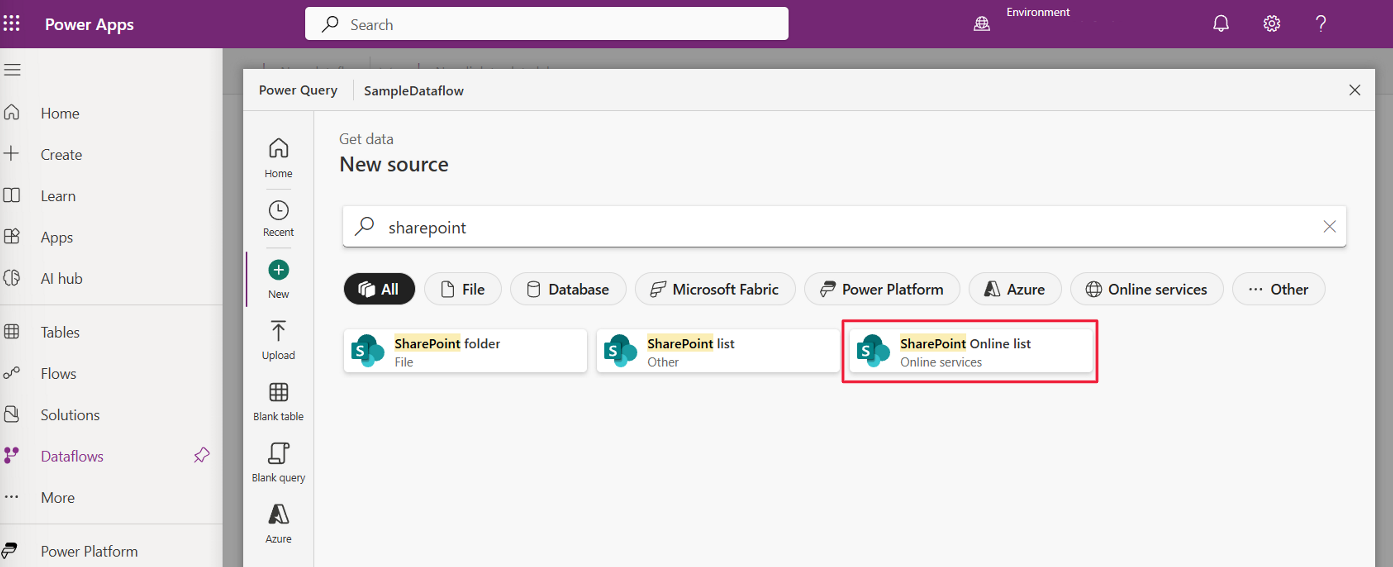
From the Power Query > Choose data source popup, select your data source. In this example, we'll select SharePoint Online list. You may need to search or select More to find it.
After you select a data source, you’re prompted to provide the connection settings for your SharePoint list, including the Site URL and the Connection credentials account to use when connecting to the data source. You might be prompted to input your credentials to continue. Once you've entered the correct settings, the Next button in the bottom right corner of the window will be unmasked. Select Next to continue.
Note
If you receive an invalid credentials error when connecting, you may need to install a data gateway. From the side menu, select More, Discover all, and then scroll down to find Gateways in the Dataflows section. Select + New Gateway and then follow the prompts to download and register the gateway.
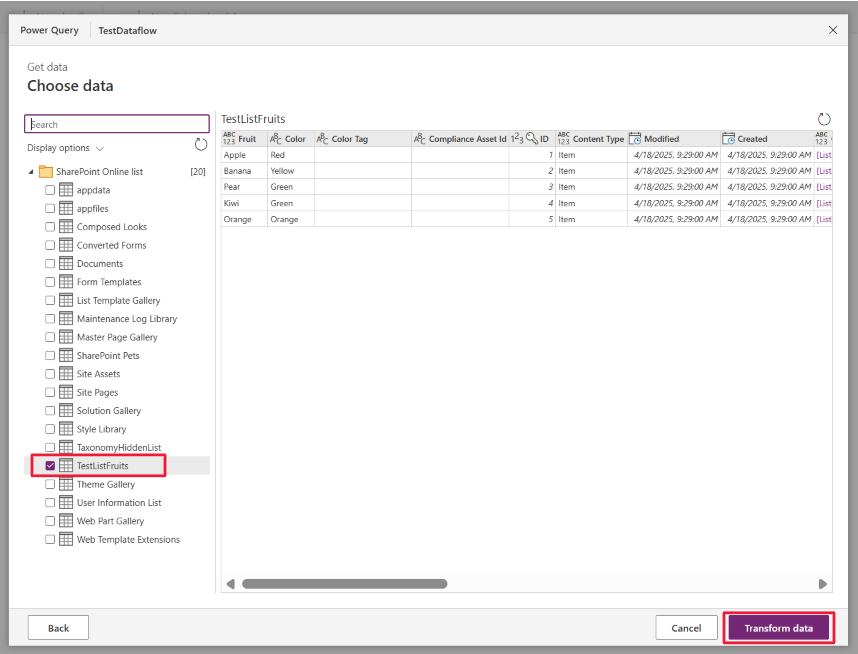
It might take a few moments, but once you're connected, you can select the SharePoint list, under the Choose data header, to use for your table. Each time you select a data source table, Power Query provides a preview of your data to the right. (Note: you don't need to select the checkbox.) At this point, the Transform data button is unmasked. To continue select Transform data.
Now that you've selected the data to use in the table, you can use the Power Query dataflow editor to shape or transform that data into the format necessary for use in your dataflow.
Use the editor to remove unnecessary columns and columns with identical or similar names and data. When you're satisfied with your changes, select Next.
The Choose destination settings window appears where you're prompted to choose your Load settings and Column mapping.
Since we're learning how to create a dataflow, we'll choose to Load to new table.
Also under the Load settings, you can provide a Table name and a Table description, but you'll notice that Power Query automatically imports the name of your SharePoint list.
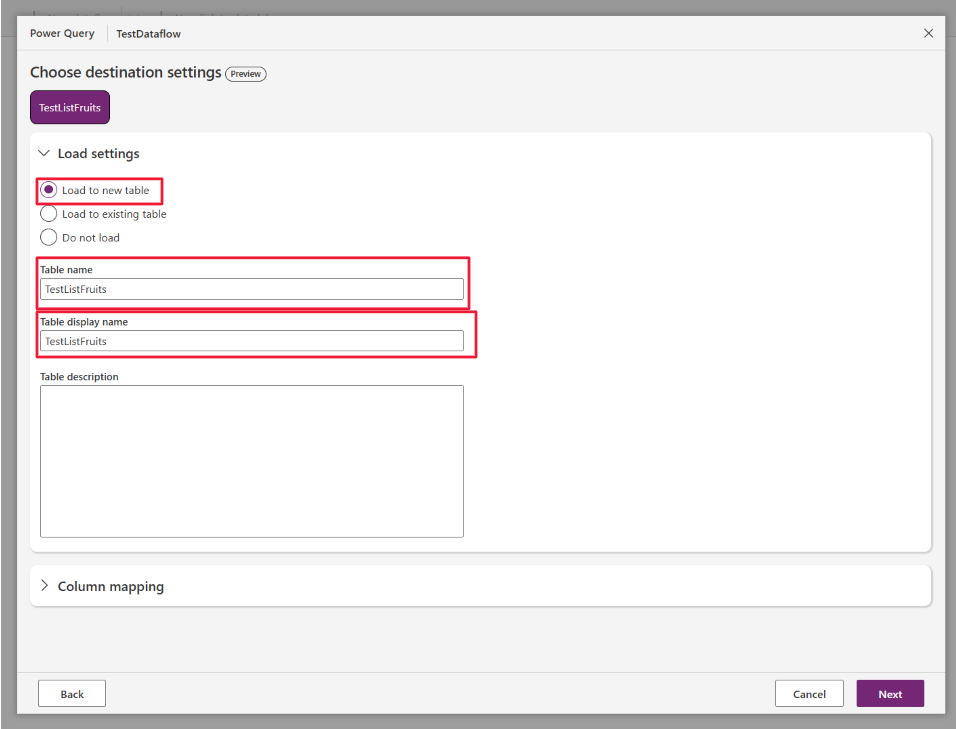
Having a primary key column in the entity helps in avoiding duplicates in the data rows. A primary key column is a column that's unique and deterministic of a data row in the entity. Under Column mapping, from the Unique primary name column, you can select a primary name column, or allow Power Query to use an Autogenerated column (the default and recommended setting -- for a SharePoint List, this would be the ID column).
Under the Destination column type section, you can designate what type of Dataverse column you want to create with the data coming from your source data (not all types are available).
Once you’re satisfied with the selections, you’re ready for the next step, which is selecting the refresh frequency of your dataflow. Select Next to continue.

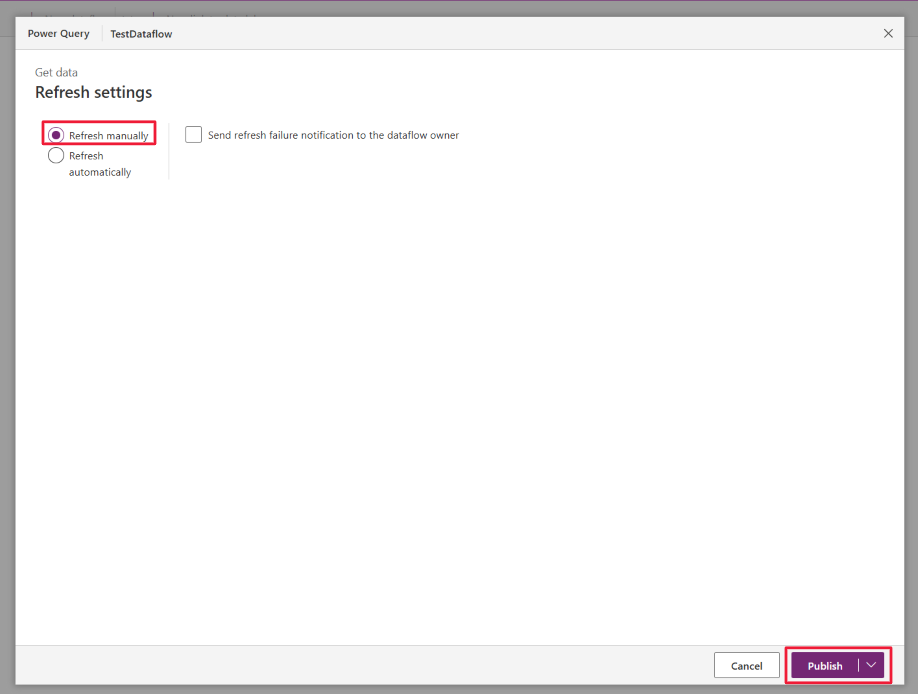
A Refresh settings window appears giving you the option to schedule the refresh frequency for each of your connected data sources.
Dataflows use a data refresh process to keep your destination data updating from the source. You can choose to refresh your dataflow manually or automatically on a scheduled interval of your choice. If you select Refresh automatically, you'll have options to select the refresh rate frequency or schedule. Notice how you can send a failure notification if refresh fails.
In our new flow, we're going to Refresh manually.
Select Publish.
Note
If you select the down chevron on the right side of the Publish button you can Publish later and choose when you would like to do that.
Once we publish the dataflow, it will be available in our dataflows.
You can test your new dataflow by going to your SharePoint list and making some updates to the data. Then return to the dataflow you created and refresh it. (You can find the Refresh option by selecting the ellipsis next to the name of the dataflow.)


Importing and refreshing data from another data source is an excellent way to incorporate current data into Dataverse.