Configure app registration permission scopes
By registering your web API and exposing it through scopes, assigning an owner and app role, you can provide permissions-based access to its resources to authorized users and client apps that access your API.
Register the web API
Access to APIs requires configuration of access scopes and roles. If you want to expose your resource application web APIs to client applications, configure access scopes and roles for the API. If you want a client application to access a web API, configure permissions to access the API in the app registration.
To provide scoped access to the resources in your web API, you first need to register the API with the Microsoft identity platform.
Perform the steps in the Register an application section of Quickstart: Register an app with the Microsoft identity platform.
Skip the Redirect URI (optional) section. You don't need to configure a redirect URI for a web API since no user is logged in interactively.
Assign application owner
In your app registration, under Manage, select Owners, and Add owners.
In the new window, find and select the owner(s) that you want to assign to the application. Selected owners appear in the right panel. Once done, confirm with Select. The app owner(s) will now appear in the owner's list.
Note
Ensure that both the API application and the application you want to add permissions to both have an owner, otherwise the API will not be listed when requesting API permissions.
Assign app role
- In your app registration, under Manage, select App roles, and Create app role.
- Next, specify the app role's attributes in the Create app role pane. For this walk-through, you can use the example values or specify your own.
| Field | Description | Example |
|---|---|---|
| Display name | The name of your app role | Employee Records |
| Allowed member types | Specifies whether the app role can be assigned to users/groups and/or applications | Applications |
| Value | The value displayed in the "roles" claim of a token | Employee.Records |
| Description | A more detailed description of the app role | Applications have access to employee records |
- Select the checkbox to enable the app role.
With the web API registered, assigned an app role and owner, you can add scopes to the API's code so it can provide granular permission to consumers.
Add a scope
Tip
The following steps may vary slightly depending on the portal you start from.
The code in a client application requests permission to perform operations defined by your web API by passing an access token along with its requests to the protected resource (the web API). Your web API then performs the requested operation only if the access token it receives contains the scopes required for the operation.
First, follow these steps to create an example scope named Employees.Read.All:
Sign in to the Microsoft Entra admin center as at least a Cloud Application Administrator.
If you have access to multiple tenants, use the Settings icon

in the top menu to switch to the tenant containing the app registration from the Directories + subscriptions menu.
Browse to Identity > Applications > App registrations, and then select your API's app registration.
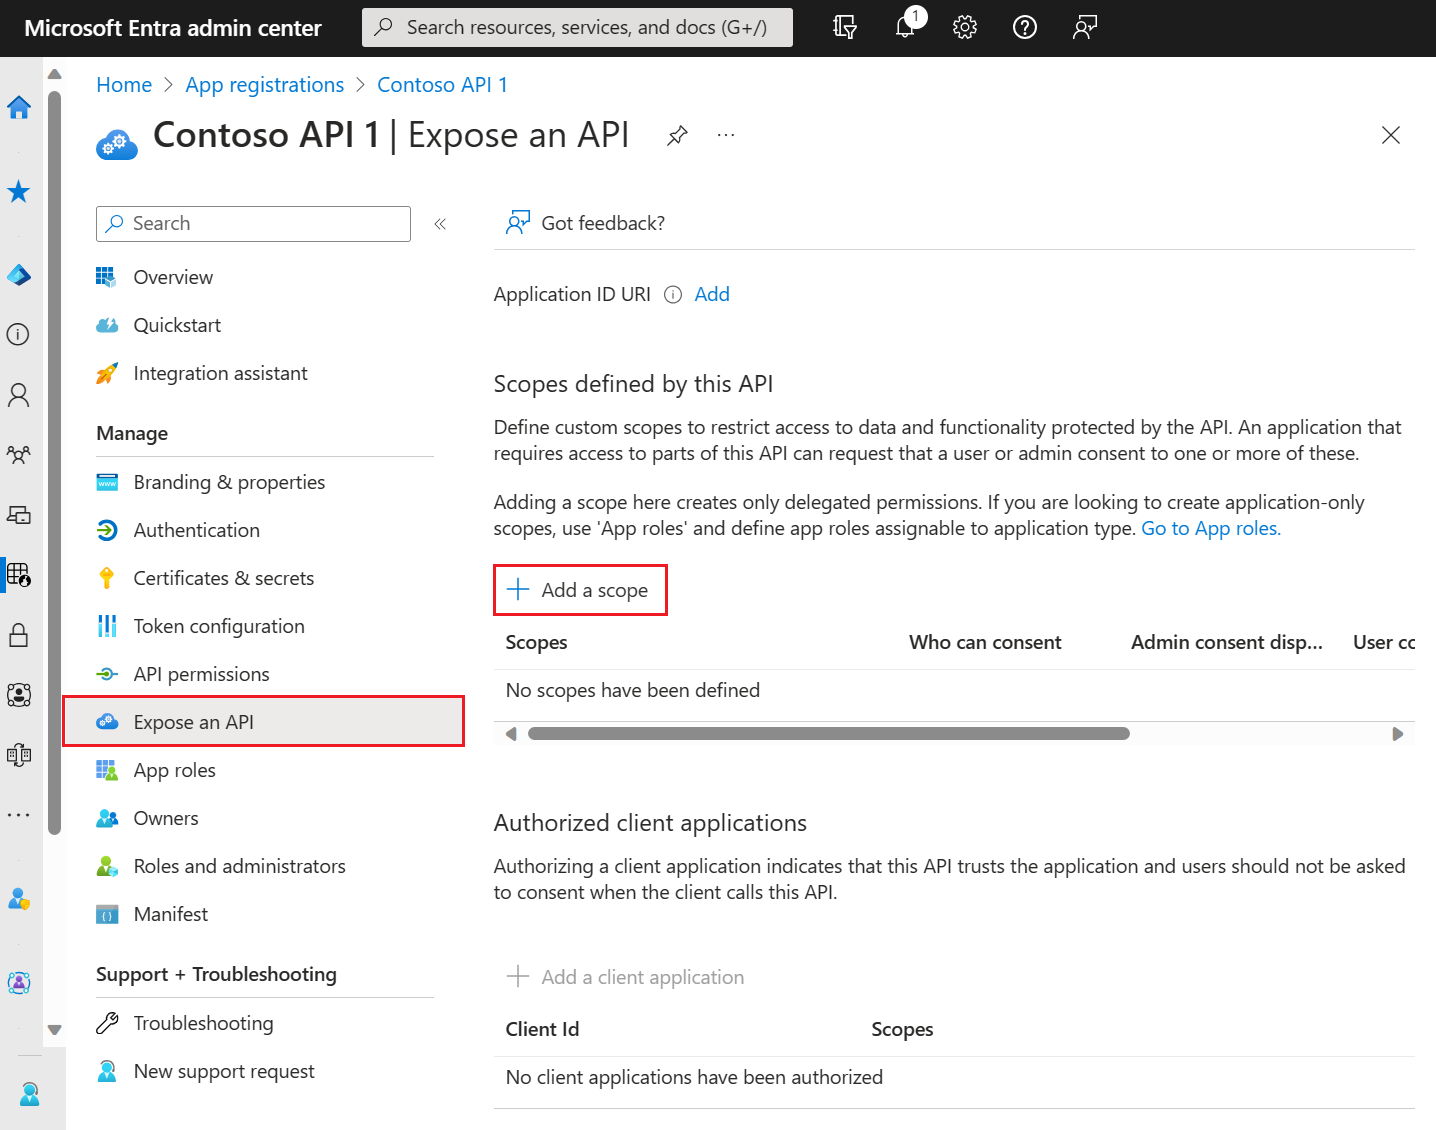
Select Expose an API
Select Add next to Application ID URI if you haven't yet configured one.
Note
You can use the default value of api://. The App ID URI acts as the prefix for the scopes you'll reference in your API's code, and it must be globally unique."
- Select Add a scope:
- Next, specify the scope's attributes in the Add a scope pane. For this walk-through, you can use the example values or specify your own.
| Field | Description | Example |
|---|---|---|
| Scope name | The name of your scope. A common scope naming convention is resource.operation.constraint. |
Employees.Read.All |
| Who can consent | Whether this scope can be consented to by users or if admin consent is required. Select Admins only for higher-privileged permissions. | Admins and users |
| Admin consent display name | A short description of the scope's purpose that only admins will see. | Read-only access to Employee records |
| Admin consent description | A more detailed description of the permission granted by the scope that only admins will see. | Allow the application to have read-only access to all Employee data. |
| User consent display name | A short description of the scope's purpose. Shown to users only if you set Who can consent to Admins and users. | Read-only access to your Employee records |
| User consent description | A more detailed description of the permission granted by the scope. Shown to users only if you set Who can consent to Admins and users. | Allow the application to have read-only access to your Employee data. |
- Set the State to Enabled, and then select Add scope.
- (Optional) To suppress prompting for consent by users of your app to the scopes you've defined, you can pre-authorize the client application to access your web API. Pre-authorize only those client applications you trust since your users won't have the opportunity to decline consent.
- Under Authorized client applications, select Add a client application
- Enter the Application (client) ID of the client application you want to pre-authorize. For example, that of a web application you've previously registered.
- Under Authorized scopes, select the scopes for which you want to suppress consent prompting, then select Add application.
If you followed this optional step, the client app is now a pre-authorized client app (PCA), and users won't be prompted for their consent when signing in to it.
Add a scope requiring admin consent
Next, add another example scope named Employees.Write.All that only admins can consent to. Scopes that require admin consent are typically used for providing access to higher-privileged operations, and often by client applications that run as backend services or daemons that don't sign in a user interactively.
To add the Employees.Write.All example scope, follow the steps in the Add a scope section and specify these values in the Add a scope pane:
| Field | Example value |
|---|---|
| Scope name | Employees.Write.All |
| Who can consent | Admins only |
| Admin consent display name | Write access to Employee records |
| Admin consent description | Allow the application to have write access to all Employee data. |
| User consent display name | None (leave empty) |
| User consent description | None (leave empty) |
Set the State to Enabled, and then select Add scope.
Verify the exposed scopes
If you have successfully added both example scopes described in the previous sections, they'll appear in the Expose an API pane of your web API's app registration, similar to the following image:

As shown in the image, a scope's full string is the concatenation of your web API's Application ID URI and the scope's Scope name.
For example, if your web API's application ID URI is https://contoso.com/api and the scope name is Employees.Read.All, the full scope is:
https://contoso.com/api/Employees.Read.All