Exercise enable sign-in risk policy
Enable user risk policy
Sign in to the Microsoft Entra admin center using a Global administrator account.
Open the portal menu and then select Identity.
On the Identity menu, select Protection.
On the Security blade, in the left navigation, select Identity protection.
In the Identity protection blade, in the left navigation, select User risk policy.
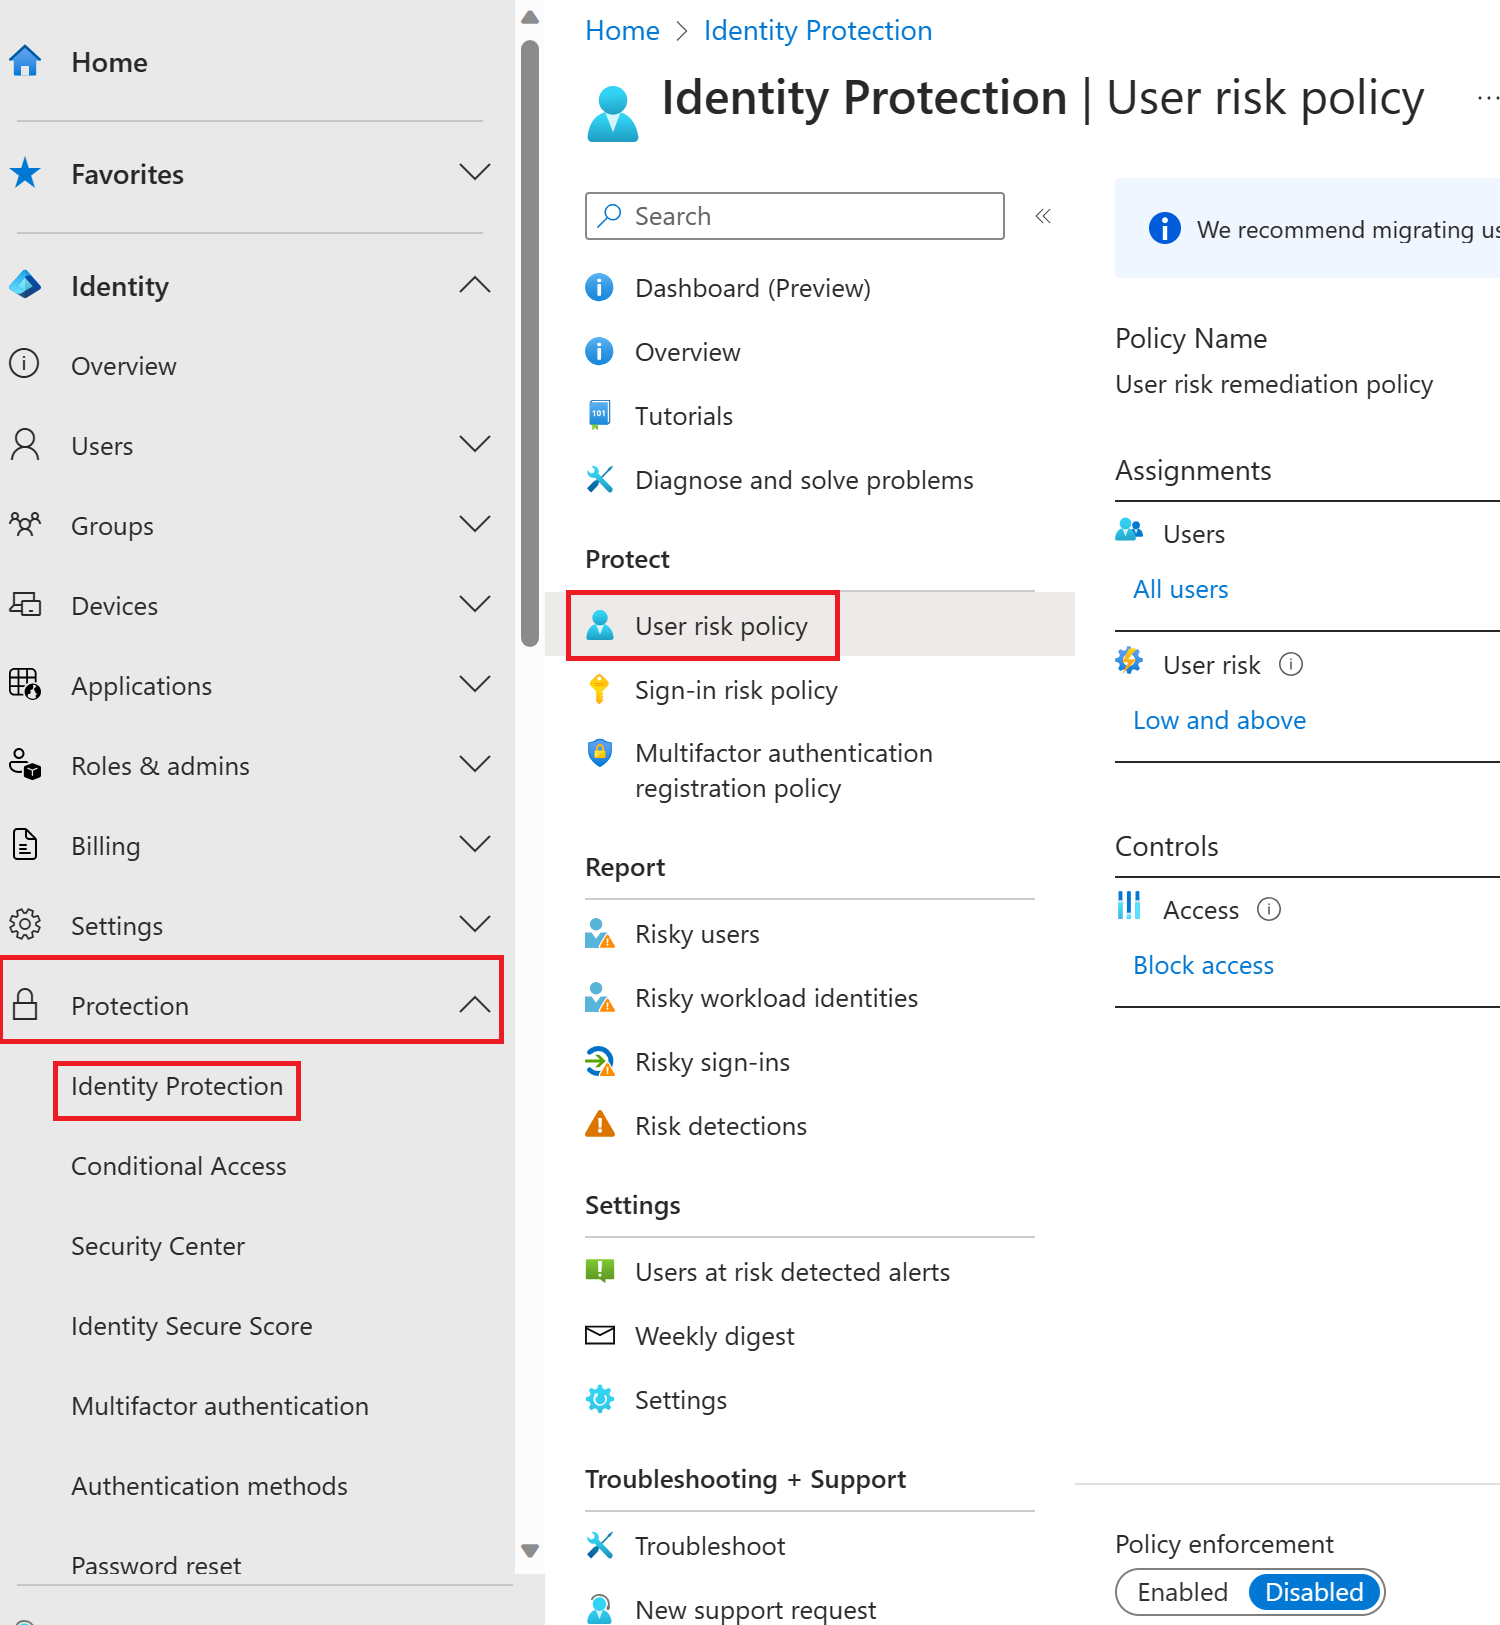
Under Assignments, select All users and review the available options. You can select from All users or Select individuals and groups if limiting your rollout. Additionally, you can choose to exclude users from the policy.
Under User risk, select Low and above.
In the User risk pane, select High and then select Done.
Under Controls, then Access, and then select Block access.
In the Access pane, review the available options.
Tip
Microsoft's recommendation is to Allow access and Require password change.
- Select the Require password change check box and then select Done.
- Under Enforce Policy, select On and then select Save.
Enable sign-in risk policy
- On the Identity protection blade, in the left navigation, select Sign-in risk policy.
- As with the User risk policy, the Sign-in risk policy can be assigned to users and groups and allows you to exclude users from the policy.
- Under Sign-in risk, select Medium and above.
- In the Sign-in risk pane, select High and then select Done.
- Under Controls, then Access, and then select Block access.
- Select the Require multifactor authentication check box and then select Done.
- Under Enforce Policy, select On and then select Save.