Build an automation runbook
Let's look at the steps required to create an automation account and an automation runbook.
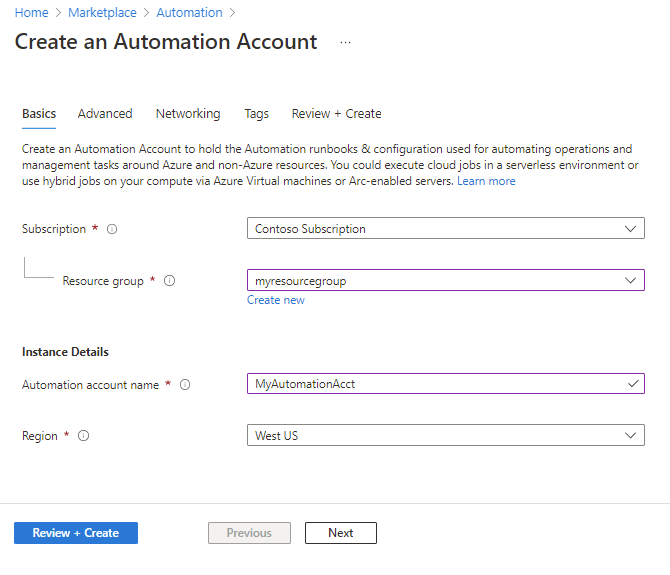
Create an automation account
To create an automation runbook, you first need to create an automation account.
In this example, you connect to an Azure SQL Database using PowerShell. This requires importing modules to support the necessary cmdlets. Before creating your runbook, import the required modules into your Azure Automation account. Navigate to the Shared Resources section of the main blade for your automation account and select Modules. Import the Az.Accounts module, as the Az.SQL module depends on it.
Search for the module in the gallery as shown above. After selecting the module, select Import, as shown below. This imports the module into your account. Repeat this process for the Az.SQL module.
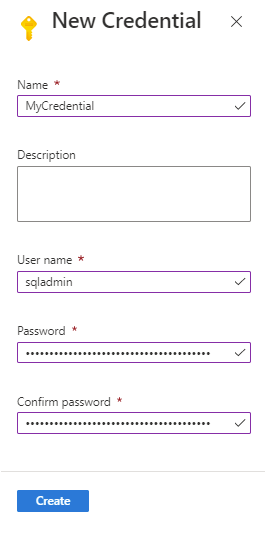
Next, you can optionally create a credential for your runbook to use. Create a credential by selecting on Credentials in the Shared Resources section of the main blade of your automation account. Creating a credential isn't mandatory for using Azure Automation, but this example includes one.
Create a runbook
Automation executes your runbooks based on the logic defined inside them. If a runbook is interrupted, it restarts at the beginning. This behavior requires you to write runbooks that support being restarted if transient issues occur.
On the Process Automation section of your Automation Account, select Runbooks, to create a runbook.
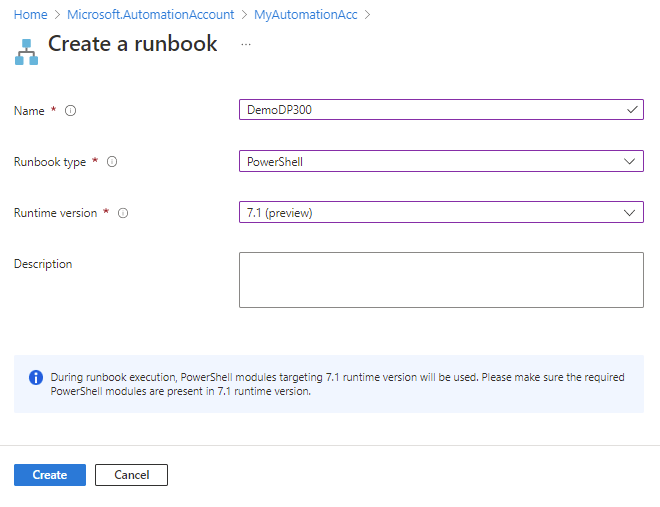
To create a runbook, you need to provide a name, the type of runbook, the runtime version, and optionally a description. Since this example specifies PowerShell as the type, a PowerShell editor opens.
On the editor, provide the following PowerShell code. We use system-managed identity to log in to Azure. You need to enable appropriate RBAC permissions for the system identity of this Automation account. Otherwise, the runbook might fail.
# Uses the system-managed identity to log in to Azure
try {
    Write-Output "Logging in to Azure..."
    Connect-AzAccount -Identity
} catch {
    Write-Error -Message $_.Exception
    throw $_.Exception
}

# Get SQL Database name
$dbname = (Get-AzSQLDatabase -ResourceGroupName 'SQLDB' -ServerName 'GSData' -DatabaseName 'GSData').DatabaseName

# Set SQL Server name
$AzureSQLServerName = $dbname + ".database.windows.net"

# Get SQL credentials
$Cred = Get-AutomationPSCredential -Name "SQLUser"

# Execute SQL query
$SQLOutput = $(Invoke-Sqlcmd -ServerInstance $AzureSQLServerName -Username $Cred.UserName -Password $Cred.GetNetworkCredential().Password -Database $dbname -Query "SELECT * FROM INFORMATION_SCHEMA.TABLES" -Verbose) 4>&1

Write-Output $SQLOutput
In this example, we use system-managed identity to log in to Azure, retrieves information about an Azure SQL Database, runs a query, and returns the results.
You can select Test pane in the code editor in the Azure portal. This allows you to test your code in the context of Azure Automation. A typical development process involves creating your PowerShell code locally and then testing it within the automation environment. This helps separate any PowerShell errors from those generated by the automation context. Always test your code within automation to ensure there are no errors in the code itself.