Exercise - Publish your repository
At the toy company, the website's developers have offered to help you write the Bicep template. You told them you've been keeping the Bicep code in a repository, and they've asked you to publish the repository. In this exercise, you'll publish your Git repository so that so your colleagues can view the files and collaborate with you.
During the process, you'll:
- Create a new remote repository.
- Configure your local Git repository to integrate with the remote repository.
- Push your changes from your local repository to the remote repository.
- Verify that the changes appear in the remote repository.
Create a repository in GitHub
In a browser, go to GitHub. Sign in with your GitHub account, or create a new account if you don't have one.
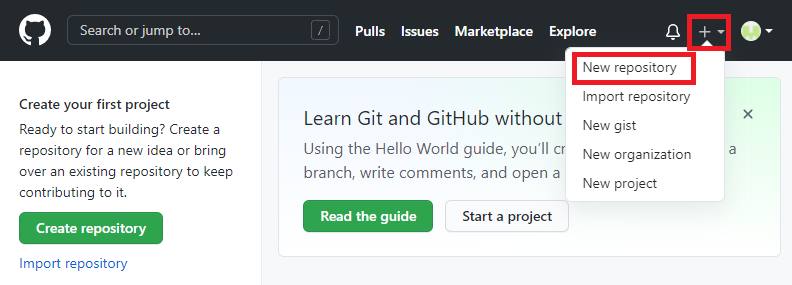
Select the plus (+) icon in the upper right of the window, and then select New repository.
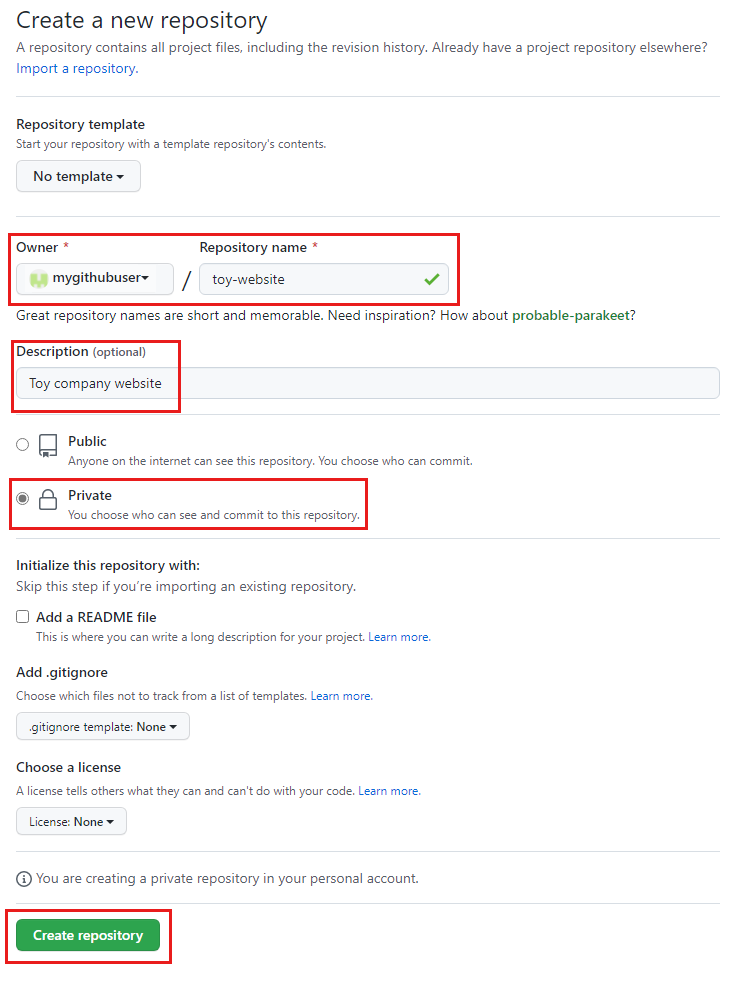
Enter the details of your new repository:
- Owner: Select your GitHub user name from the drop-down menu. In the screenshot,
mygithubuseris the repository owner's GitHub account name. You'll use your account name later in this module. - Repository name: Enter a meaningful but short name. For this module, use
toy-website-workflow. - Description: Include a description to help others understand the repository's purpose.
- Private: You can use GitHub to create public and private repositories. Create a private repository, because only people inside your organization should access your toy website's files. You can grant access to others later.
After you're done, your repository configuration should look like the following screenshot:
- Owner: Select your GitHub user name from the drop-down menu. In the screenshot,
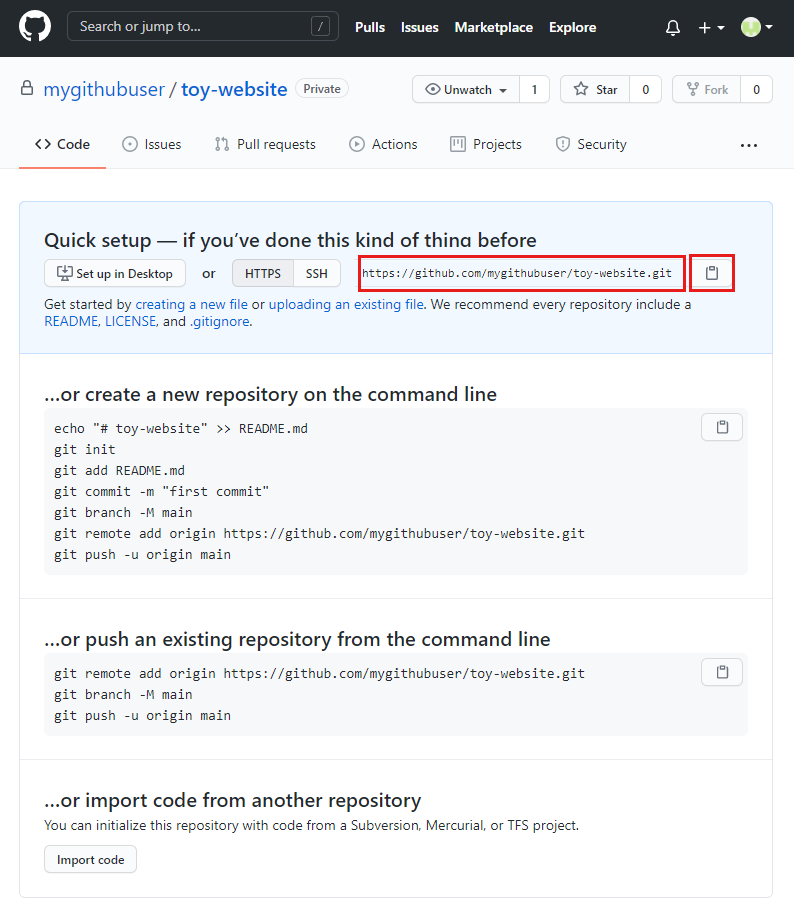
Select Create repository.
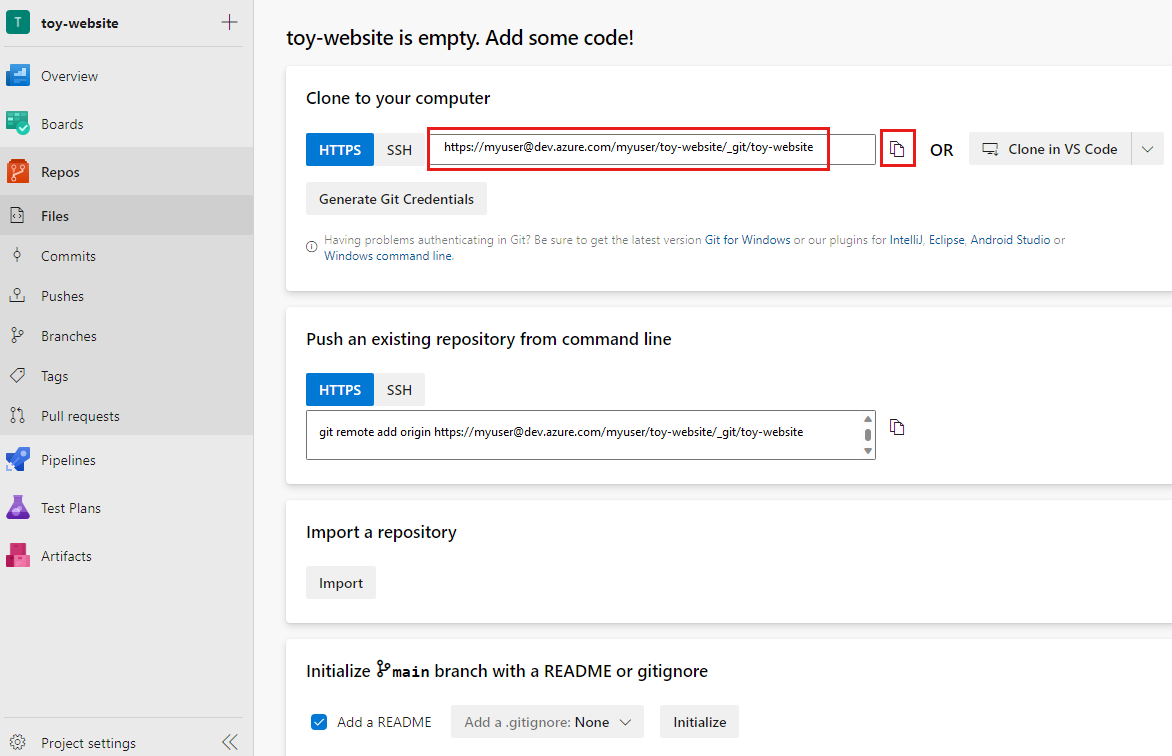
On the confirmation page that appears, make a note of the repository's URL. You can use the copy button to copy the URL. You'll use it shortly.
Create a repository in Azure Repos
In a browser, go to Azure DevOps. Sign in or create a new account.
If you're creating a new account, follow the prompts to create an Azure DevOps organization. Azure DevOps then asks you to create a new project. Continue to the next step.
If you signed in to an existing Azure DevOps organization, select the New project button to create a new project.
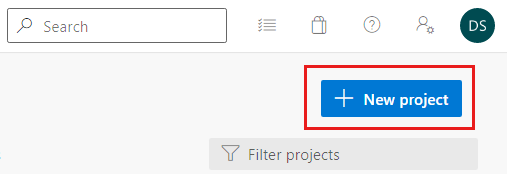
Enter the details of your new project:
- Project name: Enter a meaningful but short name. For this module, use
toy-website. - Description: Include a description to help others understand the repository's purpose.
- Visibility: You can use Azure DevOps to create public and private repositories. Create a private repository, because only people inside your organization should access your website's files. You can grant access to others later.
After you're done, your project configuration should look like the following screenshot:

- Project name: Enter a meaningful but short name. For this module, use
Select Create.
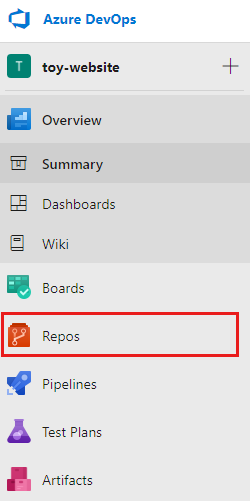
On the project page that appears, select the Repos menu item.
Make a note of the repository's URL. You can use the copy button to copy the URL. You'll use it shortly.
Generate a Git password
When you work with Azure Repos from Visual Studio Code on macOS, you need to use a special password that's different from the password that you use to sign in.
Note
If you're using Windows, skip to the next section, Configure your local Git repository.
Select the Generate Git credentials button.
Azure Repos creates a random password for you to use.
Make a note of the Password value. You'll use it shortly.
Keep your browser open. You'll check on the repository again later in this exercise.
Configure your local Git repository
Ensure you're on the main branch by entering the following command in the Visual Studio Code terminal:
git checkout mainEnter the following command to integrate your local repository with the remote repository that you created. Replace
YOUR_REPOSITORY_URLwith the URL that you saved earlier.git remote add origin YOUR_REPOSITORY_URLNotice that you're using the command
git remote addto create a new reference to a remote repository. You name the referenceorigin, which is the standard name.Verify the remote was created.
git remote -vThe output will look like the example.
origin  https://github.com/mygithubuser/toy-website.git (fetch)
origin  https://github.com/mygithubuser/toy-website.git (push)
origin https://myuser@dev.azure.com/myuser/toy-website/_git/toy-website (fetch) origin https://myuser@dev.azure.com/myuser/toy-website/_git/toy-website (push)
Push your changes by using the Git CLI
In the Visual Studio Code terminal, enter the following command:
git push -u origin mainBecause your current local branch is main, this command tells Git that your local main branch tracks the main branch in your remote repository. It also pushes the commits from your local repository to the remote repository.
This is the first time you've used this remote repository, so the terminal prompts you to select how to authenticate. Choose the option to use the browser.
Follow the instructions in the browser to sign in and authorize Visual Studio Code to access your GitHub repository.
In your terminal window, Git displays output similar to the following example:
Enumerating objects: 16, done.
Counting objects: 100% (16/16), done.
Delta compression using up to 8 threads
Compressing objects: 100% (11/11), done.
Writing objects: 100% (16/16), 2.30 KiB | 785.00 KiB/s, done.
Total 16 (delta 2), reused 0 (delta 0), pack-reused 0
remote: Resolving deltas: 100% (2/2), done.
To https://github.com/mygithubuser/toy-website.git
 * [new branch]      main -> main
Branch 'main' set up to track remote branch 'main' from 'origin'.
This output indicates that Git successfully pushed the contents of your repository to the remote repository.
In the Visual Studio Code terminal, enter the following command:
git push -u origin mainBecause your current local branch is main, this command tells Git that your local main branch tracks the main branch in your remote repository. It also pushes the commits from your local repository to the remote.
This is the first time you've used this repository, so you're prompted to sign in.
If you're using Windows, enter the same credentials that you used to sign in to Azure DevOps earlier in this exercise.
If you're using macOS, paste the password that you generated earlier in this exercise.
In your terminal window, Git displays output similar to the following example:
Enumerating objects: 16, done.
Counting objects: 100% (16/16), done.
Delta compression using up to 8 threads
Compressing objects: 100% (11/11), done.
Writing objects: 100% (16/16), 2.30 KiB | 785.00 KiB/s, done.
Total 16 (delta 2), reused 0 (delta 0), pack-reused 0
remote: Analyzing objects... (16/16) (5 ms)
remote: Storing packfile... done (165 ms)
remote: Storing index... done (75 ms)
To https://dev.azure.com/myuser/toy-website/_git/toy-website
 * [new branch]      main -> main
Branch 'main' set up to track remote branch 'main' from 'origin'.
This output indicates that Git successfully pushed the contents of your repository to the remote repository.
Add a README file
Now that your colleagues will use your repository, it's important to create a README.md file to help them understand what your repository is for and how they can get started.
Open Explorer in Visual Studio Code.
Add a new file at the root of your current folder structure, and name it README.md.
Copy the following text into the file:
# Toy company's website

This repository contains the website for our toy company.

## How to use

The Azure infrastructure is defined using [Bicep](/azure/azure-resource-manager/bicep).

To deploy the website's Azure resources, use the _deploy/main.bicep_ file.
Tip
This is a placeholder README file, so it doesn't have a lot of useful content. When you work with your own Git repositories, create a README file that helps someone understand how to get started with your code. Think of it as a lightweight manual for your project.
Save the file.
Stage and commit the file to your local Git repository. You can choose whether you commit by using the Git CLI or by using Source Control in Visual Studio Code.
Push again by using Visual Studio Code
Now that you've committed a new file, you need to push your changes again so that the remote has the latest files. This time, you use Visual Studio Code to push to the remote repository.
Open Source Control in Visual Studio Code.
Select the icon with three dots on the right side of the Source Control toolbar, and then select Push.

Notice that you're not prompted to sign in again. Your credentials are shared between the Git CLI and Visual Studio Code.
Verify the changes in GitHub
Now that you've pushed your changes to your remote repository, you can inspect the contents of the repository on GitHub.
In your browser, refresh the repository's page.
Notice that the files you created are now listed, and your README.md file is displayed.
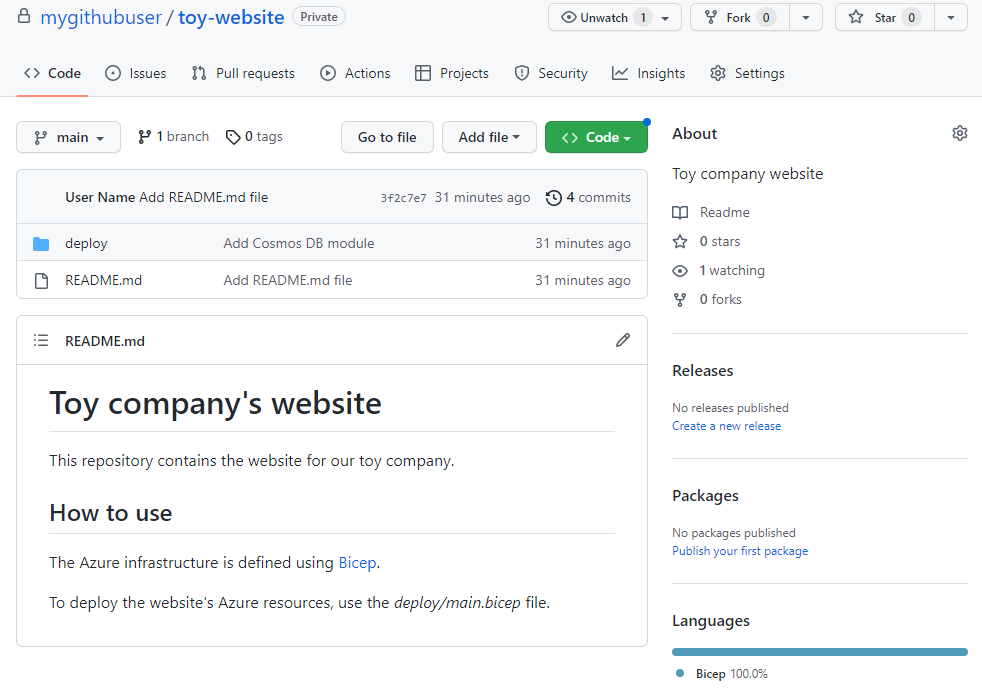
Browse through the GitHub interface to explore the files, and notice that your changes are all displayed. Because GitHub has the full list of changes to each file, you can even view the history of a file, just as you can when you work in Visual Studio Code.
Verify the changes in Azure Repos
Now that you've pushed your changes to your remote repository, you can inspect the contents of the repository on Azure Repos.
In your browser, refresh the Repos page.
Notice that the files you created are now listed, and your README.md file is displayed.
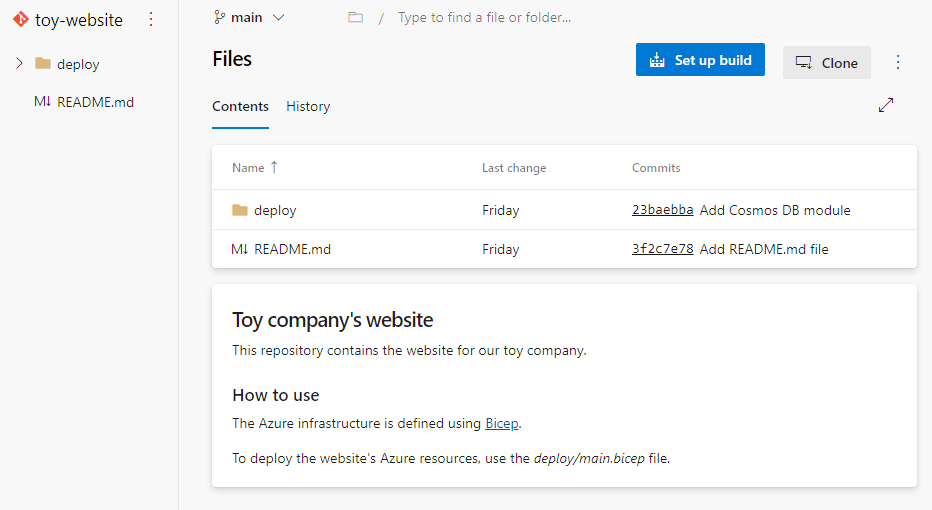
Browse through the Azure Repos interface to explore the files, and notice that your changes are all displayed. Because Azure Repos has the full list of changes to each file, you can even view the history of a file, just as you can when you work in Visual Studio Code.