Enable Managed Environments and environment groups
Managed Environments add governance controls to individual environments. When you use them with environment groups and routing, you can apply and enforce governance settings across your tenant without manually configuring each environment.
Enable Managed Environments
Managed Environments is a suite of premium capabilities available with standalone Power Apps, Power Automate, Microsoft Copilot Studio, Power Pages, and Dynamics 365 licenses. When you enable this property on an environment, it activates features such as sharing limits, weekly usage insights, maker welcome content, solution checker enforcement, and extended backup.
Prerequisites
- You need the Power Platform Administrator or Dynamics 365 Administrator role in Microsoft Entra ID.
- The environment must have Dataverse provisioned.
- Users with the Delegated Admin or Environment Admin security role can't change the Managed Environments property.
Enable in the admin center
- Sign in to the Power Platform admin center.
- Select Manage > Environments.
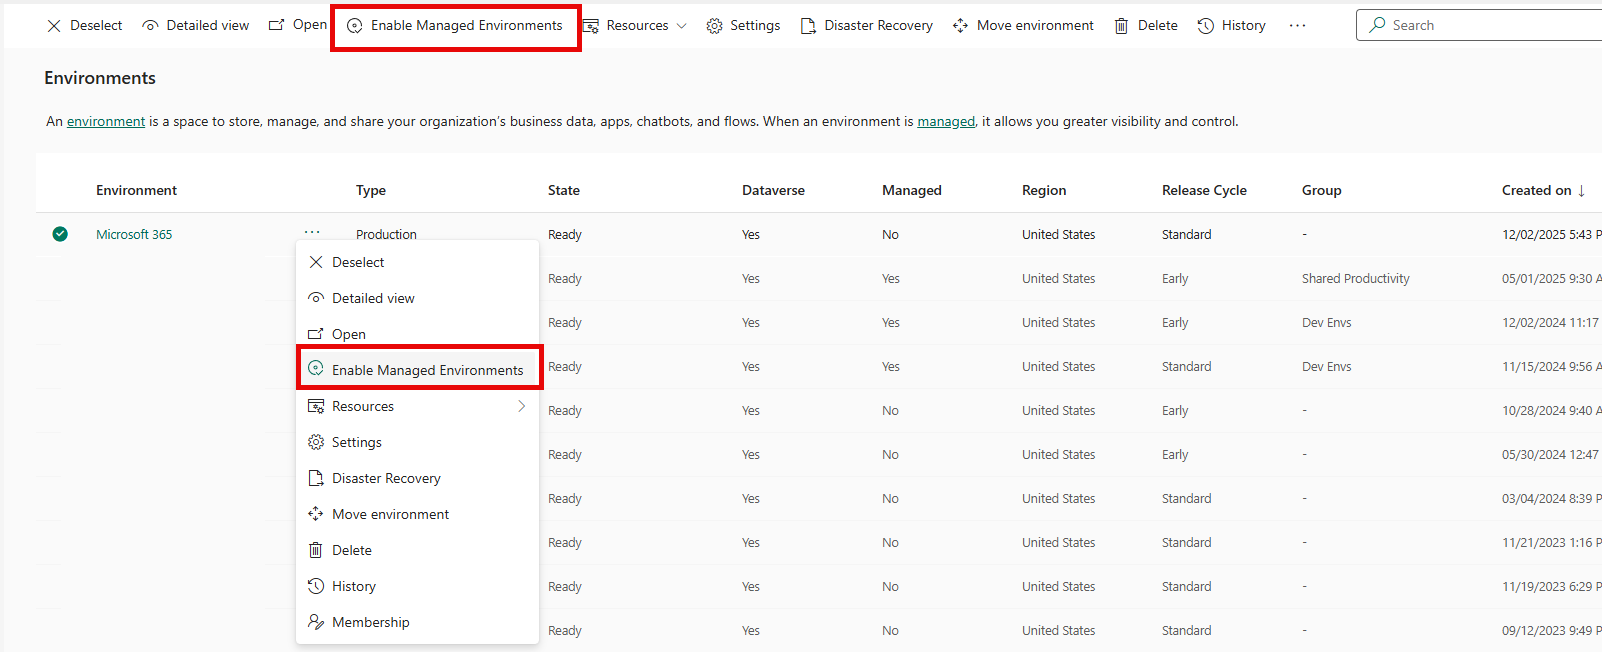
- Select the ellipsis (...) next to an environment, and then select Enable Managed Environments.
- Configure the available settings, such as sharing limits, usage insights, and solution checker.
- Select Enable.
Enable using PowerShell
$GovernanceConfiguration = [pscustomobject]@{
    protectionLevel = "Standard"
    settings = [pscustomobject]@{
        extendedSettings = @{}
    }
}

Set-AdminPowerAppEnvironmentGovernanceConfiguration `
    -EnvironmentName <EnvironmentID> `
    -UpdatedGovernanceConfiguration $GovernanceConfiguration
To disable Managed Environments, set protectionLevel to "Basic". Before disabling, confirm that none of the Managed Environments capabilities are actively in use.
Note
You can copy Managed Environment settings from one environment to another using PowerShell. If the target isn't yet managed, copying settings also enables Managed Environments on it. The Copy Managed Environment settings using PowerShell example shows how you can do this.
Configure environment groups
Environment groups let you define governance rules once and apply them to all member environments. When you add an environment to a group, it inherits the group's published rules. This approach replaces the need to configure each environment individually.
Create an environment group
- In the Power Platform admin center, select Manage > Environment groups.
- Select + New group in the command bar.
- Provide a name and description (for example, "Personal Productivity - Green Zone").
- Select Save.
Define rules for a group
Rules define the governance settings that apply to all environments in the group. Available rules include:
- Sharing limits: Control how broadly makers can share canvas apps and cloud flows.
- Solution checker: Require that solutions pass validation before deployment.
- Maker welcome content: Display custom getting-started information when makers access Power Apps.
- AI features: Control availability of AI-powered capabilities in the group's environments.
- Default deployment pipeline: Associate a specific pipeline for application lifecycle management (ALM) across all development environments in the group.
To configure rules:
- Select your environment group.
- Select the Rules tab.
- Select a rule to configure its settings.
- After configuring all desired rules, select Publish rules in the command bar.
Important
Rules don't take effect until you publish them. After publishing, allow up to 10 minutes for rules to propagate to all environments in the group.
Add environments to a group
You can add environments to a group manually or automatically through routing:
- Manual: In the environment group, select Add environments, then choose existing environments to include.
- Automatic: Configure environment routing to place newly created developer environments in a specific group.
Set up environment routing
Environment routing automatically redirects makers from the default environment to their own personal developer environment. This keeps the default environment clean and ensures every new maker works in a governed space.
Configure routing in the admin center
- In the Power Platform admin center, select Manage > Tenant settings.
- Select Environment routing.
- In the Turn on environment routing for section, select which product portals to enable routing for (Power Apps, Power Automate, Copilot Studio).
- Select New rule to create a routing rule:
- Name: Give the rule a descriptive name.
- Apply to: Choose Everyone or select specific security groups.
- Environment group: Select the group where new developer environments are created.
- Select Save.
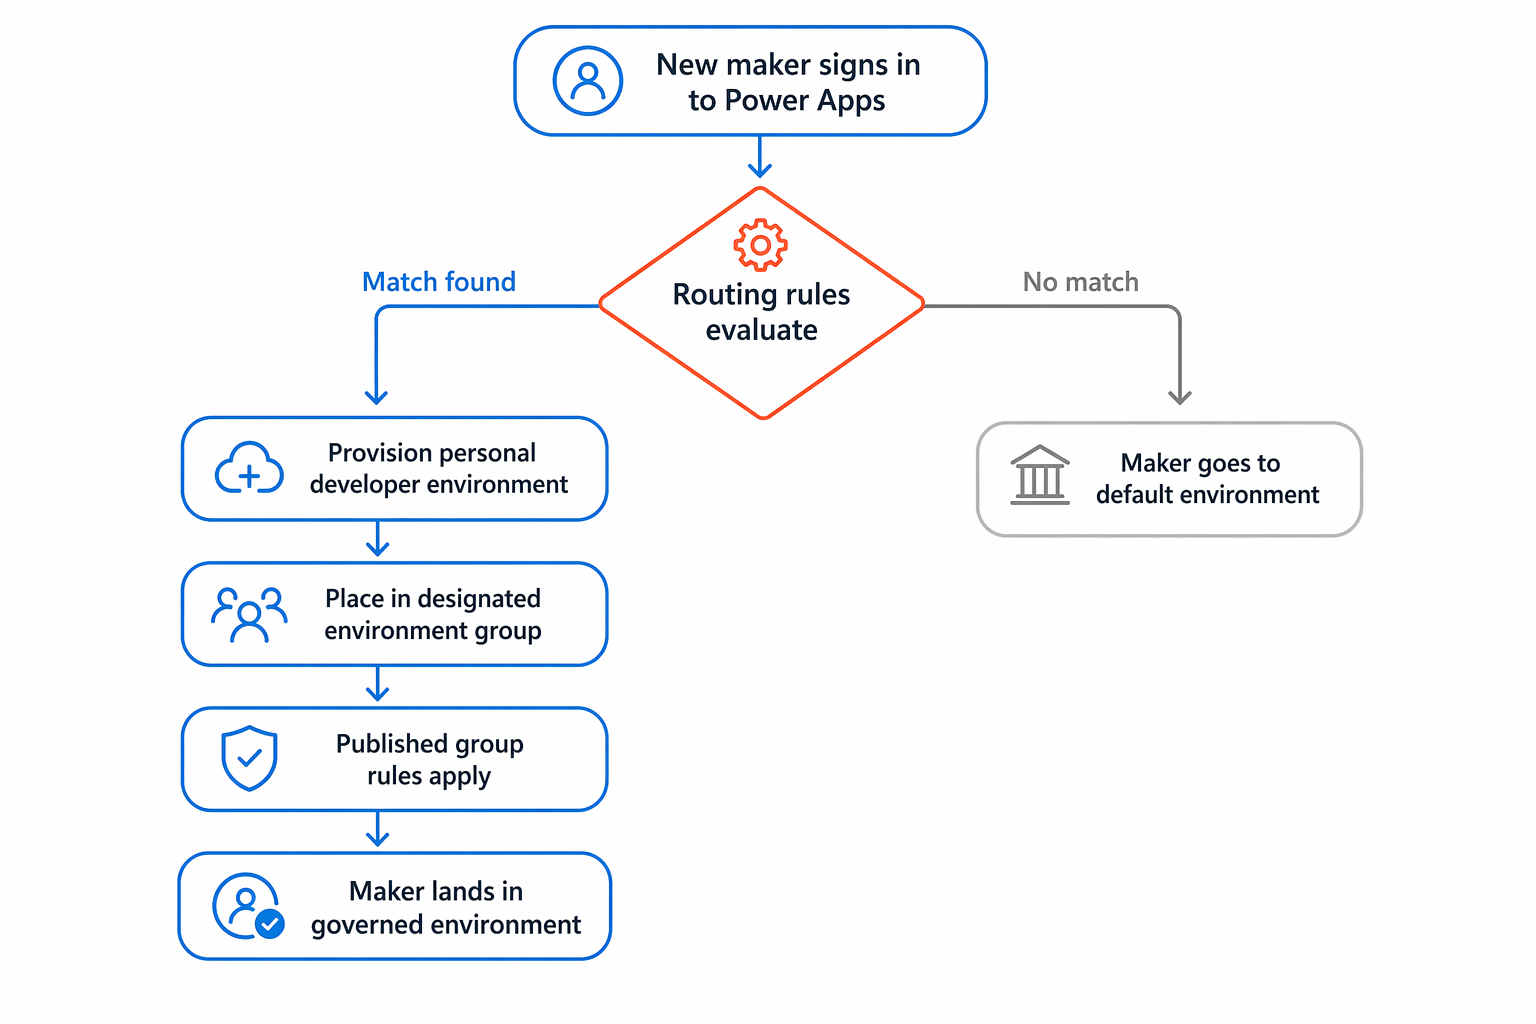
When a maker accesses a portal, the system evaluates rules in priority order and applies the first match. If no rule matches, the maker goes to the default environment.
How routing works in practice
When environment routing is active:
- A new maker signs in to Power Apps for the first time.
- The system checks routing rules and finds a match.
- The system automatically provisions a personal developer environment.
- The system places the new environment in the designated environment group.
- All published group rules apply immediately.
- The maker lands in their personal environment, ready to build.
The developer environments created by routing are Managed Environments by default. Makers with Developer Plan licenses can create and preview resources but need appropriate licensing to run them in production.
Tip
Use environment routing together with environment groups for the strongest governance posture. New environments inherit governance rules from the moment they're created, requiring no manual configuration.