Consume materials
You can post consumption manually or automatically. Posting consumption is also known as flushing.
Business Central includes the following flushing options:
Forward flush the whole production order
Backward flush the whole production order
Forward flush by routing operation
Backward flush by routing operation
Manual flushing
Automatic flushing that occurs at the start of a production order or routing operation is known as forward flushing. Automatic flushing that occurs when a production order or routing operation has finished is known as backward flushing.
The main advantages of automatic flushing are:
It reduces data entry.
If you use the backward flushing method, it bases its calculations on the quantity of manufactured items that are actually produced. As a result, the flexibility increases because, in certain types of production, the final output quantity is unknown until you finish the production order.
The main disadvantages of automatic flushing are:
If you generate added usage, such as component scrap or more time spent on manufacturing processes, or if you want to record finished goods scrap by operation, you might miss procedures to record this information.
Back flushing creates a temporary inventory mismatch because it overstates warehouse inventory and understates work-in-progress (WIP) inventory.
Forward flush a production order
Forward flushing a whole production order means that the program automatically consumes all the order's component items when you release the order or when you first refresh a released order.
The program bases this type of flushing on the expected output quantity of manufactured items for the order, multiplied by the required quantity of each component that's specified on the production order BOM.
To forward flush a whole order, select Forward as the flushing method for all items in the top level of the production order BOM. Also, make sure that you remove all routing link codes on the production order BOM.
Forward flushing a whole order is appropriate for a production environment that has a low number of defects, a low number of operations, and high component consumption in early operations.
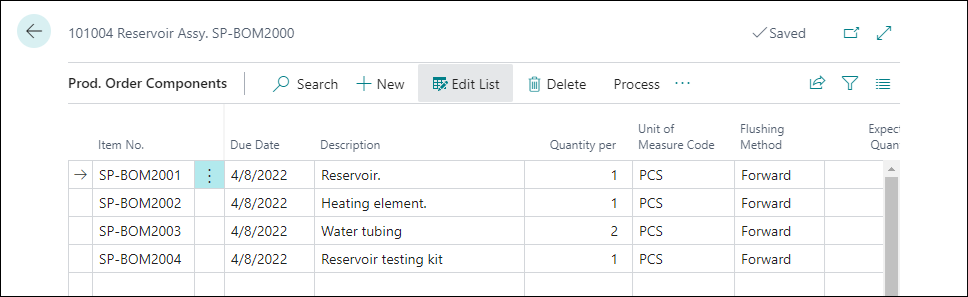
The following demonstration shows how to forward flush a production order for 10 units of item SP-BOM2000 (Reservoir Assy.). It starts with a firm planned production order:
Select the Search for page icon in the upper-right corner of the page, enter firm planned prod. orders, and then select the related link.
Select New.
In the Source Type field, select Item.
In the Source No. field, enter SP-BOM2000.
In the Quantity field, enter 10.
Select Refresh Production Order and then select OK.
To achieve forward flushing, make sure that you set up the components for this production order with the flushing method of Forward. For items that you always want to forward flush, you can set the Flushing Method field on the item card or stockkeeping unit card to Forward.
Additionally, for components that are set up with manual flushing, you can still enable forward flushing by changing the flushing method on the Prod. Order Components page. If you do so before converting the firm planned order into a released one, the forward flushing will take place when you change the status of the firm planned production order to released. If you change the flushing method of the production order components of a released production order, the forward flushing will take place when you refresh the released production order.
In the demonstration steps of this method, the production order components are set up with manual flushing.

You can change the flushing method as follows:
On the Lines FastTab of the firm planned production order, select Lines > Components.
For all components, change the flushing method from Manual to Forward.

Now that the firm planned production order is ready, you can convert it to a released production order as follows:
On the firm planned production order, select Change Status.
Make sure that Released is selected and then select Yes.
When you change the status from Firm Planned to Released, the program will also post the consumption. Essentially, item ledger entries and value entries with negative quantities are created for all components.
You can check these entries from the released production order as follows:
Select the Search for Page icon in the upper-right corner of the page, enter released production orders, and then select the related link.
Open the released production order of this demonstration.
Select Related > Order > Entries > Item Ledger Entries.
For this example, four item ledger entries of entry type Consumption will be posted.

You don't need to forward flush all components on a production order. You can set up only some components to use forward flushing. Use manual or backward flushing for the other components.
Backward flush a production order
Backward flushing a whole production order means that the program automatically consumes all the order's component items when you change the status of a production order to Finished.
The program bases this type of flushing on the actual output quantity of manufactured items that are recorded for the order, multiplied by the required quantity of each component that's specified on the production order BOM.
To backward flush a whole order, make sure that you select Backward as the flushing method for all items in the top level of the production order BOM. Also, make sure that you remove all routing link codes on the production order BOM.
You can use the same setup and procedures to backward flush a whole order as you would use to forward flush it. The main differences are as follows:
You'll change the flushing method for all the production BOM lines to Backward instead of Forward.
Consumption doesn't post until you change the status of the production order to Finished.
Manually flush a production order
With manual flushing, consumption isn't posted automatically. You'll need to record manual flushing in the consumption journal or production journal. This method gives you the option to adjust the quantities to consume if frequent component substitutions or greater-than-expected scrap exist.
If you manually record component consumption and production output, the sequence of events can affect the recorded values, as follows:
If you record consumption first, you'll need to record component consumption based on the expected output of manufactured items.
If you record production output first, you can record component consumption based on the actual output of manufactured items.
The following steps demonstrate how to manually flush a production order for 10 units of item SP-BOM2000 (Reservoir Assy.). It starts with a released production order:
Select the Search for Page icon in the upper-right corner of the page, enter released production orders, and then select the related link.
Select New.
In the Source Type field, select Item.
In the Source No. field, enter SP-BOM2000.
In the Quantity field, enter 10.
Select Refresh Production Order and then select OK.
To check the components of this production order, select the line with item SP-BOM2000 and then select Line > Components. All components will have Manual as flushing method. To consume these components, you can use the consumption journal as follows. To open the consumption journal, select the Search for Page icon in the upper-right corner of the page, enter consumption journals, and then select the related link.
You can manually enter lines in the consumption journal. However, this process can be time consuming and error prone. With the Calc. Consumption function, you can insert the items to consume, based on the expected or actual output.
To run the Calc. Consumption function, in the consumption journal, select Prepare > Calc. Consumption.

You can calculate the consumption based on actual output or expected output. Calculating consumption based on actual output will only work when you've already posted output for the production order for which you want to post consumption.
In this situation, consumption is calculated based on expected output. After entering the production order number in the No. field, you can select OK to populate the lines.

The consumption journal contains lines of all components of the production order. Posting these lines will result in item ledger entries with negative quantities.
To post the lines in the consumption journal, select Post/Print > Post > Yes.
Forward flush by operation
Forward flushing of material by operation will consume components at the start of a specific routing operation for a production order. Routing link codes will control the timing of the consumption. The program automatically flushes a component that has a routing link code assigned to it and a flushing method of Forward when work starts on an operation with the same routing link code. Specifically, "work starts" means that some output activity is recorded for the operation, such as setup time or run time.
The component quantity that's consumed is the quantity that's required for the component to make one manufactured item, multiplied by the expected output quantity of manufactured items.
You would use this flushing method when many operations are present and certain components aren't required until late in the manufacturing process.
The following steps demonstrate how to forward flush components by operations for a released production order for 10 units of item SP-BOM2000 (Reservoir Assembly). Before you create the production order, you'll first need to assign a routing link code to operation 10 of the SP-BOM2000 routing and items SP-BOM2001 and SP-BOM2002 of the SP-BOM2000 production BOM:
Select the Search for Page icon in the upper-right corner of the page, enter routing, and then select the related link.
Select routing SP-BOM2000 and then open the routing card.
Change the status from Certified to Under Development.
In the Routing Link Code field for operation 10, enter 100. You can use the Personalize function to add the Routing Link Code field to routing lines.
Change the status from Under Development to Certified.
Close the routing pages.
Select the Search for Page icon in the upper-right corner of the page, enter production BOM, and then select the related link.
Select production BOM SP-BOM2000 and then open the card.
Change the status from Certified to Under Development.
In the Routing Link Code field for SP-BOM2001 and SP-BOM2002, enter 100. You can use the Personalize function to add the Routing Link Code field to routing lines.
Change the status from Under Development to Certified.
Close the production BOM pages.
Now that the routing link codes are assigned, you can create a released production order for 10 units of item SP-BOM2000 (Reservoir Assembly). After you've created the production order, you can set the flushing method for components SP-BOM2001 and SP-BOM2002 to Forward.
Select the Search for Page icon in the upper-right corner of the page, enter released production orders, and then select the related link.
Select New.
In the Source Type field, select Item.
In the Source No. field, enter SP-BOM2000.
In the Quantity field, enter 10.
Select Refresh Production Order and then select OK.
Select Line > Components.
For components SP-BOM2001 and SP-BOM2002, select Forward in the Flushing Method field.
Close the Prod. Order Components page.
The next step is to record setup time for operation 10 for the new production order.
Select the Search for Page icon in the upper-right corner of the page, enter output journals, and then select the related link.
On the Output Journal page, select the Order No. field, and then select the production order that you created in the previous steps.
Select Process > Explode Routing. This action will insert all operations in the output journal. For this demonstration, you only need operation 10, so you can delete the lines for operations 20 and 30.
In the Setup Time field for operation 10, enter 15. This number represents 15 minutes. You can use the Personalize function to add the Setup Time field output journal.
Select Post/Print > Post > Yes to post the output journal.
To check the result, open the released production order and then select Related > Order > Entries > Item Ledger Entries.

The program will post consumption for the two components that are linked to operation 10 through routing link code 100.
Operation 10 isn't finished yet because you haven't posted quantities. The fact that these components are consumed while operation 10 isn't finished yet is the result of forward flushing. With backward flushing, the components are only consumed when quantities for an operation are posted in the output journal.
Backward flush by operation
Backward flushing of material by operation will record component consumption when output quantities post for a specific routing operation. Routing link codes will control the timing of the consumption. When a component has a flushing method of Backward and a routing link code, and when output has been posted for an operation that has the same routing link code, the program will flush the component automatically. The component quantity that's consumed is the quantity that's required to make one manufactured item, multiplied by the output quantity of manufactured items that are posted for the operation. The advantage of this approach is that you base your component consumption on actual output quantities of manufactured items instead of expected quantities.
To try backward flushing by operation, you can follow the same steps as outlined in the section on forward flushing by operation. However, in the output journal, you'll need to enter 10 in the Output Quantity field for operation 10 before you post the journal.