Exercise - Set up your environment
In this section, you make sure that your Azure DevOps organization is set up to complete the rest of this module. You also create the Azure App Service environments that you'll deploy to.
To meet these objectives, you:
- Add a user to ensure that Azure DevOps can connect to your Azure subscription.
- Set up an Azure DevOps project for this module.
- In Azure Boards, move the work item for this module to the Doing column.
- Make sure that your project is set up locally so that you can push changes to the pipeline.
- Create the Azure App Service environments by using the Azure CLI in Azure Cloud Shell.
- Create pipeline variables that define the names of your App Service environments.
- Create a service connection that enables Azure Pipelines to securely access your Azure subscription.
- Perform an initial deployment.
Add a user to Azure DevOps
To complete this module, you need your own Azure subscription. You can get started with Azure for free.
Although you don't need an Azure subscription to work with Azure DevOps, here you'll use Azure DevOps to deploy to resources that exist in your Azure subscription. To simplify the process, use the same Microsoft account to sign in to both your Azure subscription and your Azure DevOps organization.
If you use different Microsoft accounts to sign in to Azure and Azure DevOps, then add a user to your DevOps organization under the Microsoft account that you use to sign in to Azure. For more information, see Add users to your organization or project. When you add the user, choose the Basic access level.
Then sign out of Azure DevOps and sign in again under the Microsoft account that you use to sign in to your Azure subscription.
Get the Azure DevOps project
Here you make sure that your Azure DevOps organization is set up to complete the rest of this module. You set it up by running a template that creates a project in Azure DevOps.
The modules in this learning path are part of a progression. You follow the Tailspin web team through their DevOps journey. For learning purposes, each module has an associated Azure DevOps project.
Run the template
Run a template that sets up your Azure DevOps organization.
Get and run the ADOGenerator project in Visual Studio or the IDE of your choice.
When prompted to Enter the template number from the list of templates, enter 34 for Manage release cadence in Azure Pipelines with deployment patterns, and then press Enter.
Choose your authentication method. You can set up and use a Personal Access Token (PAT) or use device login.
Note
If you set up a PAT, make sure to authorize the necessary scopes. For this module, you can use Full access, but in a real-world situation, you should ensure you grant only the necessary scopes.
Enter your Azure DevOps organization name, then press Enter.
If prompted, enter your Azure DevOps PAT, and then press Enter.
Enter a project name such as Space Game - web - Deployment patterns, then press Enter.
Once your project is created, go to your Azure DevOps organization in your browser (at
https://dev.azure.com/<your-organization-name>/) and select the project.
Fork the repository
If you haven't already, create a fork of the mslearn-tailspin-spacegame-web-deploy repository.
On GitHub, go to the mslearn-tailspin-spacegame-web-deploy repository.
Select Fork at the top-right of the screen.
Choose your GitHub account as the Owner, then select Create fork.
Important
The Clean up your Azure DevOps environment page in this module contains important cleanup steps. Cleaning up helps ensure that you don't run out of free build minutes. Be sure to follow the cleanup steps even if you don't complete this module.
Set your project's visibility
Initially, your fork of the Space Game repository on GitHub is set to public while the project created by the Azure DevOps template is set to private. A public repository on GitHub can be accessed by anyone, while a private repository is only accessible to you and the people you choose to share it with. Similarly, on Azure DevOps, public projects provide read-only access to non-authenticated users, while private projects require users to be granted access and authenticated to access the services.
At the moment, it is not necessary to modify any of these settings for the purposes of this module. However, for your personal projects, you must determine the visibility and access you wish to grant to others. For instance, if your project is open source, you may choose to make both your GitHub repository and your Azure DevOps project public. If your project is proprietary, you would typically make both your GitHub repository and your Azure DevOps project private.
Later on, you may find the following resources helpful in determining which option is best for your project:
- Use private and public projects
- Change project visibility to public or private
- Setting repository visibility
Move the work item to Doing
In this part, in Azure Boards you assign yourself a work item that relates to this module. You also move the work item to the Doing state. In practice, your team would create work items at the start of each sprint or work iteration.
Assigning work in this way gives you a checklist to work from. It gives your team visibility into what you're working on and how much work is left. It also helps the team enforce limits on work in progress (WIP) so that the team doesn't take on too much work at one time.
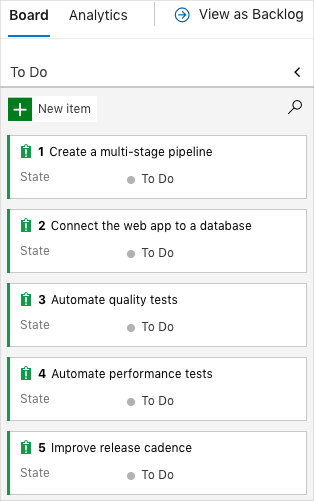
Recall that the team settled on these top issues for the current sprint:
Note
Within an Azure DevOps organization, work items are numbered sequentially. In your project, the number for each work item might not match what you see here.
Here you move the fifth item, Improve release cadence, to the Doing column. Then you assign yourself to the work item. Improve release cadence relates to choosing a deployment pattern that enables you to quickly release changes to your users.
To set up the work item:
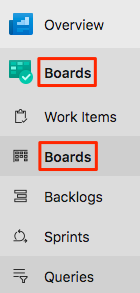
In Azure DevOps, go to Boards, and then select Boards from the menu.
At the bottom of the Improve release cadence work item, select the down arrow. Then assign the work item to yourself.

Move the work item from the To Do column to the Doing column.
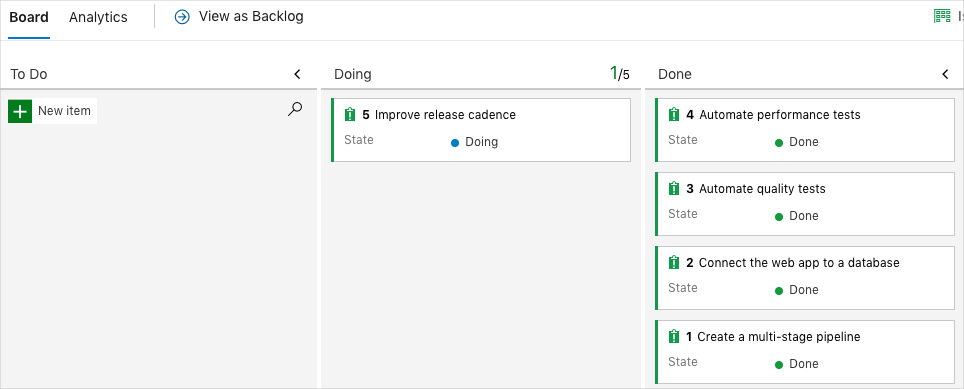
At the end of this module, you move the card to the Done column after you complete the task.
Set up the project locally
Here you load the Space Game project in Visual Studio Code, configure Git, clone your repository locally, and set the upstream remote so that you can download starter code.
Note
If you're already set up with the mslearn-tailspin-spacegame-web-deploy project locally, you can move to the next section.
Open the integrated terminal
Visual Studio Code comes with an integrated terminal. Here you both edit files and work from the command line.
Start Visual Studio Code.
On the View menu, select Terminal.
In the dropdown list, select Git Bash. If you're familiar with another Unix shell that you prefer to use, select that shell instead.

In the terminal window, you can choose any shell that's installed on your system. For example, you can choose Git Bash, or PowerShell, or another shell.
Here you'll use Git Bash, part of Git for Windows, which makes it easy to run Git commands.
Note
On Windows, if you don't see Git Bash listed as an option, make sure you've installed Git, and then restart Visual Studio Code.
Run the
cdcommand to go to the directory where you want to work. Choose your home directory (~) or a different directory if you want.cd ~
Configure Git
If you're new to Git and GitHub, first run a few commands to associate your identity with Git and authenticate with GitHub. For more information, see Set up Git.
At a minimum, you need to complete the following steps. Run the commands from the integrated terminal.
Note
If you already use two-factor authentication with GitHub, create a personal access token. When you're prompted, use your token in place of your password.
Treat your access token like a password. Keep it in a safe place.
Set up your project in Visual Studio Code
In the Build applications with Azure DevOps learning path, you forked and then cloned a Git repository. The repository contains the source code for the Space Game website. Your fork was connected to your projects in Azure DevOps so that the build runs when you push changes to GitHub.
Important
In this learning path, we switch to a different Git repository, mslearn-tailspin-spacegame-web-deploy. When you ran the template to set up your Azure DevOps project, the process forked the repository automatically for you.
In this part, you clone your fork locally so that you can change and build out your pipeline configuration.
Clone your fork locally
You now have a copy of the Space Game web project in your GitHub account. Now you'll download, or clone, a copy to your computer so you can work with it.
A clone, just like a fork, is a copy of a repository. When you clone a repository, you can make changes, verify that they work as you expect, and then upload those changes to GitHub. You can also synchronize your local copy with changes that other authenticated users have made to the GitHub copy of your repository.
To clone the Space Game web project to your computer:
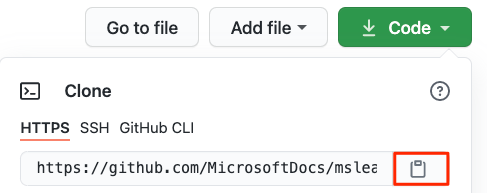
Go to your fork of the Space Game web project (mslearn-tailspin-spacegame-web-deploy) on GitHub.
Select Code. Then, from the HTTPS tab, select the button next to the URL that's shown to copy the URL to your clipboard.
In Visual Studio Code, go to the terminal window.
In the terminal, move to the directory where you want to work. Choose your home directory (
~) or a different directory if you want.cd ~Run the
git clonecommand. Replace the URL that's shown here with the contents of your clipboard:git clone https://github.com/your-name/mslearn-tailspin-spacegame-web-deploy.gitMove to the
mslearn-tailspin-spacegame-web-deploydirectory. This is the root directory of your repository.cd mslearn-tailspin-spacegame-web-deploy
Set the upstream remote
A remote is a Git repository where team members collaborate (like a repository on GitHub). Here you list your remotes and add a remote that points to Microsoft's copy of the repository so that you can get the latest sample code.
Run this
git remotecommand to list your remotes:git remote -vYou see that you have both fetch (download) and push (upload) access to your repository:
origin  https://github.com/username/mslearn-tailspin-spacegame-web-deploy.git (fetch)
origin  https://github.com/username/mslearn-tailspin-spacegame-web-deploy.git (push)
Origin specifies your repository on GitHub. When you fork code from another repository, the original remote (the one you forked from) is often named upstream.
Run this
git remote addcommand to create a remote named upstream that points to the Microsoft repository:git remote add upstream https://github.com/MicrosoftDocs/mslearn-tailspin-spacegame-web-deploy.gitRun
git remoteagain to see the changes:git remote -vYou see that you still have both fetch (download) access and push (upload) access to your repository. You also now have fetch access to the Microsoft repository:
origin  https://github.com/username/mslearn-tailspin-spacegame-web-deploy.git (fetch)
origin  https://github.com/username/mslearn-tailspin-spacegame-web-deploy.git (push)
upstream        https://github.com/MicrosoftDocs/mslearn-tailspin-spacegame-web-deploy.git (fetch)
Open the project in the file explorer
In Visual Studio Code, your terminal window points to the root directory of the Space Game web project. To view its structure and work with files, from the file explorer, you'll now open the project.
The easiest way to open the project is to reopen Visual Studio Code in the current directory. To do so, run the following command from the integrated terminal:
code -r .You see the directory and file tree in the file explorer.
Reopen the integrated terminal. The terminal places you at the root of your web project.
If the code command fails, you need to add Visual Studio Code to your system PATH. To do so:
- In Visual Studio Code, select F1 or select View > Command Palette to access the command palette.
- In the command palette, enter Shell Command: Install 'code' command in PATH.
- Repeat the previous procedure to open the project in the file explorer.
You're now set up to work with the Space Game source code and your Azure Pipelines configuration from your local development environment.
Create the Azure App Service environments
Here you create the environments that define the pipeline stages. You create one App Service instance that corresponds to each stage: Dev, Test, and Staging.
In previous modules, you used the Azure CLI to create your App Service instances. Here you'll do the same.
Important
You need your own Azure subscription to complete the exercises in this module.
Bring up Cloud Shell through the Azure portal
- Go to the Azure portal and sign in.
- On the menu, select Cloud Shell. When you're prompted, select the Bash experience.
Select an Azure region
Here you specify the default region, or geographic location, where your Azure resources will be created.
In Cloud Shell, run the following
az account list-locationscommand to list the regions that are available from your Azure subscription.az account list-locations \ --query "[].{Name: name, DisplayName: displayName}" \ --output tableFrom the Name column in the output, choose a region that's close to you. For example, choose eastasia or westus2.
Run
az configureto set your default region. Replace <REGION> with the name of the region that you chose.az configure --defaults location=<REGION>This example sets westus2 as the default region:
az configure --defaults location=westus2
Create the App Service instances
Here you create App Service instances for the three stages that you'll deploy to: Dev, Test, and Staging. You'll add a deployment slot to Staging later in this module.
Note
For learning purposes, here you use the default network settings. These settings make your site accessible from the internet. In practice, you could configure an Azure virtual network that places your website in a network that's not routable from the internet but that only your team can access. Later, when you're ready, you could reconfigure your network to make the website available to your users.
In Cloud Shell, generate a random number that makes your web app's domain name unique:
webappsuffix=$RANDOMRun the following
az group createcommand to create a resource group that's named tailspin-space-game-rg.az group create --name tailspin-space-game-rgRun the following commands to create two App Service plans.
az appservice plan create \
  --name tailspin-space-game-test-asp \
  --resource-group tailspin-space-game-rg \
  --sku B1 \
  --is-linux

az appservice plan create \
  --name tailspin-space-game-prod-asp \
  --resource-group tailspin-space-game-rg \
  --sku P1V2 \
  --is-linux
Important
If the B1 SKU isn't available as part of your Azure subscription, then choose a different plan, such as S1 (Standard).
Recall that an App Service plan defines the CPU, memory, and storage resources that are provided for your web app to run.
The first command specifies the B1 plan. This plan runs on the Basic tier. The App Service environments use this plan for the Dev and Test stages. The B1 Basic plan is intended for apps that have low-traffic requirements, such as in a development or test environment.
The second command specifies the P1V2 plan, which runs on the Premium tier. This plan is used for Staging. The Premium P1V2 plan is for production workloads. It runs on dedicated virtual machine instances.
The Basic plan tier offers no additional deployment slots. However, the Premium plan does. That's why you need the Premium plan for your Staging environment.
Run the following
az webapp createcommands to create the three App Service instances, one for each of the Dev, Test, and Staging environments.az webapp create \ --name tailspin-space-game-web-dev-$webappsuffix \ --resource-group tailspin-space-game-rg \ --plan tailspin-space-game-test-asp \ --runtime "DOTNET|8.0" az webapp create \ --name tailspin-space-game-web-test-$webappsuffix \ --resource-group tailspin-space-game-rg \ --plan tailspin-space-game-test-asp \ --runtime "DOTNET|8.0" az webapp create \ --name tailspin-space-game-web-staging-$webappsuffix \ --resource-group tailspin-space-game-rg \ --plan tailspin-space-game-prod-asp \ --runtime "DOTNET|8.0"Notice that here you apply the same App Service plan, B1 Basic, to the App Service instances for Dev and Test. You apply the App Service plan Premium P1V2 to the App Service instance for Staging.
Run the following
az webapp listcommand to list the host name and state of each App Service instance.az webapp list \ --resource-group tailspin-space-game-rg \ --query "[].{hostName: defaultHostName, state: state}" \ --output tableNote the host name for each running service. You'll need these host names later when you verify your work. Here's an example of the host names:
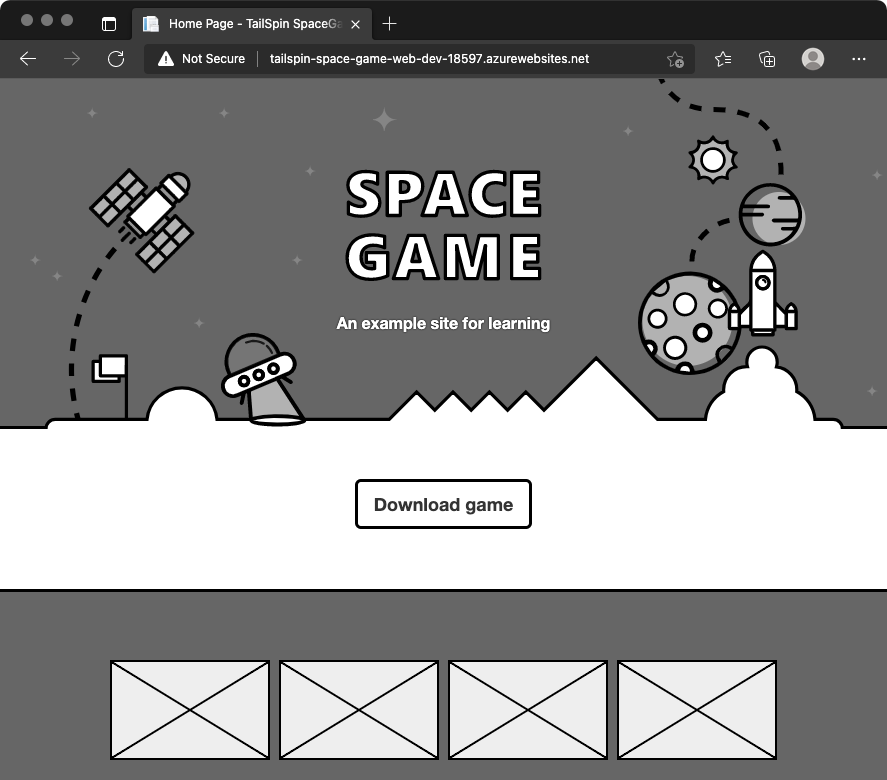
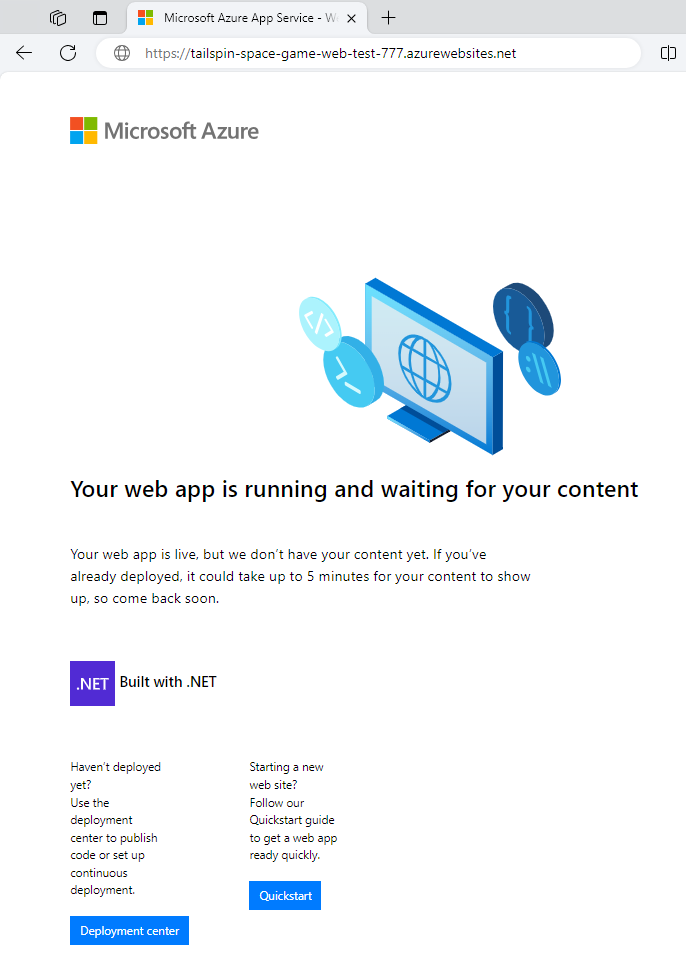
HostName                                                 State
-------------------------------------------------------  -------
tailspin-space-game-web-dev-21017.azurewebsites.net      Running
tailspin-space-game-web-test-21017.azurewebsites.net     Running
tailspin-space-game-web-staging-21017.azurewebsites.net  Running
As an optional step, go to one or more of the names. Verify that they're running and that the default home page appears.
You see this page in each environment:
Important
The Clean up your Azure DevOps environment page in this module contains important cleanup steps. Cleaning up helps ensure that you're not charged for Azure resources after you complete this module. Be sure to perform the cleanup steps even if you don't complete this module.
Create pipeline variables in Azure Pipelines
In Create a multistage pipeline by using Azure Pipelines, you added one variable for each of the App Service instances that correspond to the Dev, Test, and Staging stages in your pipeline. Here you do the same.
Each stage in your pipeline configuration uses these variables to identify which App Service instance to deploy to.
To add the variables:
In Azure DevOps, go to your Space Game - web - Deployment patterns project.
Under Pipelines, select Library.

Select + Variable group.
Under Properties, for the variable group name, enter Release.
Under Variables, select + Add.
For the name of your variable, enter WebAppNameDev. As its value, enter the name of the App Service instance that corresponds to your Dev environment, such as tailspin-space-game-web-dev-1234.
Repeat steps 5 and 6 twice more to create variables for your Test and Staging environments, as shown in this table:
Variable name Example value WebAppNameTest tailspin-space-game-web-test-1234 WebAppNameStaging tailspin-space-game-web-staging-1234 Be sure to replace each example value with the App Service instance that corresponds to your environment.
Important
Set the name of the App Service instance, not its host name. In this example, you would enter tailspin-space-game-web-dev-1234 and not tailspin-space-game-web-dev-1234.azurewebsites.net.
Near the top of the page, select Save to save your variable to the pipeline.
Your variable group resembles this one:

Create the dev, test, and staging environments
In previous modules, you created environments for the dev, test, and staging environments. Here, you repeat the process.
To create the dev, test, and staging environments:
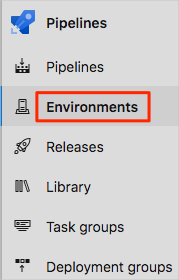
From Azure Pipelines, select Environments.
To create the dev environment:
- Select Create environment.
- Under Name, enter dev.
- Leave the remaining fields at their default values.
- Select Create.
To create the test environment:
- Return to the Environments page.
- Select New environment.
- Under Name, enter test.
- Select Create.
To create the staging environment:
- Return to the Environments page.
- Select New environment.
- Under Name, enter staging.
- Select Create.
Create a service connection
Here you create a service connection that enables Azure Pipelines to access your Azure subscription. Azure Pipelines uses this service connection to deploy the website to App Service. You created a similar service connection in the previous module.
Important
Make sure that you're signed in to both the Azure portal and Azure DevOps under the same Microsoft account.
In Azure DevOps, go to your Space Game - web - Deployment patterns project.
From the bottom corner of the page, select Project settings.
Under Pipelines, select Service connections.
Select New service connection, then choose Azure Resource Manager, and then select Next.
Near the top of the page, Service principal (automatic). Then select Next.
Fill in these fields:
Field Value Scope level Subscription Subscription Your Azure subscription Resource Group tailspin-space-game-rg Service connection name Resource Manager - Tailspin - Space Game During the process, you might be prompted to sign in to your Microsoft account.
Ensure that Grant access permission to all pipelines is selected.
Select Save.
Azure DevOps performs a test connection to verify that it can connect to your Azure subscription. If Azure DevOps can't connect, you have the chance to sign in a second time.
Fetch the branch from GitHub
Here you fetch the blue-green branch from GitHub. Then you check out, or switch to, that branch.
This branch contains the Space Game project that you worked with in the previous modules and an Azure Pipelines configuration to start with.
In Visual Studio Code, open the integrated terminal.
Run the following
gitcommands to fetch a branch namedblue-greenfrom the Microsoft repository and to switch to that branch.git fetch upstream blue-green git checkout -B blue-green upstream/blue-greenThe format of these commands enables you to get starter code from the Microsoft GitHub repository, known as
upstream. Shortly, you'll push this branch up to your GitHub repository, known asorigin.As an optional step, open azure-pipelines.yml from Visual Studio Code. Familiarize yourself with the initial configuration.
The configuration resembles the ones that you created in the previous modules in this learning path. It builds only the application's Release configuration. For brevity, it omits the triggers, manual approvals, and tests that you set up in previous modules.
For learning purposes, this configuration promotes changes from any branch to Dev, Test, and Staging. A more robust approach might promote changes from only a release branch or
main. You used this robust approach in the Create a multistage pipeline by using Azure Pipelines module.
Run the pipeline and see the deployed website
Here you push the initial configuration to GitHub so that you're up to date with the team. Later, you'll add a slot to the Staging environment so that you can implement a blue-green deployment.
In Visual Studio Code, open the integrated terminal.
Run the following
git commitcommand to add an empty entry to your commit history.git commit --allow-empty -m "Trigger the pipeline"This step is for learning purposes. It isn't typical. We provide starter code that you don't need to modify now. The
--allow-emptyflag ensures that the next step successfully pushes the branch to GitHub and triggers Azure Pipelines to run.If you omitted this step, then the
git pushcommand that you run in the next step wouldn't take any action. So it wouldn't trigger Azure Pipelines to run.Run the following
git pushcommand to upload the branch to your GitHub repository.git push origin blue-greenIn Azure Pipelines, go to the build. Then trace the build as it runs. When prompted, select Permit to grant deployment permissions to the different stages.
After your pipeline run has been completed, navigate to the summary page to see your pipeline status.

Navigate to the URL that corresponds to each stage. Your web app should be deployed to each environment.