Exercise - Push a change through the pipeline
In this part, you see your deployment slots in action. On the website's home page, you change the background color and the text on the hero banner. You then push your changes to GitHub, watch the pipeline run, and verify the changes.
To further practice the process, you then revert your changes and watch the pipeline run as a way of rolling forward.
Change the text on the hero banner
Here you change the text on the hero banner. Later you'll see the change when you deploy to App Service.
In Visual Studio Code, in the Tailspin.SpaceGame.Web/Views/Home directory, open Index.cshtml.
Look for this text near the top of the page:
<p>An example site for learning</p>Tip
Visual Studio Code provides a way to search for text in files. To access the search pane, select the magnifying glass icon in the side pane.
Replace the example text with the following text, and then save the file.
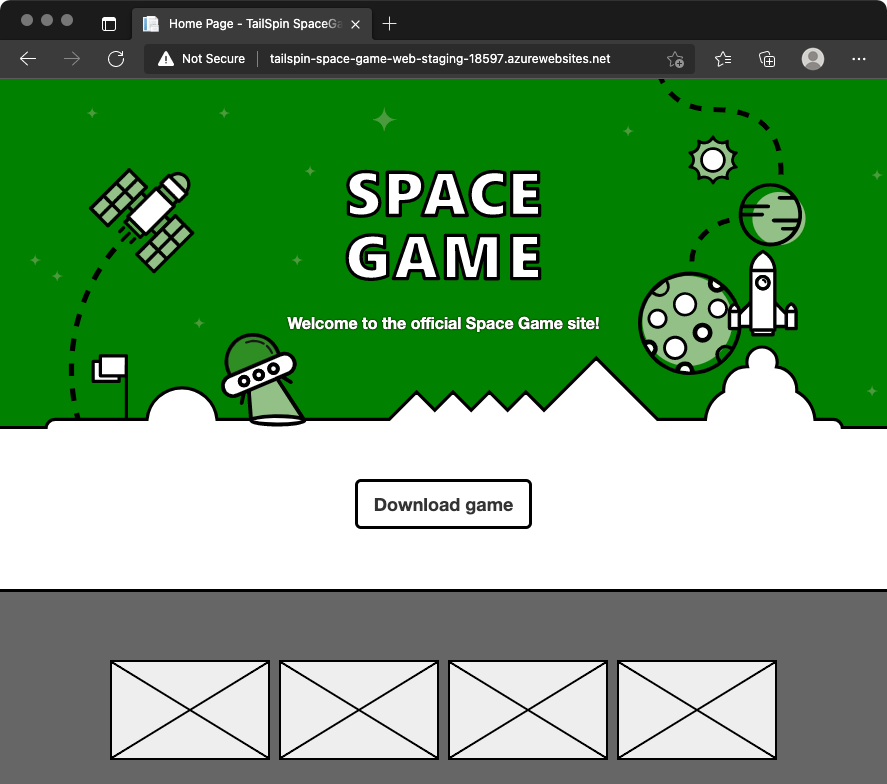
<p>Welcome to the official Space Game site!</p>
Change the background color
Here you change the background color of the hero banner from gray to green.
In Visual Studio Code, in the Tailspin.SpaceGame.Web/wwwroot/css directory, open site.scss.
Important
Open site.scss, not site.css. The Build stage runs
node-sassto convert site.scss (a Sass file) to site.css (a standard CSS file).Locate the following code near the top of the file:
.intro {
  height: 350px;
  background-color: #666;
  background-image: url('/images/space-background.svg');
  background-size: 1440px;
  background-position: center top;
  background-repeat: no-repeat;
  background-attachment: fixed;
In the code, replace the highlighted text as shown in the following example. Then save the file.
.intro {
  height: 350px;
  background-color: green;
  background-image: url('/images/space-background.svg');
  background-size: 1440px;
  background-position: center top;
  background-repeat: no-repeat;
  background-attachment: fixed;
Push the change through the pipeline
Normally you would build and run the site locally to verify the change. You might also run any associated unit tests to verify that your change doesn't break existing functionality.
For brevity, here you commit the changes to your branch, push your branch to GitHub, and watch the pipeline run.
Add Index.cshtml and site.scss to the index, commit the changes, and then push the changes up to GitHub.
git add Tailspin.SpaceGame.Web/Views/Home/Index.cshtml Tailspin.SpaceGame.Web/wwwroot/css/site.scss
git commit -m "Change text and colors on the home page"
git push origin blue-green
In Azure Pipelines, trace the build through each step.
Go to the URL that corresponds to the production slot for your Staging environment. This slot is the default slot that you configured when you set up the pipeline earlier.
You see that the deployed website shows the color and text changes.
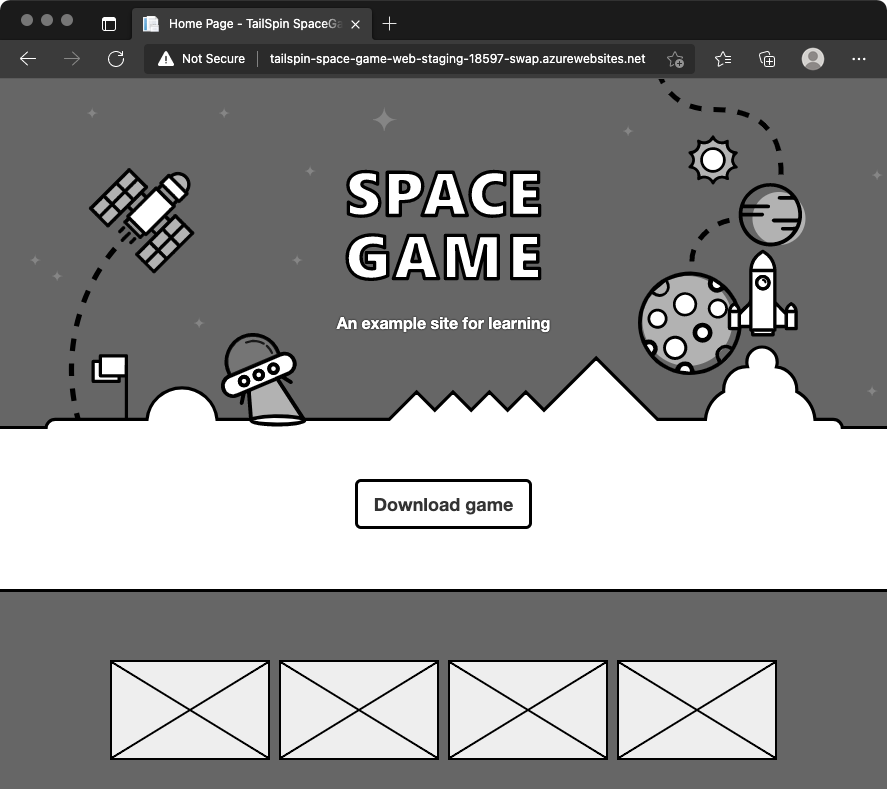
Go to the URL that corresponds to the swap slot for your Staging environment. The URL includes "-swap.azurewebsites.net" in its name.
You see the previous version of the website, without the color and text changes.
You see no changes because you swapped the production slot and the swap slot. In other words, here you always deploy to the swap slot, and then you swap the production slot and swap slot. The swap process ensures that the production slot points to the more recent deployment.
Revert the change
Let's say that you deployed a change that you want to revert. At this point, you could roll back the change by swapping the production slot and swap slot again. For example, you could swap the slots manually through the Azure portal. Or, instead of rolling back the changes, you could roll forward by pushing another change through the pipeline.
That's what you'll do here. You'll revert your latest code changes and push another change through the pipeline. To do so, you use the git revert command.
In Git, you seldom remove commits from a file's history. Unlike the "undo" operation in a text editor, the git revert command creates a new commit that's essentially the opposite of the specified set of commits. To see the commits, you first run the git log command to trace your commit history during the revert process.
In your terminal, run the following
git logcommand to view your commit history.git --no-pager log --onelineYour output resembles the following code example. In your output, you'll see additional commits and different commit IDs.
d6130b0 (HEAD -> blue-green, origin/blue-green) Change text and colors on the home page
ce56955 Swap deployment slots
0d6a123 Trigger the pipeline
In the output, trace the commit history. The latest commit is on top.
Run the following
git revertcommand to revert by one commit.git revert --no-edit HEADThink of HEAD as the current state of your branch. HEAD refers to the latest commit. This command specifies to revert only the HEAD, or latest, commit.
Run
git logagain to see your updated commit history.git --no-pager log --onelineAt the top of your output, you see an additional commit that reverts the previous commit. Here's an example:
e58896a (HEAD -> blue-green) Revert "Change text and colors on the home page"
d6130b0 (origin/blue-green) Change text and colors on the home page
ce56955 Swap deployment slots
0d6a123 Trigger the pipeline
Push the reverted change through the pipeline
Here you push your reverted change through the pipeline and see the results.
Run the following
git pushcommand to upload theblue-greenbranch to your GitHub repository.git push origin blue-greenIn Azure Pipelines, go to the build. Trace the build as it runs.
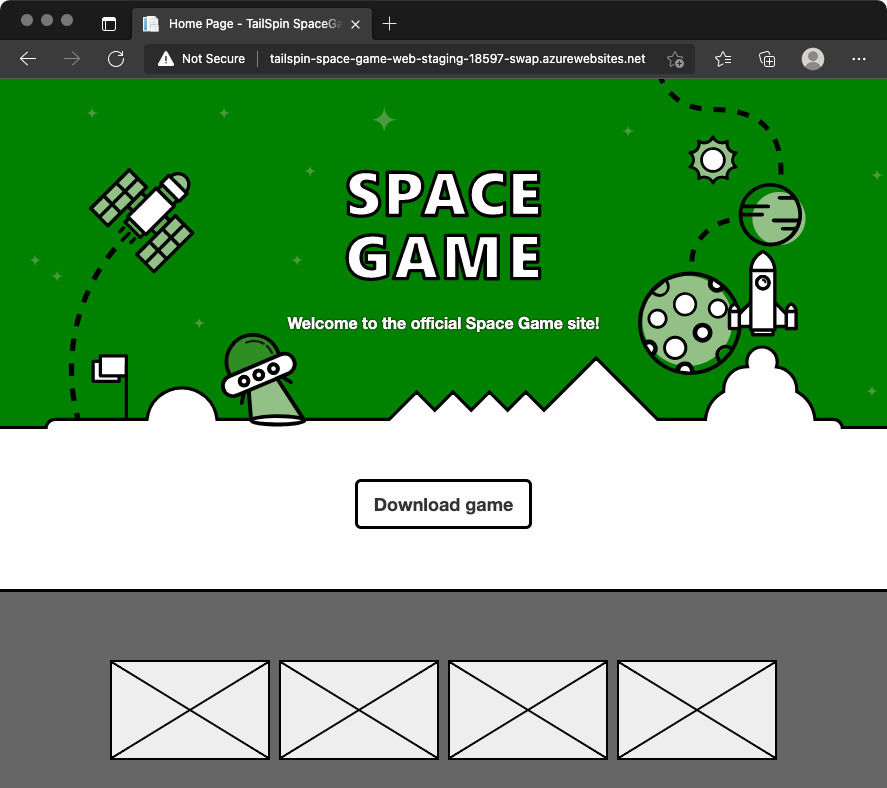
Go to the URLs that correspond to the swap slot and production slot for your Staging environment.
The production slot now points to your reverted change, which is the original website.

The swap slot now points to the previous change.
Great work! The team now has a way to automate the releases. They can get new features to their users without incurring downtime.
Team meeting
The team gathers to demo the pipeline. This time, Tim pushes a change through the pipeline while everyone watches. But not everyone's convinced.
Andy: It's great seeing deployment slots at work. But I don't get it. How do we benefit from zero-downtime deployments here? Staging is only for our team and management.
Tim: Indeed, we won't see much benefit right now. But imagine when we apply blue-green deployments to a Production stage. We'll still have the manual approval from management before we promote to Production. But when we do release new features, the swap process will make the rollout nearly instantaneous. It will be seamless to our users.
Andy: OK, I think I understand now. I like this improvement. The system of deployment slots was easy to set up, and it will benefit our users. Everyone wins.
Amita: Speaking of improvements, why don't we revisit our value-stream mapping exercise we did a few weeks ago? I bet we'll see progress in how quickly we can release new features.
Mara: Great, let's put that on the agenda for our next team meeting.