Exercise - Convert and migrate resources
Important
You need your own Azure subscription to complete this exercise, and you might incur charges. If you don't already have an Azure subscription, create a free account before you begin.
Your toy company has acquired a competitor that created a popular toy truck. The toys connect to a virtual machine that's hosted in Azure to receive firmware updates. All the resources for the virtual machine were created manually by using the Azure portal. In this unit, you'll begin the process of migrating the resources to a Bicep file.
During the process, you'll do the following tasks:
- Deploy a new virtual machine by using the Azure portal.
- Export the virtual machine resources to a JSON template.
- Decompile the JSON template to Bicep.
- Create a new Bicep file and move the resources from the decompiled template.
This exercise uses the Bicep extension for Visual Studio Code. Be sure to install this extension in Visual Studio Code.
Create a virtual machine by using the Azure portal
To simulate the situation in the example scenario, you'll first deploy a virtual machine by using the Azure portal.
Sign in to the Azure portal.
On the Azure home page, under Azure services, select Create a resource:

Azure Marketplace appears in the Create a resource pane.
Under Ubuntu Server 20.04 LTS, select Create:

Important
If you don't see Ubuntu Server 20.04 LTS, go directly to Ubuntu Server 20.04 LTS in Azure Marketplace.
On the Basics tab, enter the following values for each setting. Use the defaults for all other settings.
Setting Value Project details Resource group Select Create new and enter ToyTruck Instance details Virtual machine name ToyTruckServer Region (US) West US 3 Availability options No infrastructure redundancy required Image Ubuntu Server 20.04 LTS - x64 Gen2 Size Standard_D2s_v3 Administrator account Authentication type Password Username toytruckadmin Password Enter a password Inbound port rules Public inbound ports None On the Management tab, ensure that Enable auto-shutdown isn't selected.
Select Review + Create. Azure validates your settings. You might need to enter or select more information depending on the image requirements.
Select Create to deploy and create the VM.
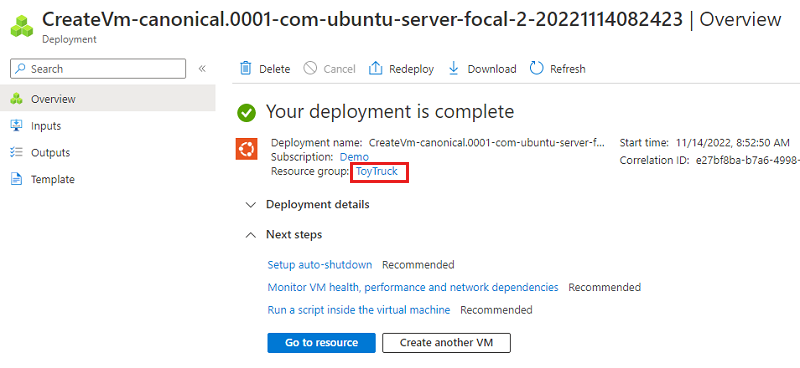
The Azure portal shows the deployment while it's in progress.
When the deployment is finished, select the resource group name to open the resource group:
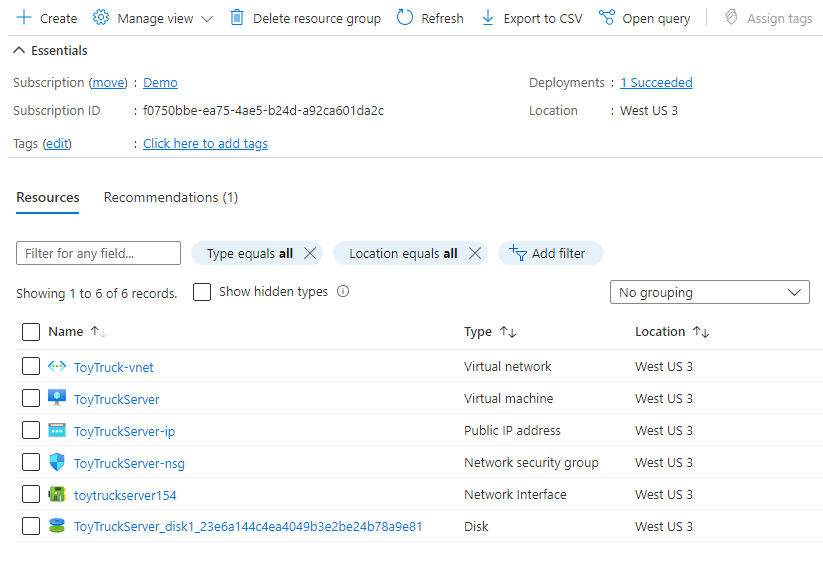
The resource group now contains the virtual machine and its dependencies:
Export the resource group contents to a JSON template
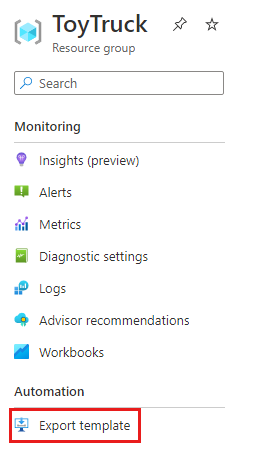
In the left menu, under Automation, select Export template:
A JSON template is generated. It might take a minute or two for the process to finish.
Select the Download button:
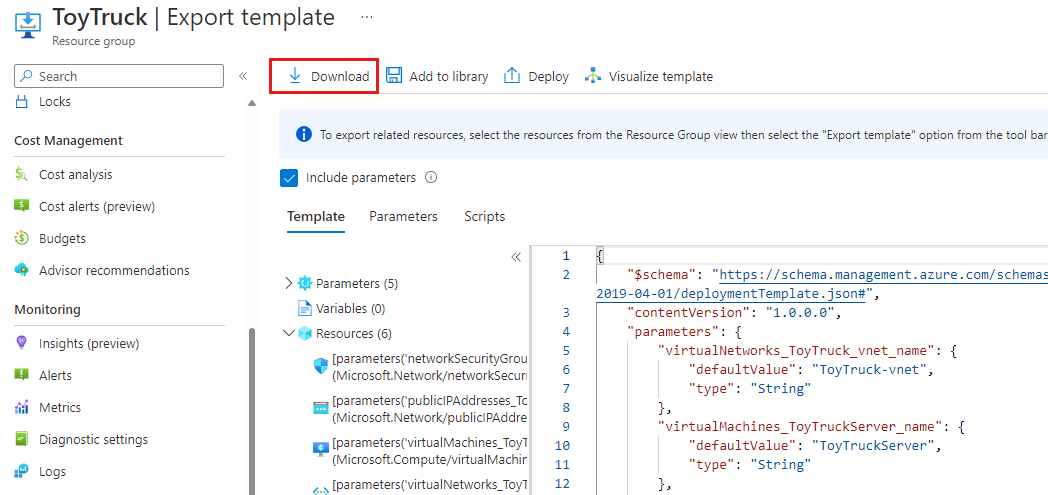
The JSON template and parameters file are downloaded to your computer as a .zip file.
Unzip the file to a folder that you can access easily, like your desktop.
Open Visual Studio Code.
Prepare your local environment
On the Terminal menu, select New Terminal. The terminal window usually opens in the lower half of your screen.
If the terminal window displays bash on the right side, it means the correct shell is already open. Alternatively, if you see a bash shell icon on the right, you can select it to launch the shell.

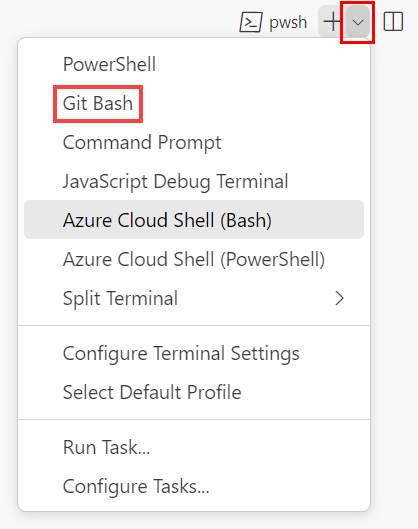
If a shell other than bash appears, select the shell dropdown arrow, and then select Git Bash.
In the terminal, go to the directory where you saved your template. For example, if you saved your template to the templates folder, you can use this command:
cd templates
Install Bicep
Run the following command to ensure you have the latest version of Bicep:
az bicep install && az bicep upgrade
On the Terminal menu, select New Terminal. The terminal window usually opens in the lower half of your screen.
If the terminal window displays pwsh or powershell on the right side, it means the correct shell is already open. Alternatively, if you see a PowerShell shell icon on the right, you can select it to launch the shell.

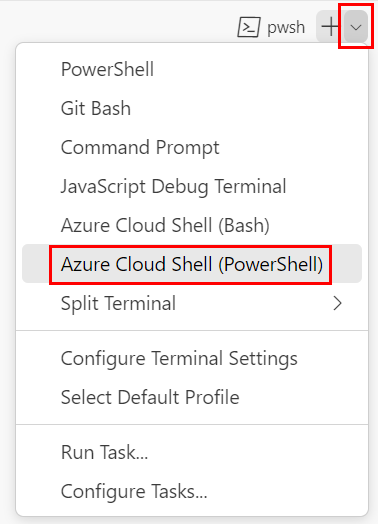
If a shell other than pwsh or powershell appears, select the shell dropdown arrow, and then select PowerShell.
In the terminal, go to the directory where you saved your template. For example, if you saved your template in the templates folder, you can use this command:
Set-Location -Path templates
Install the Bicep CLI
To use Bicep from Azure PowerShell, install the Bicep CLI.
Decompile the JSON template to Bicep
Use the decompile command to create a Bicep file from the template:
az bicep decompile --file template.json
The decompile operation generates a warning similar to this one:
WARNING: Decompilation is a best-effort process, as there is no guaranteed mapping from ARM JSON
 to Bicep.

You might need to fix warnings and errors in the generated bicep file(s), or decompilation might fail
 entirely if an accurate conversion is not possible.

If you would like to report any issues or inaccurate conversions,
please see https://github.com/Azure/bicep/issues.
Use the decompile command to create a Bicep file from the template:
bicep decompile template.json
The decompile operation generates a warning similar to this one:
WARNING: Decompilation is a best-effort process, as there is no guaranteed mapping from ARM JSON
 to Bicep.

You might need to fix warnings and errors in the generated bicep file(s), or decompilation might fail
 entirely if an accurate conversion is not possible.

If you would like to report any issues or inaccurate conversions,
please see https://github.com/Azure/bicep/issues.
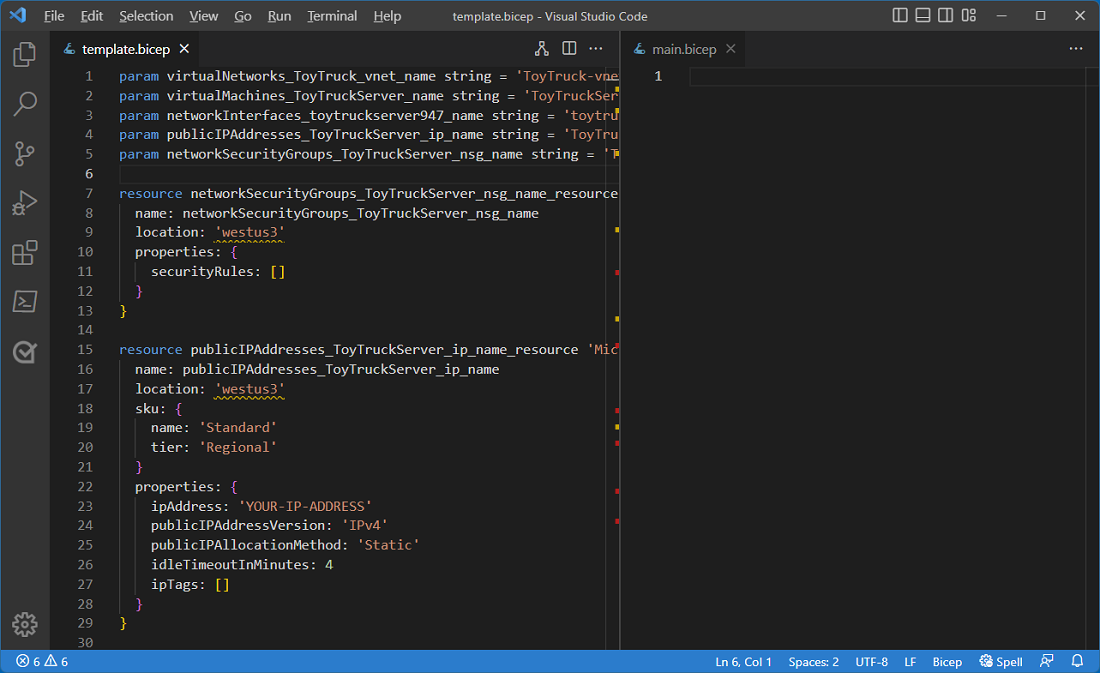
Inspect the decompiled Bicep file
Open the template.bicep file in Visual Studio Code and read through it. Notice that it's a valid Bicep file, but it has a few problems, including:
- The symbolic names that are given to parameters and resources include underscores and aren't easy to understand.
- The
locationproperty is hard-coded in all the resource definitions. - The template includes hard-coded values that should either be parameters or be set automatically by Azure.
You'll fix these problems throughout the rest of this module.
Create a new Bicep file
In Visual Studio Code, create a new file called main.bicep.
Save the empty file so that Visual Studio Code loads the Bicep tooling.
You can either select File > Save As or select Ctrl+S in Windows (⌘+S in macOS).
Split the editor so that you can see both files at the same time (the template.bicep file in the left pane and the main.bicep file in the right pane).
- Select the main.bicep tab.
- Select View > Editor Layout > Split Right to open the main.bicep tab in the right pane.
- Close the main.bicep tab in the left pane.
Copy each element into your new Bicep file
Copy the resource named
networkSecurityGroups_ToyTruckServer_nsg_name_resourcefrom the template.bicep file to the main.bicep file.As you copy it, note that the
securityRulesproperty is empty. Later in this module, you'll refactor the file to remove redundant properties.Visual Studio Code indicates an error because the
networkSecurityGroups_ToyTruckServer_nsg_nameparameter is missing:
Copy the parameter to the main.bicep file.
Repeat the process with the following resources and their associated parameters:
publicIPAddresses_ToyTruckServer_ip_name_resourcevirtualMachines_ToyTruckServer_name_resourcevirtualNetworks_ToyTruck_vnet_name_resourcevirtualNetworks_ToyTruck_vnet_name_defaultnetworkInterfaces_toytruckserver890_name_resource
Note
The names of the resources in your deployment might be different from the resources listed here. Find the resources that have names that are close to these names.
As you copy each resource, inspect its properties. Later in this module, you'll update each resource's properties and configuration to conform to Bicep best practices.
Tip
When you convert or export your own templates, you can update the resources to follow best practices as you copy them. In this module, we update the resources separately to make it easier to understand each phase of the migration process.
Check for missing resources
In the Azure portal, open the ToyTruck resource group.
Review the list of resources and compare it against the list of resources in your Bicep file. Notice that the resource group contains a Disk resource that isn't defined as a
resourcein your Bicep file: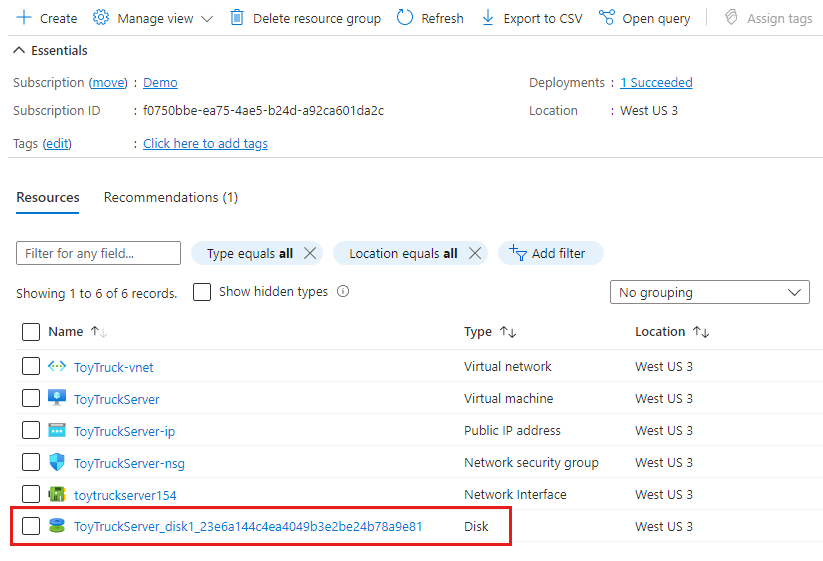
When you work with virtual machines in Bicep, you don't need to explicitly define the managed disk resource. Instead, you define the properties of the virtual machine and Azure creates the managed disk for you automatically. In this example, you don't need to be concerned that the disk resource isn't defined in the Bicep file.
Verify your template
At the end of the migrate phase, your main.bicep file should look similar to this example:
param virtualNetworks_ToyTruck_vnet_name string = 'ToyTruck-vnet'
param virtualMachines_ToyTruckServer_name string = 'ToyTruckServer'
param networkInterfaces_toytruckserver154_name string = 'toytruckserver154'
param publicIPAddresses_ToyTruckServer_ip_name string = 'ToyTruckServer-ip'
param networkSecurityGroups_ToyTruckServer_nsg_name string = 'ToyTruckServer-nsg'

resource networkSecurityGroups_ToyTruckServer_nsg_name_resource 'Microsoft.Network/networkSecurityGroups@2024-05-01' = {
  name: networkSecurityGroups_ToyTruckServer_nsg_name
  location: 'westus3'
  properties: {
    securityRules: []
  }
}

resource publicIPAddresses_ToyTruckServer_ip_name_resource 'Microsoft.Network/publicIPAddresses@2024-05-01' = {
  name: publicIPAddresses_ToyTruckServer_ip_name
  location: 'westus3'
  sku: {
    name: 'Standard'
    tier: 'Regional'
  }
  properties: {
    ipAddress: '1.2.3.4'
    publicIPAddressVersion: 'IPv4'
    publicIPAllocationMethod: 'Static'
    idleTimeoutInMinutes: 4
    ipTags: []
  }
}

resource virtualMachines_ToyTruckServer_name_resource 'Microsoft.Compute/virtualMachines@2024-07-01' = {
  name: virtualMachines_ToyTruckServer_name
  location: 'westus3'
  properties: {
    hardwareProfile: {
      vmSize: 'Standard_D2s_v3'
    }
    storageProfile: {
      imageReference: {
        publisher: 'canonical'
        offer: '0001-com-ubuntu-server-focal'
        sku: '20_04-lts-gen2'
        version: 'latest'
      }
      osDisk: {
        osType: 'Linux'
        name: '${virtualMachines_ToyTruckServer_name}_disk1_23e6a144c4ea4049b3e2be24b78a9e81'
        createOption: 'FromImage'
        caching: 'ReadWrite'
        managedDisk: {
          storageAccountType: 'Premium_LRS'
          id: resourceId('Microsoft.Compute/disks', '${virtualMachines_ToyTruckServer_name}_disk1_23e6a144c4ea4049b3e2be24b78a9e81')
        }
        deleteOption: 'Delete'
        diskSizeGB: 30
      }
      dataDisks: []
    }
    osProfile: {
      computerName: virtualMachines_ToyTruckServer_name
      adminUsername: 'toytruckadmin'
      linuxConfiguration: {
        disablePasswordAuthentication: false
        provisionVMAgent: true
        patchSettings: {
          patchMode: 'ImageDefault'
          assessmentMode: 'ImageDefault'
        }
        enableVMAgentPlatformUpdates: false
      }
      secrets: []
      allowExtensionOperations: true
      requireGuestProvisionSignal: true
    }
    networkProfile: {
      networkInterfaces: [
        {
          id: networkInterfaces_toytruckserver154_name_resource.id
          properties: {
            deleteOption: 'Detach'
          }
        }
      ]
    }
    diagnosticsProfile: {
      bootDiagnostics: {
        enabled: true
      }
    }
  }
}

resource virtualNetworks_ToyTruck_vnet_name_resource 'Microsoft.Network/virtualNetworks@2024-05-01' = {
  name: virtualNetworks_ToyTruck_vnet_name
  location: 'westus3'
  properties: {
    addressSpace: {
      addressPrefixes: [
        '10.0.0.0/16'
      ]
    }
    subnets: [
      {
        name: 'default'
        id: virtualNetworks_ToyTruck_vnet_name_default.id
        properties: {
          addressPrefix: '10.0.0.0/24'
          delegations: []
          privateEndpointNetworkPolicies: 'Disabled'
          privateLinkServiceNetworkPolicies: 'Enabled'
        }
        type: 'Microsoft.Network/virtualNetworks/subnets'
      }
    ]
    virtualNetworkPeerings: []
    enableDdosProtection: false
  }
}

resource virtualNetworks_ToyTruck_vnet_name_default 'Microsoft.Network/virtualNetworks/subnets@2024-05-01' = {
  name: '${virtualNetworks_ToyTruck_vnet_name}/default'
  properties: {
    addressPrefix: '10.0.0.0/24'
    delegations: []
    privateEndpointNetworkPolicies: 'Disabled'
    privateLinkServiceNetworkPolicies: 'Enabled'
  }
  dependsOn: [
    virtualNetworks_ToyTruck_vnet_name_resource
  ]
}

resource networkInterfaces_toytruckserver154_name_resource 'Microsoft.Network/networkInterfaces@2024-05-01' = {
  name: networkInterfaces_toytruckserver154_name
  location: 'westus3'
  kind: 'Regular'
  properties: {
    ipConfigurations: [
      {
        name: 'ipconfig1'
        id: '${networkInterfaces_toytruckserver154_name_resource.id}/ipConfigurations/ipconfig1'
        etag: 'W/"6a38849d-bd59-4eae-856e-4909f7ac1fac"'
        type: 'Microsoft.Network/networkInterfaces/ipConfigurations'
        properties: {
          provisioningState: 'Succeeded'
          privateIPAddress: '10.0.0.4'
          privateIPAllocationMethod: 'Dynamic'
          publicIPAddress: {
            name: 'ToyTruckServer-ip'
            id: publicIPAddresses_ToyTruckServer_ip_name_resource.id
            properties: {
              provisioningState: 'Succeeded'
              resourceGuid: '07079685-0980-4ddf-acc3-3c8797c94b9a'
              publicIPAddressVersion: 'IPv4'
              publicIPAllocationMethod: 'Dynamic'
              idleTimeoutInMinutes: 4
              ipTags: []
              ipConfiguration: {
                id: '${networkInterfaces_toytruckserver154_name_resource.id}/ipConfigurations/ipconfig1'
              }
              deleteOption: 'Detach'
            }
            type: 'Microsoft.Network/publicIPAddresses'
            sku: {
              name: 'Basic'
              tier: 'Regional'
            }
          }
          subnet: {
            id: virtualNetworks_ToyTruck_vnet_name_default.id
          }
          primary: true
          privateIPAddressVersion: 'IPv4'
        }
      }
    ]
    dnsSettings: {
      dnsServers: []
    }
    enableAcceleratedNetworking: true
    enableIPForwarding: false
    disableTcpStateTracking: false
    networkSecurityGroup: {
      id: networkSecurityGroups_ToyTruckServer_nsg_name_resource.id
    }
    nicType: 'Standard'
  }
}
Note
A few things might be different in your template, including some of the symbolic names, API versions, and the IP addresses. That's OK. You'll resolve some of these discrepancies later in the module.
You've created an initial Bicep file to represent your resources. The Bicep file isn't well structured and it doesn't follow best practices. In the next unit, you'll learn how to improve the quality of the migrated template.
Tip
If you use a version control system like Git, this would be a good time to commit your work.
After you've verified your main.bicep file close the template.bicep file.