Migrate on-premises MySQL database to Azure
Once a company makes the decision to move to Azure Database for MySQL, the next step is to plan how to migrate on-premises databases and choose the tools to move their data.
Having explored how Azure Database for MySQL supports and scales MySQL on Azure, you now want to consider how you'll migrate your existing on-premises databases.
In this unit, you'll see how to create an instance of the Azure Database for MySQL service using the Azure portal. If you need to create many instances of this service, you can script the process by using the Azure CLI.
Create an Azure Database for MySQL using the portal
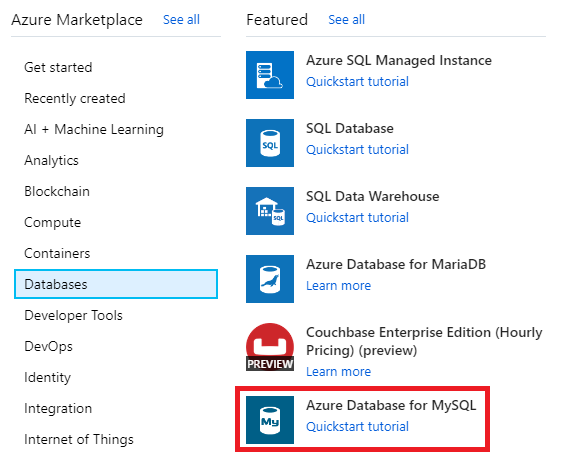
In the Azure portal, select the Databases command in Azure Marketplace, and select Azure Database for MySQL.
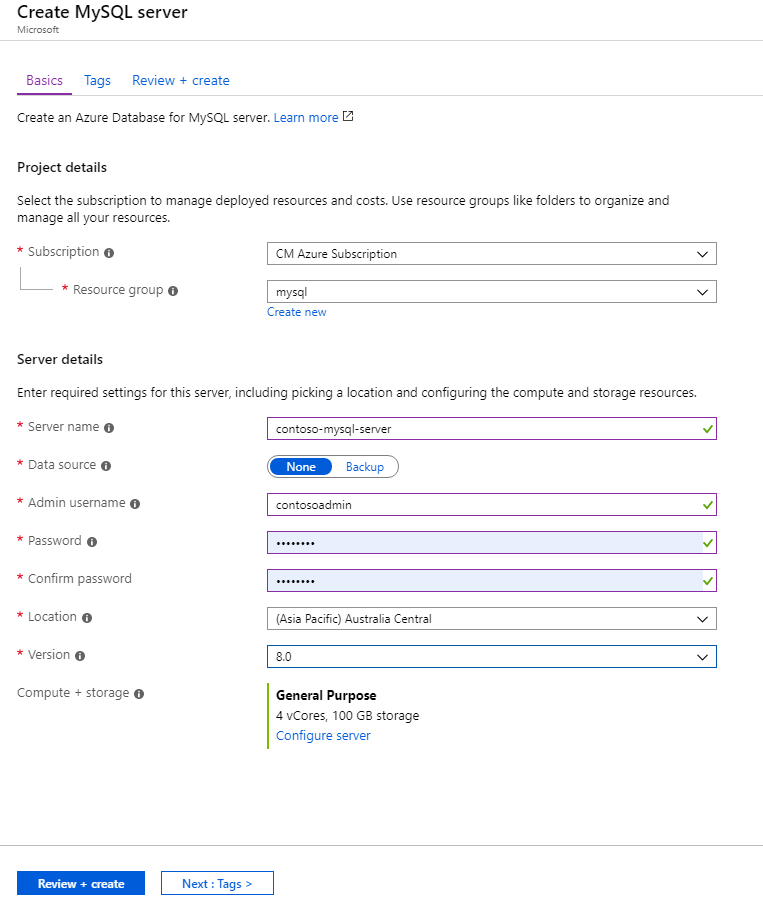
Enter the details for the service. These include:
- Server name. This must be a unique name between 3 and 63 characters, containing only lowercase letters, numbers, and hyphens.
- Data source. If you're creating a new server for migration purposes, select None. The Backup option enables you to restore a backup taken from another instance of Azure Database for MySQL into this service.
- Admin username. This is the name of a user account that will be created with administrative privileges. Azure creates some accounts for its own use, and other names are restricted; you can't use azure_superuser, admin, administrator, root, guest, or public.
- Password. This must be between 8 and 128 characters. It should contain a mixture of uppercase and lowercase letters, numbers, and nonalphanumeric characters. Azure Database for MySQL currently only supports password authentication; integration with Microsoft Entra ID isn't available yet.
- Version. Select the version that corresponds to the on-premises database that you're migrating.
- Compute + storage. Select Configure server to set the pricing tier and specify the resources that you require for the service. The options were covered in Lesson 1. Remember that, if you select the General purpose or Memory optimized pricing tiers, you scale up and down the number of virtual processor cores later. However, you can't reduce the amount of storage; it can only increase after the server has been created.
Select Review + Create to deploy the service. Deployment will take several minutes.
After the service has been deployed, select the Connection security option and add the appropriate firewall rules to enable clients to connect—as described in the topic Client Connectivity in Lesson 1. You must also select the Allow access to Azure services option.
Create an Azure Database for MySQL instance using the Azure CLI
You create an instance of Azure Database for MySQL using the az mysql server create command. The statement below shows an example that creates a MySQL instance. Most of the parameters are self-explanatory, except for the following:
- sku-name. You construct this from a combination of the pricing tier (B for Basic, GP for General Purpose, and MO for Memory Optimized), the compute generation (Gen4 or Gen5), and the number of virtual CPU cores. In the example below, the server is created using the General Purpose pricing tier, with four CPU cores of the Gen5 generation.
- storage-size. This is the amount of disk storage required, specified in megabytes. The example below allocates 10 gigabytes.
az mysql server create \
  --name contoso-MySQL-server \
  --resource-group MySQLrg \
  --admin-user contosoadmin \
  --admin-password 7Hh7*ku5k$$£jhk \
  --sku-name GP_Gen5_4 \
  --storage-size 10240
Perform offline migration
An offline migration takes a snapshot of the source database at a particular point in time, and copies that data to the target database. Any changes made to the source data after the snapshot has been taken will not be reflected in the target database.
You have at least two options if you want to perform an offline migration to Azure Database for MySQL:
Export and import
You can export a database from MySQL and import it into Azure Database for MySQL using tools such as MySQL Workbench. This is useful in a number of scenarios:
- You want to select which tables to import.
- You want to select which database objects to export and import including views, stored procedures, constraints, and functions.
- You want to also migrate data from other sources. For example, you need to add data from text files and use mysqlimport to add these as tables to your database.
You can perform an export and import using MySQL Workbench. From the Server menu, select Data Export or Data Import.
Note
You could also use mysqldump to export specific tables by listing their names after the database name.
For more information, see Migrate your MySQL database by using import and export.
Dump and restore
Use dump and restore when you want to efficiently move the entire database.
There are a number of considerations when using dump and restore:
- Prevent triggers firing during restore by using the exclude-triggers option.
- Dump the entire database in a single transaction with the single-transaction option.
- Disable foreign key constraints firing during the process with the disable-keys option.
- Defer index creation until after the restore is complete with the defer-table-indexes option.
For more information on mysqldump, see mysqldump — A Database Backup Program.
Note
You also use mysqldump to export specific tables by listing their names after the database name.
Azure Database Migration Service (DMS)
In addition to offline migrations to Azure Database for MySQL, DMS supports cross-region, cross-resource group, and cross-subscription migrations, so you can select a region, resource group, and subscription for the target server that is different than what is specified for your source server.
Migrate by using dump and restore
Perform the following steps to migrate a database by using the dump and restore approach.
Export the data to another file with the mysqldump command:
mysqldump -h [host name] -u [username] -p[password] [database name] > db_data.sqlAt this point, db_data.sql is a SQL script that you modify using a text editor.
Create the target database in Azure Database for MySQL. You do this with the Azure CLI:
az mysql db create \
    --name [database name] \
    --server-name [server name] \
    --resource-group [azure resource group]
Import the data into the target database with the mysql command:
mysql -h [host name] -u [username] -p[password] [database name] < db_data.sql
Perform online migration
DMS also supports online migration to Azure Database for MySQL. For the online migration, we recommend you select General Purpose 16 vCores compute for the target flexible server for faster migrations. Scale back to the desired compute size for the target server after migration is complete, based on the detail in the following table.
| Single Server Pricing Tier | Single Server VCores | Flexible Server Compute Size | Flexible Server Compute Tier |
|---|---|---|---|
| Basic | 1 | Burstable | Standard_B1s |
| Basic | 2 | Burstable | Standard_B2s |
| General Purpose | 4 | General Purpose | Standard_D4ds_v4 |
| General Purpose | 8 | General Purpose | Standard_D8ds_v4 |
To learn more about online migration to Azure Database for MySQL, see Tutorial: Migrate Azure Database for MySQL - Single Server to Flexible Server online using DMS via the Azure portal.