Create a service mesh for VMware HCX
After the site pairing, networking profiles, and compute profile configurations finish, the next step involves setting up a service mesh for VMware HCX Manager. The service mesh also allows VMware HCX Manager to migrate virtual machines (VMs) from a VMware HCX-enabled source site (on-premises) into a VMware HCX-enabled destination site (Azure VMware Solution).
What is a service mesh?
A service mesh provides a dedicated infrastructure abstraction layer that helps ease network transport between a source and destination site. The service mesh allows workloads and application services to decouple the networking components required for communication between sites. The service mesh enables a secure and optimized networking transport fabric between any two sites managed by VMware HCX Manager. After you enable the service mesh, you can migrate VMware vSphere VMs to Azure VMware Solution.
Create a service mesh
To successfully establish a service mesh with Azure VMware Solution, you must meet the following networking requirements:
| Requirement | Reason |
|---|---|
| UDP ports 500/4500 | These ports need to be open between the VMware HCX Connector uplink and the Azure VMware Solution HCX Cloud uplink network profile addresses. |
| VMware HCX Manager required ports | See the VMware HCX URL at the end of this module. The URL provides a comprehensive list of required open ports between source and destination sites. |
After you confirm the networking ports and test them as open, take the following steps to enable a service mesh:
From within the VMware HCX Connector dashboard on-premises, under Infrastructure, select Interconnect > Service Mesh > Create Service Mesh.

Review the prepopulated sites created during site pairing, then select Continue. If this site is the first service mesh configuration, the first screen doesn't need modification.
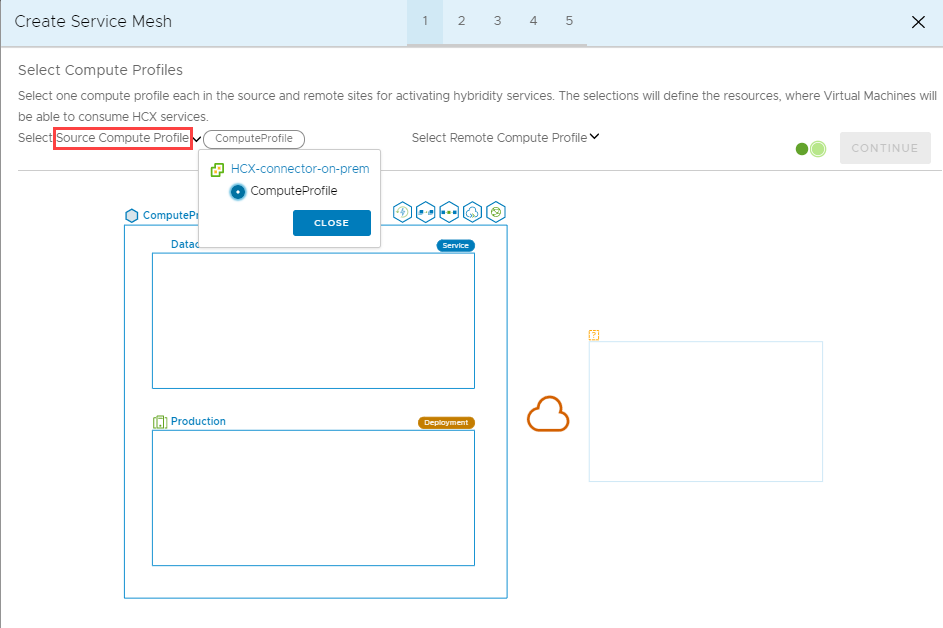
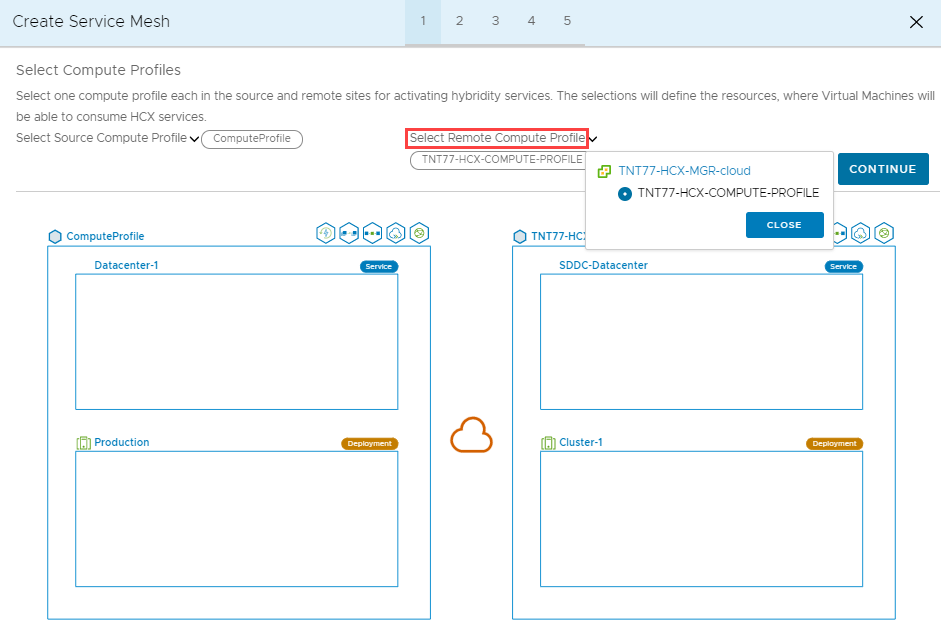
Select both the source and remote compute profiles from the dropdown lists, then select Continue. These selections define where VMs can use VMware HCX services for migration.
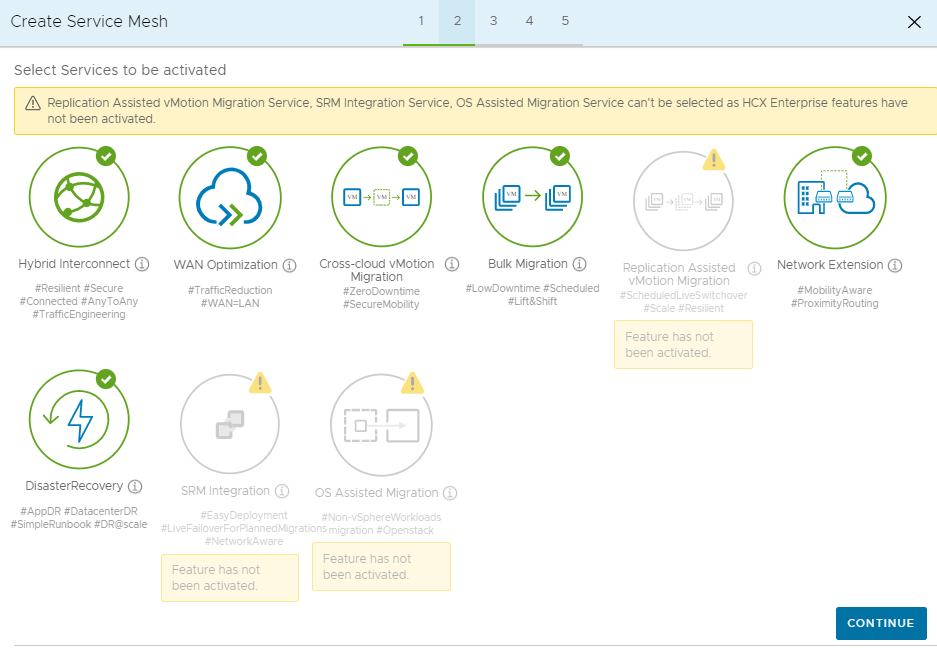
Review the services to be enabled during the service mesh configuration, then select Continue.
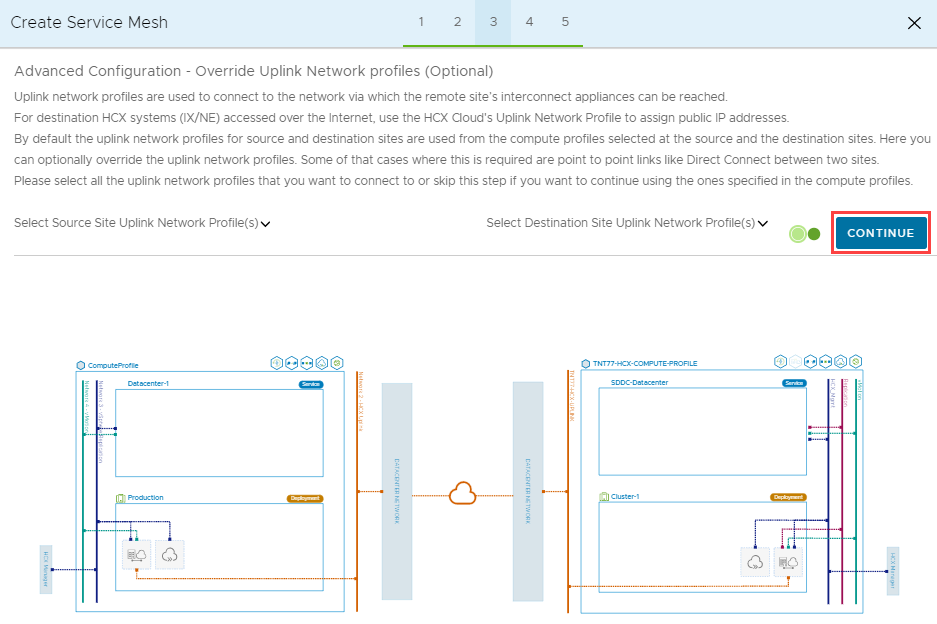
In Advanced Configuration - Override Uplink Network profiles, select Continue. This is an optional configuration.
In Advanced Configuration - Network Extension Appliance Scale Out, locate the checkbox next to the distributed switch configuration that you configured for the vMotion network profile. You should see that this checkbox is already selected. Leave the checkbox selected and select Continue.
When you reach Advanced Configuration - Traffic Engineering, select Continue.

Review the topology preview, then select Continue.

Enter a user-friendly name for this service mesh, then select Finish to complete the configuration.

Select View Tasks to monitor the service mesh deployment.

When the service mesh deployment finishes successfully, all services show as green.

Verify the health of the on-premises service mesh, by selecting Interconnect > Appliances. Each tunnel status should be green and indicate Up.

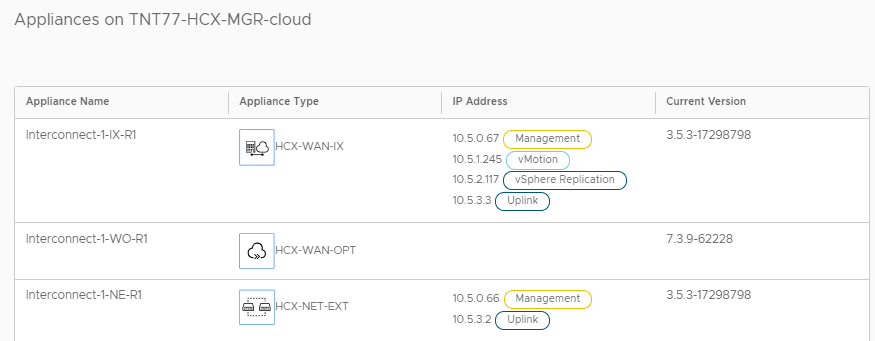
Next, verify the health of the service mesh in Azure VMware Solution. To verify, navigate to the same Appliances page, examine the appliances deployed underneath the on-premises appliances.


In the next unit, we cover how to migrate VMs from on-premises vSphere to Azure VMware Solution by using VMware HCX.