Exercise - Create ASP.NET MVC web app and register Microsoft Entra app
- 15 minutes
In this exercise, you'll create an ASP.NET MVC web application with Visual Studio and Microsoft Entra application with the Microsoft Entra admin center. Once the application is created, you'll then add the necessary packages and libraries that support user authentication and requesting data from Microsoft Graph.
Prerequisites
Developing Microsoft Graph apps requires a Microsoft 365 tenant.
For the Microsoft 365 tenant, follow the instructions on the Microsoft 365 Developer Program site for obtaining a developer tenant if you don't currently have a Microsoft 365 account.
The exercises in this module assume you have the following tools installed on your developer workstation.
Create ASP.NET MVC web application
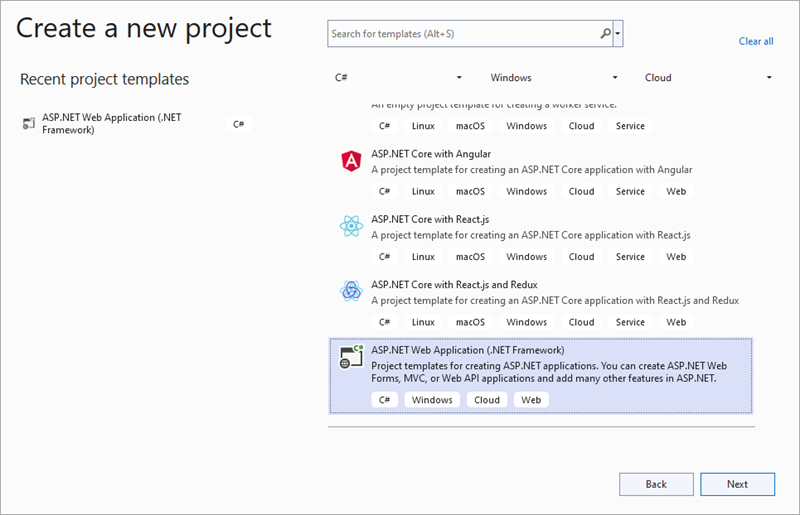
Open Visual Studio, and select Create a new project.
In the Create new project dialog, choose the ASP.NET Web Application (.NET Framework) option that uses C#, then select Next.
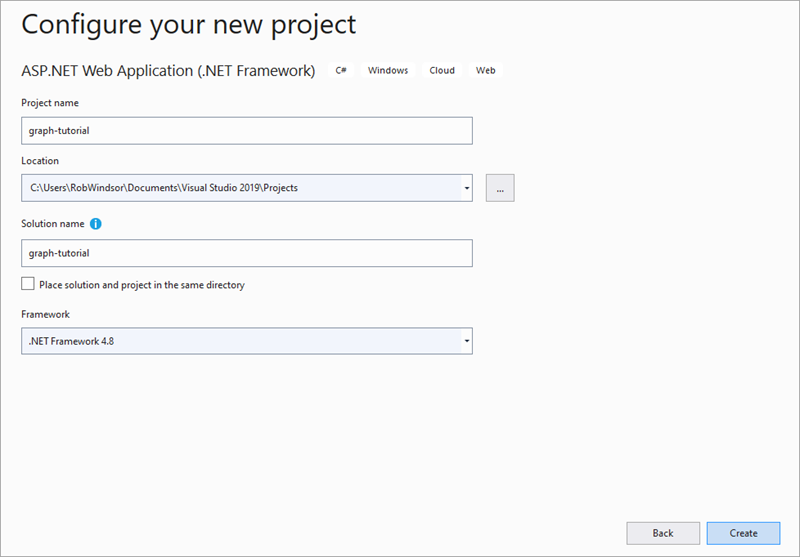
Enter graph-tutorial in the Project name field and select Create.
Note
Ensure that you enter the exact same name for the Visual Studio Project that is specified in these instructions. The Visual Studio Project name becomes part of the namespace in the code. The code inside these instructions depends on the namespace matching the Visual Studio Project name specified in these instructions. If you use a different project name the code will not compile unless you adjust all the namespaces to match the Visual Studio Project name you enter when you create the project.
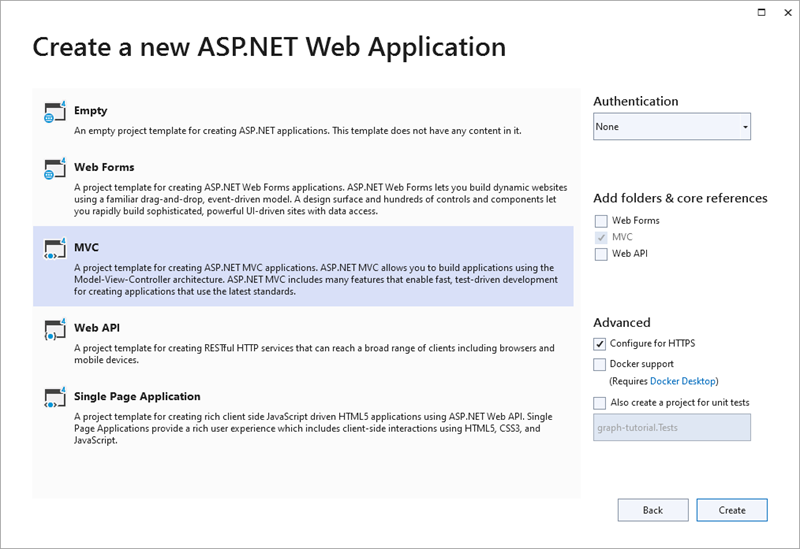
Select MVC and select Create.
Press F5 or select Debug > Start Debugging. If everything is working, your default browser should open and display a default ASP.NET page.
Add NuGet packages
Before moving on, update the bootstrap NuGet package, and install some more NuGet packages that you'll use later:
- Microsoft.Owin.Host.SystemWeb to enable the OWIN interfaces in the ASP.NET application.
- Microsoft.Owin.Security.OpenIdConnect for doing OpenID Connect authentication with Azure.
- Microsoft.Owin.Security.Cookies to enable cookie-based authentication.
- Microsoft.Identity.Client for requesting and managing access tokens.
- Microsoft.Graph for making calls to Microsoft Graph.
Select Tools > NuGet Package Manager > Package Manager Console.
In the Package Manager Console, enter the following commands.
Update-Package bootstrap -Version 4.6.0
Install-Package Microsoft.Owin.Host.SystemWeb
Install-Package Microsoft.Owin.Security.OpenIdConnect
Install-Package Microsoft.Owin.Security.Cookies
Install-Package Microsoft.Identity.Client -Version 4.43.2
Install-Package Microsoft.Graph -Version 4.28.0
Design the app
In this section, you'll create the basic structure of the application.
Create a basic OWIN startup class. Right-click the graph-tutorial folder in Solution Explorer and select Add > New Item. Choose the OWIN Startup Class template, name the file Startup.cs, and select Add.
Right-click the Models folder in Solution Explorer and select Add > Class.... Name the class Alert and select Add. Replace the entire contents of Alert.cs with the following code.
namespace graph_tutorial.Models
{
    // Used to flash error messages in the app's views.
    public class Alert
    {
        public const string AlertKey = "TempDataAlerts";
        public string Message { get; set; }
        public string Debug { get; set; }
    }
}
Open the ./Views/Shared/_Layout.cshtml file, and replace its entire contents with the following code to update the global layout of the app.
@{
    var alerts = TempData.ContainsKey(graph_tutorial.Models.Alert.AlertKey)
        ? (List<graph_tutorial.Models.Alert>)TempData[graph_tutorial.Models.Alert.AlertKey]
        : new List<graph_tutorial.Models.Alert>();
}

<!DOCTYPE html>
<html>
<head>
    <meta charset="utf-8" />
    <meta name="viewport" content="width=device-width, initial-scale=1.0">
    <title>ASP.NET Graph Tutorial</title>
    @Styles.Render("~/Content/css")
    @Scripts.Render("~/bundles/modernizr")

    <link rel="stylesheet" href="https://use.fontawesome.com/releases/v5.1.0/css/all.css"
            integrity="sha384-lKuwvrZot6UHsBSfcMvOkWwlCMgc0TaWr+30HWe3a4ltaBwTZhyTEggF5tJv8tbt"
            crossorigin="anonymous">
</head>

<body>
    <nav class="navbar navbar-expand-md navbar-dark fixed-top bg-dark">
        <div class="container">
            @Html.ActionLink("ASP.NET Graph Tutorial", "Index", "Home", new { area = "" }, new { @class = "navbar-brand" })
            <button class="navbar-toggler" type="button" data-toggle="collapse" data-target="#navbarCollapse"
                    aria-controls="navbarCollapse" aria-expanded="false" aria-label="Toggle navigation">
                <span class="navbar-toggler-icon"></span>
            </button>
            <div class="collapse navbar-collapse" id="navbarCollapse">
                <ul class="navbar-nav mr-auto">
                    <li class="nav-item">
                        @Html.ActionLink("Home", "Index", "Home", new { area = "" },
                            new { @class = ViewBag.Current == "Home" ? "nav-link active" : "nav-link" })
                    </li>
                    @if (Request.IsAuthenticated)
                    {
                        <li class="nav-item" data-turbolinks="false">
                            @Html.ActionLink("Calendar", "Index", "Calendar", new { area = "" },
                                new { @class = ViewBag.Current == "Calendar" ? "nav-link active" : "nav-link" })
                        </li>
                    }
                </ul>
                <ul class="navbar-nav justify-content-end" style="align-items:center;">
                    <li class="nav-item">
                        <a class="nav-link" href="https://developer.microsoft.com/graph/docs/concepts/overview" target="_blank">
                            <i class="fas fa-external-link-alt mr-1"></i>Docs
                        </a>
                    </li>
                    @if (Request.IsAuthenticated)
                    {
                        <li class="nav-item dropdown">
                            <a class="nav-link dropdown-toggle" data-toggle="dropdown" href="#" role="button" aria-haspopup="true" aria-expanded="false">
                                @if (!string.IsNullOrEmpty(ViewBag.User.Avatar))
                                {
                                    <img src="@ViewBag.User.Avatar" class="rounded-circle align-self-center mr-2" style="width: 32px;">
                                }
                                else
                                {
                                    <i class="far fa-user-circle fa-lg rounded-circle align-self-center mr-2" style="width: 32px;"></i>
                                }
                            </a>
                            <div class="dropdown-menu dropdown-menu-right">
                                <h5 class="dropdown-item-text mb-0">@ViewBag.User.DisplayName</h5>
                                <p class="dropdown-item-text text-muted mb-0">@ViewBag.User.Email</p>
                                <div class="dropdown-divider"></div>
                                @Html.ActionLink("Sign Out", "SignOut", "Account", new { area = "" }, new { @class = "dropdown-item" })
                            </div>
                        </li>
                    }
                    else
                    {
                        <li class="nav-item">
                            @Html.ActionLink("Sign In", "SignIn", "Account", new { area = "" }, new { @class = "nav-link" })
                        </li>
                    }
                </ul>
            </div>
        </div>
    </nav>
    <main role="main" class="container">
        @foreach (var alert in alerts)
        {
            <div class="alert alert-danger" role="alert">
                <p class="mb-3">@alert.Message</p>
                @if (!string.IsNullOrEmpty(alert.Debug))
                {
                    <pre class="alert-pre border bg-light p-2"><code>@alert.Debug</code></pre>
                }
            </div>
        }

        @RenderBody()
    </main>
    @Scripts.Render("~/bundles/jquery")
    @Scripts.Render("~/bundles/bootstrap")
    @RenderSection("scripts", required: false)
</body>
</html>
Note
This code adds Bootstrap for simple styling, and Font Awesome for some simple icons. It also defines a global layout with a nav bar, and uses the Alert class to display any alerts.
Open Content/Site.css and replace its entire contents with the following code.
body {
    padding-top: 4.5rem;
}

.alert-pre {
    word-wrap: break-word;
    word-break: break-all;
    white-space: pre-wrap;
}
Open the Views/Home/Index.cshtml file and replace its contents with the following.
@{
    ViewBag.Current = "Home";
}

<div class="jumbotron">
    <h1>ASP.NET Graph Tutorial</h1>
    <p class="lead">This sample app shows how to use the Microsoft Graph API to access a user's data from ASP.NET</p>
    @if (Request.IsAuthenticated)
    {
        <h4>Welcome @ViewBag.User.DisplayName!</h4>
        <p>Use the navigation bar at the top of the page to get started.</p>
    }
    else
    {
        @Html.ActionLink("Click here to sign in", "SignIn", "Account", new { area = "" }, new { @class = "btn btn-primary btn-large" })
    }
</div>
Right-click the Controllers folder in Solution Explorer and select Add > Controller.... Choose MVC 5 Controller - Empty and select Add. Name the controller BaseController and select Add. Replace the contents of BaseController.cs with the following code.
using graph_tutorial.Models;
using System.Collections.Generic;
using System.Web.Mvc;

namespace graph_tutorial.Controllers
{
    public abstract class BaseController : Controller
    {
        protected void Flash(string message, string debug=null)
        {
            var alerts = TempData.ContainsKey(Alert.AlertKey) ?
                (List<Alert>)TempData[Alert.AlertKey] :
                new List<Alert>();

            alerts.Add(new Alert
            {
                Message = message,
                Debug = debug
            });

            TempData[Alert.AlertKey] = alerts;
        }
    }
}
Open Controllers/HomeController.cs and change the public class HomeController : Controller line to:
public class HomeController : BaseController
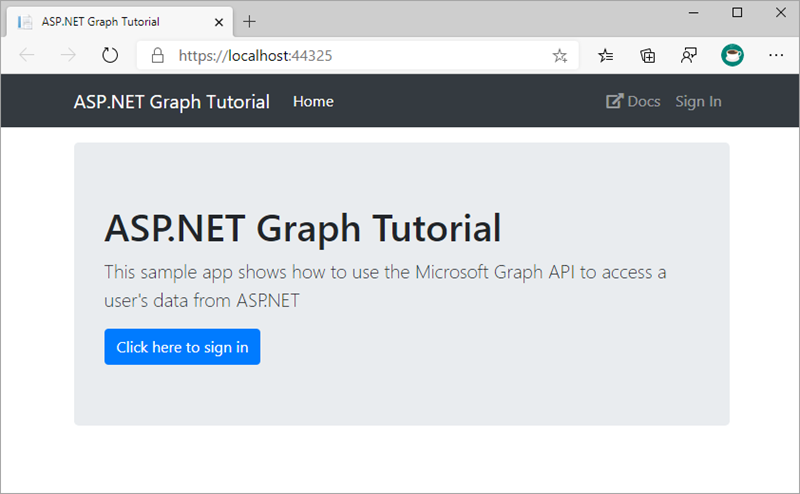
Save all of your changes and restart the server. Now, the app should look different.
Create a Microsoft Entra application
In this section, you'll create a new Microsoft Entra web application registration using the Microsoft Entra admin center.
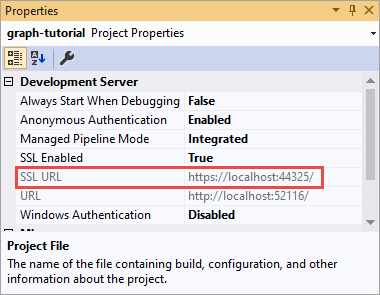
Determine your ASP.NET app's HTTPS URL. In Visual Studio's Solution Explorer, select the graph-tutorial project. In the Properties window, find the value of SSL URL. Copy this value.
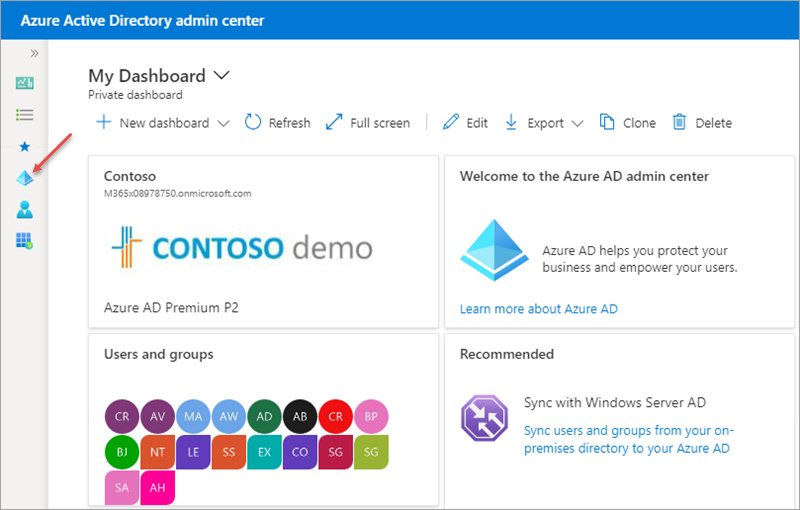
Open a browser and navigate to the Microsoft Entra admin center (https://aad.portal.azure.com). Sign in using a Work or School Account that has global administrator rights to the tenancy.
Select Microsoft Entra ID in the left-hand navigation.
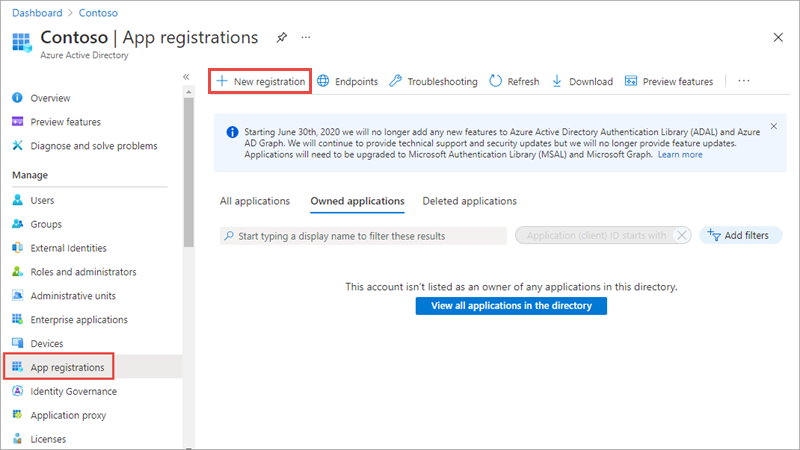
Select Manage > App registrations in the left-hand navigation.
On the App registrations page, select New registration.
Select New registration. On the Register an application page, set the values as follows.
- Set Name to ASP.NET Graph Tutorial.
- Set Supported account types to Accounts in any organizational directory and personal Microsoft accounts.
- Under Redirect URI, set the first drop-down to Web and set the value to the ASP.NET app URL you previously obtained in this section.
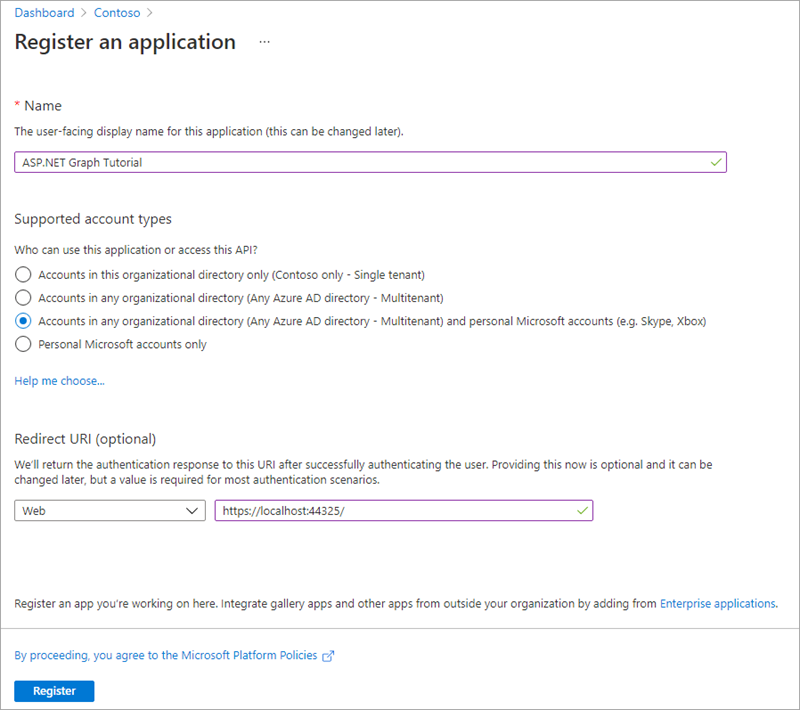
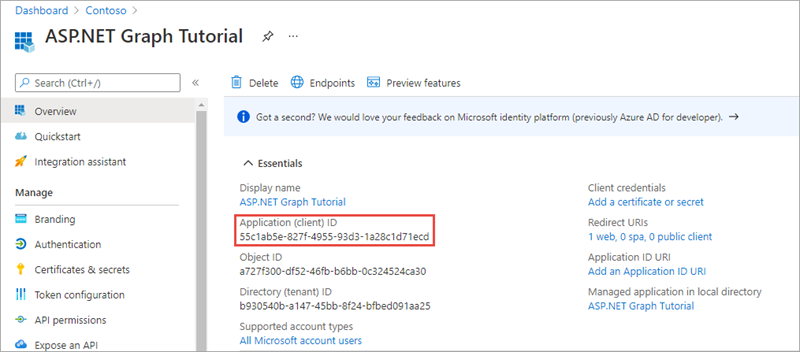
Select Register. On the ASP.NET Graph Tutorial page, copy the value of the Application (client) ID and save it, you'll need it in the next step.
Select Authentication under Manage. Locate the Implicit grant and hybrid flows section and enable ID tokens (used for implicit and hybrid flows).
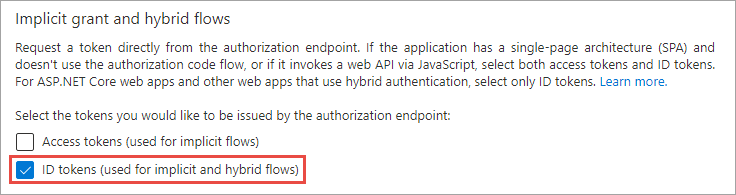
Select Save in the top menu to save your changes.
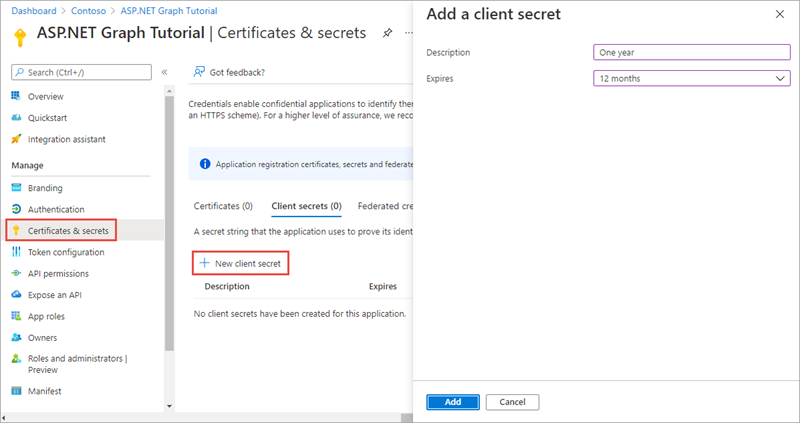
Select Certificates & secrets under Manage. Select the New client secret button. Enter a value in Description and select one of the options for Expires and select Add.
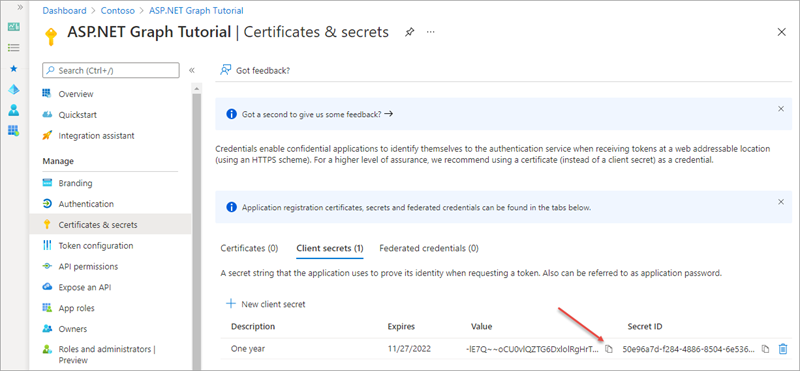
Copy the client secret value before you leave this page. You'll need it in the next step.
Important
This client secret is never shown again, so make sure you copy it now.
Summary
In this exercise, you created an ASP.NET MVC web application with Visual Studio and Microsoft Entra application with the Microsoft Entra admin center. With the application created, you then added the necessary packages and libraries that support user authentication and requesting data from Microsoft Graph.