Prerequisites and setup
Customer and vendor balance netting requires proper setup of journal names and main accounts to ensure smooth operation.
Create a journal name for netting
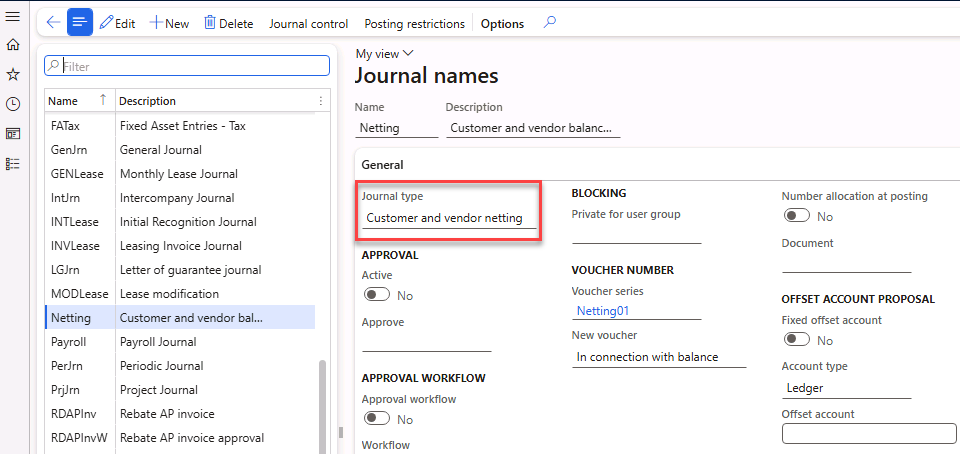
To post netting transactions, you need to define a journal name specifically for customer and vendor netting. This journal name is essential for managing the netting process effectively.
Navigate to General Ledger > Journal setup > Journal names.
Create a record and enter a name and description for the journal. (Hint: If you're using demo data, then Netting already exists; select a different Name.)
Select the journal type as Customer and vendor netting.
Enter other settings, for example, Voucher series
Save the journal name for future use in netting agreements.
Note
The journal name must be defined before creating netting transactions.
Set up main account
A main account acts as a bridging account for netting purposes. It ensures that the financial transactions are properly recorded during the netting process.
Navigate to General ledger > Chart of accounts > Accounts > Main accounts.
Create a new main account or select an existing one.
Assign the account to the appropriate financial dimensions.
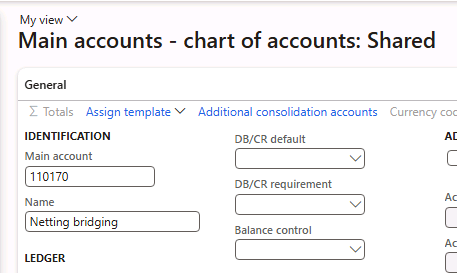
By completing these setups, you enable Dynamics 365 Finance to automate netting processes efficiently, reducing manual effort, and improving transaction accuracy.
Implement intercompany netting agreements
Intercompany netting agreements allow organizations to manage balances across different legal entities.
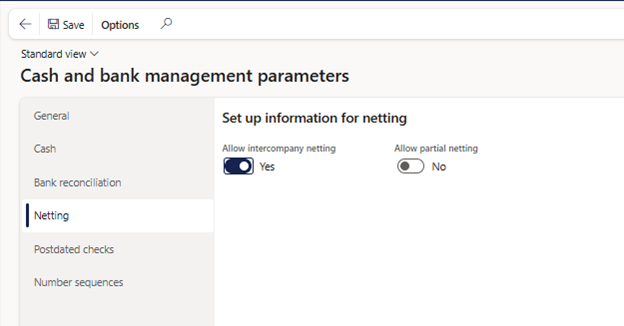
Go to Cash and bank management > Setup > Cash and bank management parameters.
On the Netting tab, select Allow intercompany netting.
Go to Cash and bank management > Netting > Netting agreement.
On the Parties FastTab, in the Customer legal entity field, select a legal entity, and then add a customer account.
In the Vendor legal entity field, select a legal entity, and then add a vendor account.
Activate the netting agreement.
Each intercompany netting transaction generates three vouchers: two in the legal entity holding the agreement and one in the counterparty legal entity.
Note
Ensure that either the customer or vendor legal entity matches the current legal entity for the agreement. The legal entity can't be selected if intercompany netting isn't enabled. Intercompany accounting setup is required between the current legal entity and the other legal entity specified in the agreement line.